

Users
Navigate to Users
Go to Manage > Users > Manage Users from the left navigation menu or the product switcher.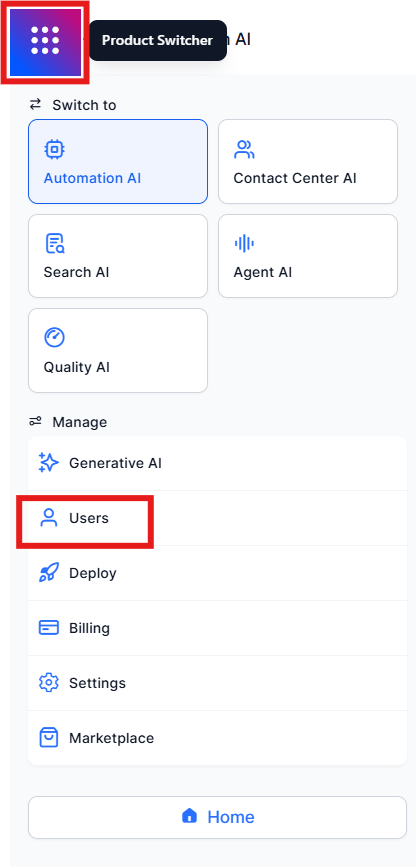
User List Features
Add a User
-
Select Invite Users.

-
In the Invite User window, fill in the following fields:
- Email: User’s email address.
- First Name and Last Name.
- Role: Select App Developer, App Tester, Agent, or Supervisor.
- Users with Change User Role set to Yes can modify another user’s role.
- Users with Change User Role set to No can’t. See Permissions.
- Attributes: Edit user details or delete the user.
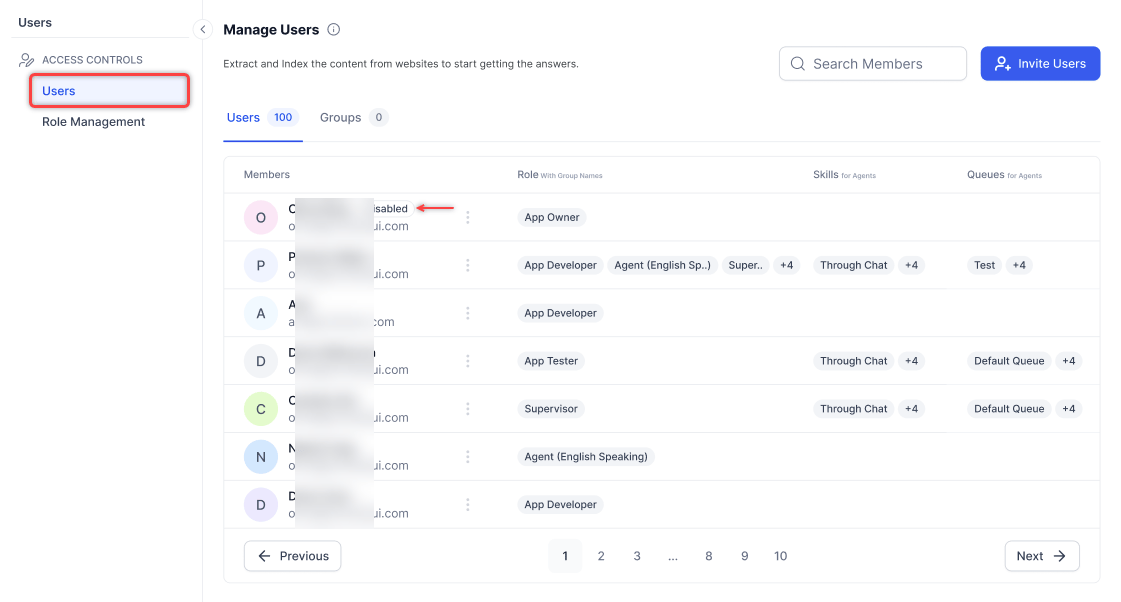
Manage Profile Fields
App Owners and Administrators can create custom fields to capture agent metadata beyond the default profile attributes. Once created, a custom field appears in the profile of every agent in the account. To add a custom field:- Select Manage Profile Fields in the upper-right corner.
- Select Add Custom Field.
- Enter the required details and select Save.
- From the UI - Edit the value directly in the agent profile and select Save.
- Using API - Use the Agent APIs to read or write custom field values.
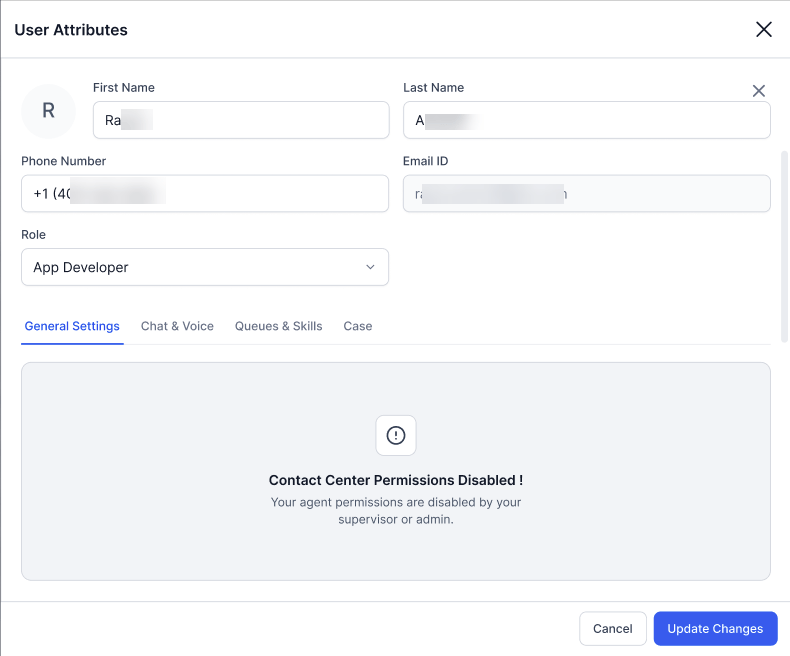
User Attributes
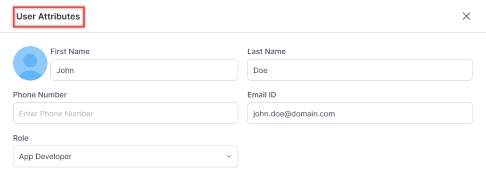
In the User Attributes window, you can:- Upload a profile picture (optional).
- Edit first name, last name, email, role, and phone number.
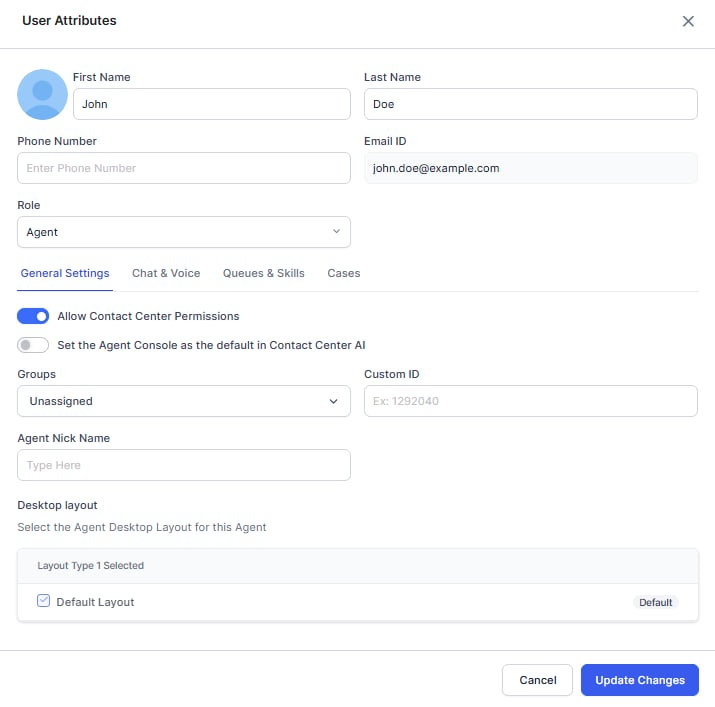
General Settings
Enable Allow Contact Center Permissions to configure:- Set Agent Console as default-Makes the Agent Console the default landing page. Dynamic Navigation Control determines the landing page based on the user’s permissions.
- Group
- Custom ID-Supports all special characters except spaces and backslashes, up to 64 characters.
- Agent Nick Name
- Desktop layout
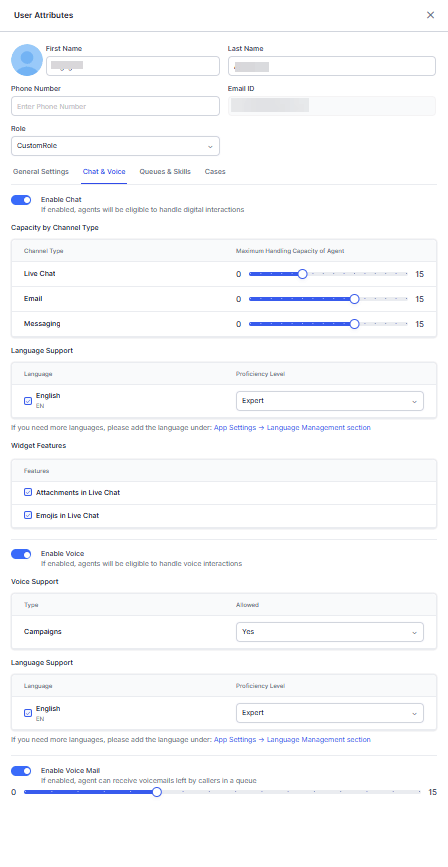
Chat & Voice
Enable Chat to set:- Capacity by Channel Type-Maximum concurrent conversations per channel (up to 15 per type). When an agent reaches the total digital conversation limit, they’re marked System Busy and receive no new digital conversations until existing ones are closed.
- Language Support-Supported languages and proficiency level (Novice, Average, Good, or Expert).
- Widget Features-Attachments and emojis in live chat.
Agents aren’t listed in Agent Transfers when Chat and Email channel slots are set to zero.
- Voice Support-Agents can accept inbound and manual outbound calls by default. Campaign calls are disabled by default; enable them and ensure the agent is in the queue attached to the campaign.
- Languages-Supported languages and proficiency levels.
Queues & Skills
Queues- Search for a queue and select it from the list. Only existing queues appear. To add a queue, see Add a Queue.
- Assign one or more queues and mark preferred queues-preferred queues take priority when routing incoming interactions.
- To remove a queue, select the Delete icon.
- Search for a skill and select it from the dropdown. Only existing skills appear. To add a skill, see Add a Skill.
- Set the proficiency level: Novice, Average, Good, or Expert.
- To remove a skill, select the Delete icon.
Save User Record
Select Invite User at the bottom of the window (available from any section).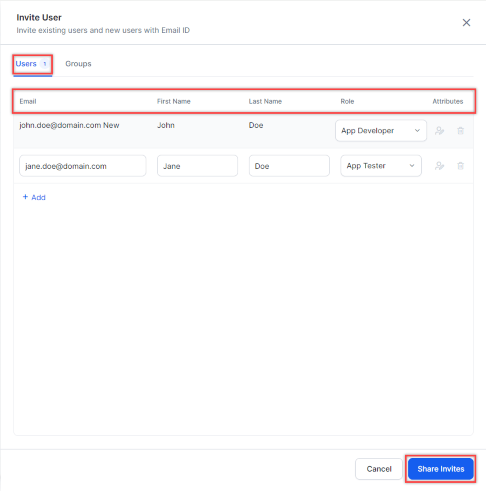
- Mandatory fields: email, first name, and role.
- At least one channel enabled (Chat or Voice).
- At least one language assigned to the enabled channel.
Edit a User Record
- On the Manage Users page, select the Ellipsis icon (⋮) for the user.
- In the User Attributes window, make your changes.
- Select Update Changes.
Promote as Owner
- Select the Ellipsis icon (⋮) for the user.
- On the Promote app owner pop-up, select a role and select Save.
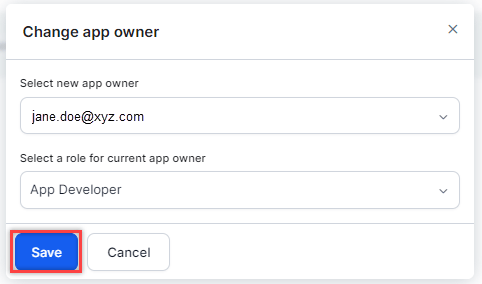
Change Owner
- Select the Ellipsis icon (⋮) for the current App Owner.
-
On the Promote app owner pop-up, select a role and select Save.
Delete a User Record
- Select the Ellipsis icon (⋮) for the user.
- Select Delete.
- Confirm when prompted.
- You can’t delete your own user account.
- You can’t delete the CCAI App Owner.
- Reports, dashboards, and APIs continue to display deleted agents as long as historical data includes them.
- After deletion, the user can no longer sign in. To temporarily restrict access without deleting, disable their Chat and Voice channels or move them to the Unassigned group.
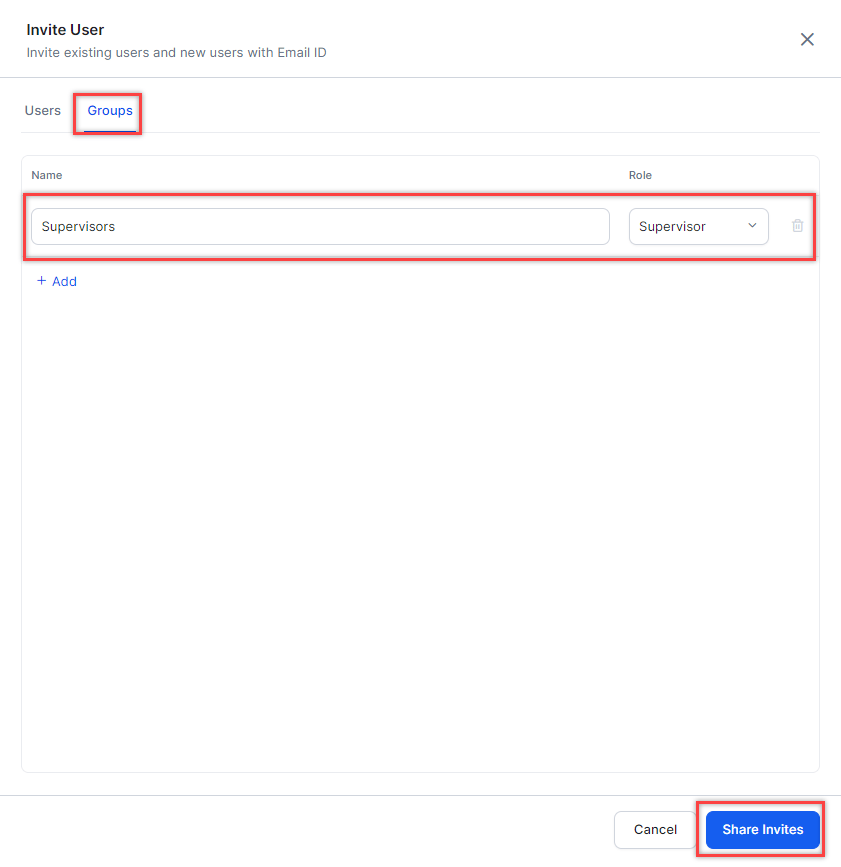
Add a Group
- Select Invite Users.
-
In the Invite User window, configure:
- Name: Group name. See Create a Group.
- Role: App Developer, App Tester, Agent, or Supervisor.
-
Select Share Invites.
Roles and Permissions
The Platform uses role-based access control. Roles determine which features a user can access and at what level. Go to Manage > Users > Manage Users and select the Role Management tab.Role Management Live Board
The Role Management board lists all roles with the following information:Default Roles
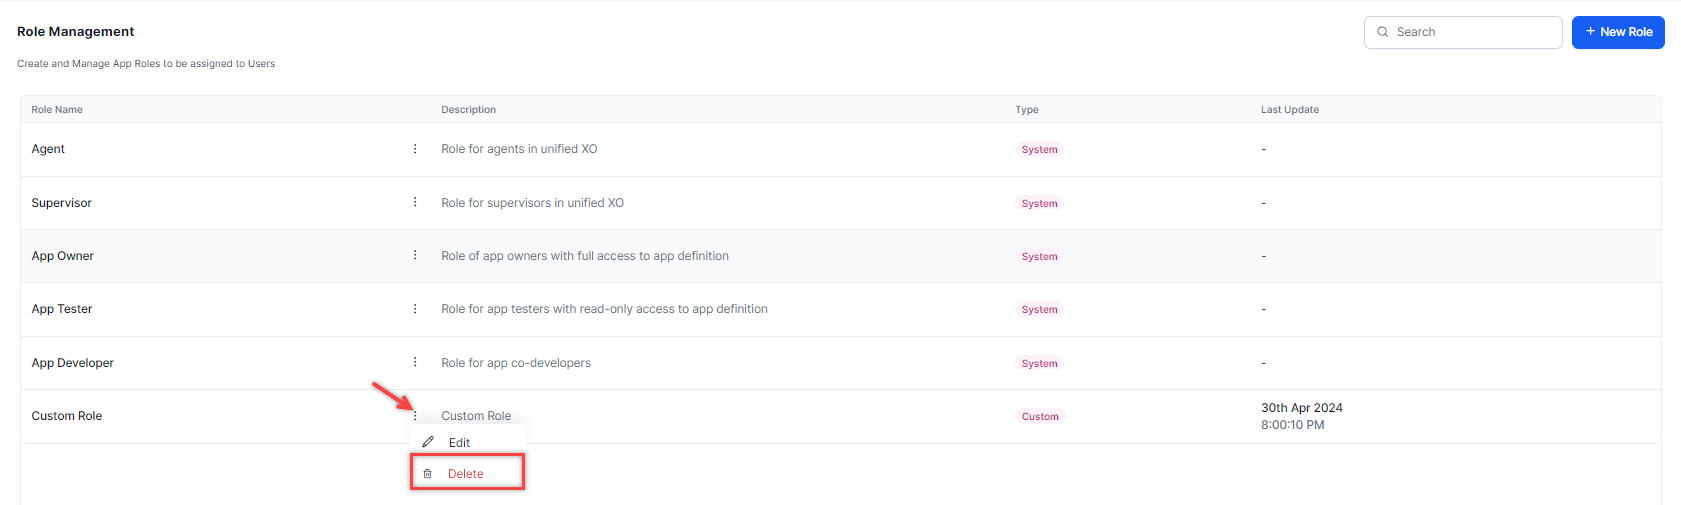
Default roles are fixed and can’t be edited or deleted.Permissions
- The Monitor Console permission is restricted to queues the user is assigned to.
- The Transfer/Close Multiple Conversations permission is split into three child permissions: Change Queue for Conversations, Assign Conversations, and Force Close Conversations. Child values inherit from the parent.
Parent and Child Permissions
Agent Desktop Console and Monitor Console are parent permissions.- When a parent is set to No or View, all child permissions are automatically disabled and can’t be changed.
- Monitor Console functions as a View permission when set to Yes with all underlying permissions set to No.
Permission Reference Tables
The tables below show the access level each default role and custom role has for each permission. For Custom Roles, the column shows the available options you can assign.Automation
Flows and Routing
User Management
User Management Permission Options
The User Management permission supports six access levels. Each level defines which user lifecycle actions the role can perform.Setting the User Management permission to View, View & Invite, or None turns off all child permissions. If you set the parent permission to Edit, Edit & Delete, or Full Access, the system restores the previous child permission configurations.
Agent and Supervisor Experience Agent Desktop Console
Agent Desktop Console is a parent permission. Child permissions are disabled when the parent is set to No or View.Agent and Supervisor Experience Monitor Console
Monitor Console is a parent permission. Child permissions are disabled when the parent is set to No or View.System
Other Modules
App Owner Exclusive Permissions
The following permissions are implicitly granted to App Owners only and aren’t available to any other role:Custom Roles
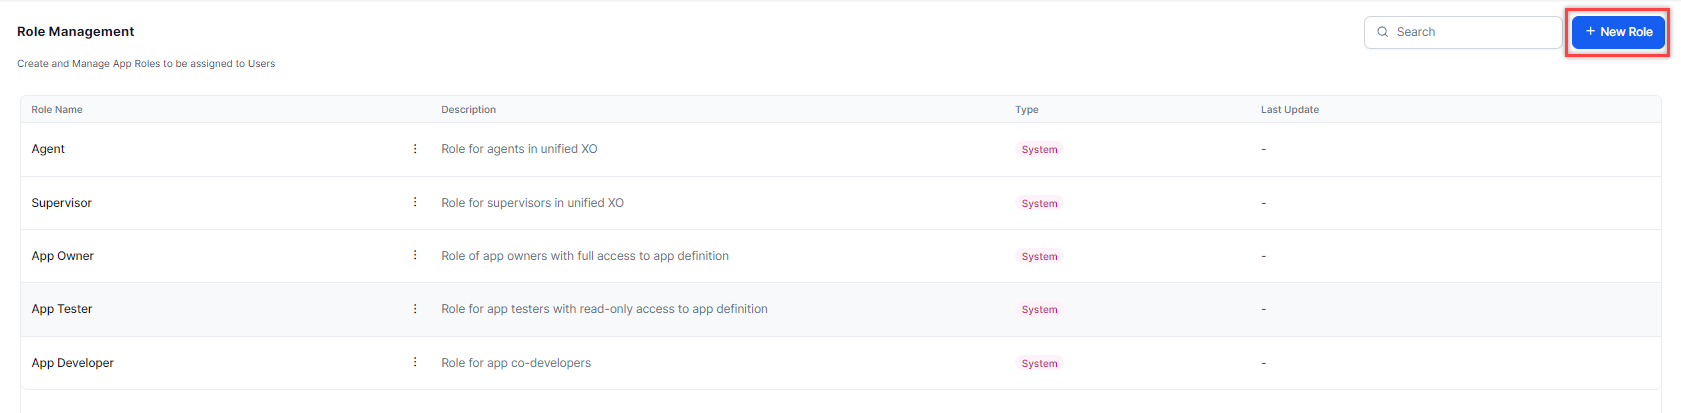
Create custom roles to define specific permission sets tailored to your organization’s needs. You can add, edit, and delete custom roles if you have the Role Management permission set to Yes.Add a Role
-
Select + New Role.
-
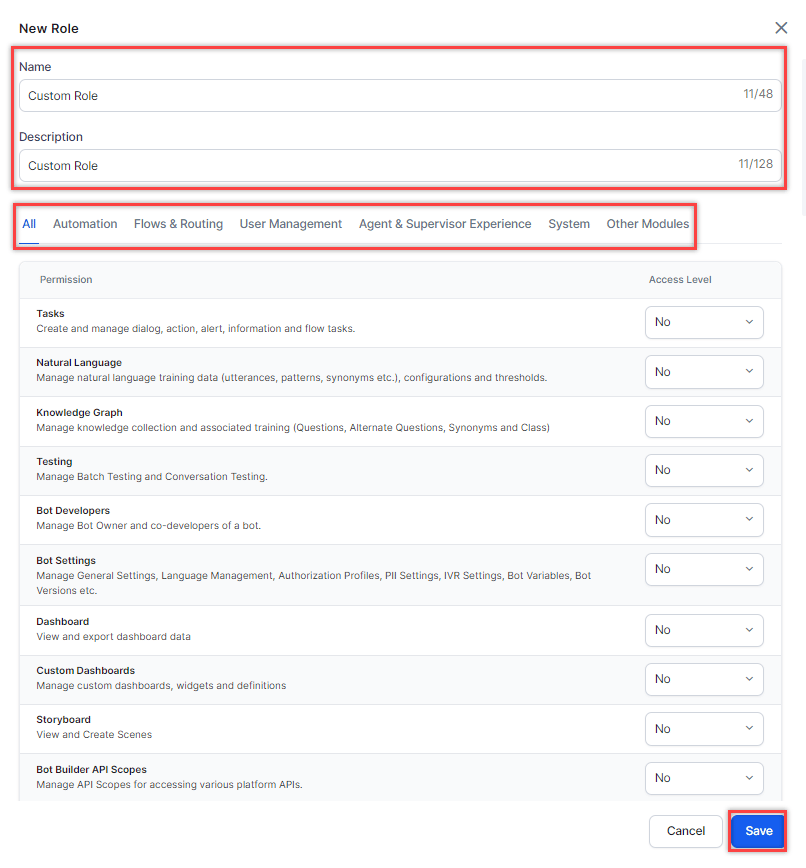
In the New Role window, fill in:
- Role Name: Displayed across Platform (for example, Experience Designer).
- Description: Summary of the role’s responsibilities or access level.
- Permissions: Set each permission using the available dropdown options.
-
Select Save.
Edit a Role
-
Select the Ellipsis icon (⋮) for the role and select Edit.
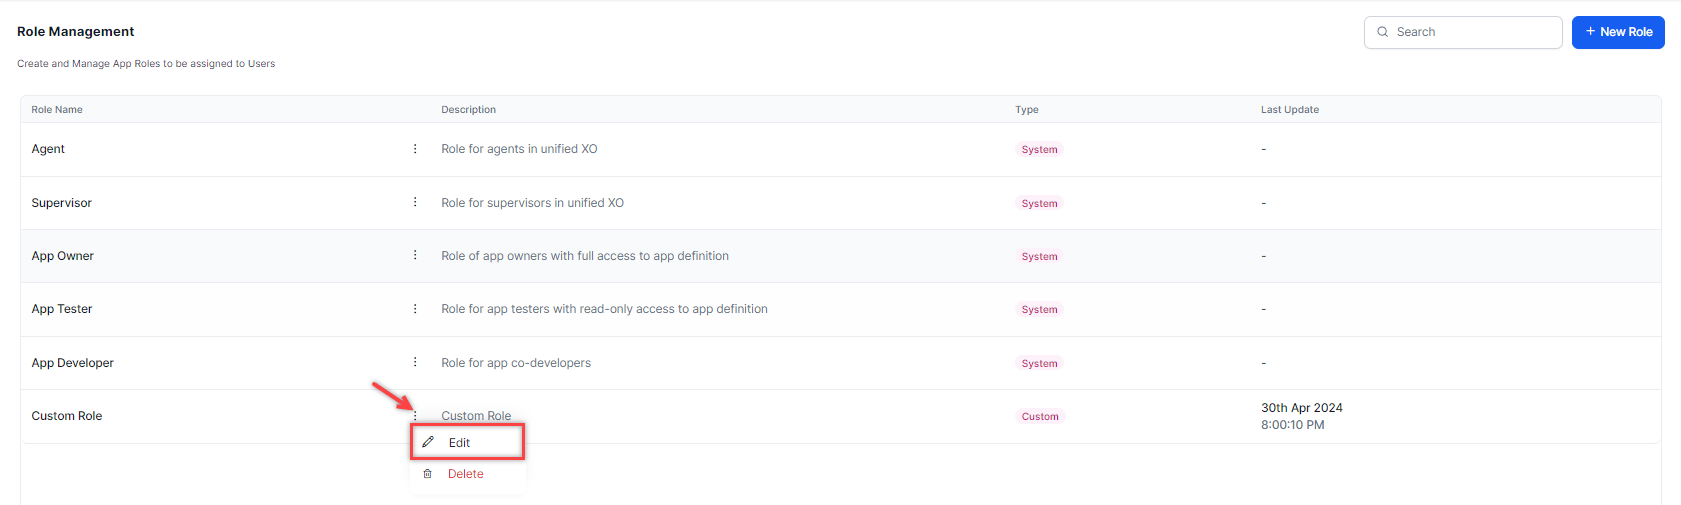
- In the Edit Role window, make your changes and select Save.
Delete a Role
-
Select the Ellipsis icon (⋮) for the role and select Delete.
-
Select Yes to confirm.
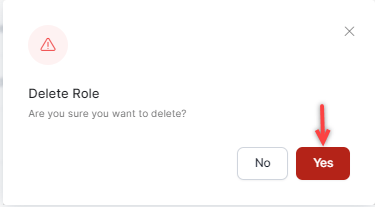
You can’t delete default roles (App Owner, App Developer, App Tester, Supervisor, Agent). Deleted roles can’t be restored.