

Key Benefits
Amazon Q vs. Native RAG Search
Integration Modes
Amazon Q integrates with the platform in two ways:Prerequisites
Before starting, ensure your AWS environment includes:- Read access to your Amazon Q Business application
- Retriever access permissions
- AWS IAM Identity Center integration permissions
- Cross-account access permissions (if applicable)
Getting Started
Enterprise Knowledge
Use this mode when Amazon Q Index is your primary knowledge source and most enterprise connectors link to it.-
Navigate to Enterprise Knowledge
- Log in to the Admin Console.
- Select Enterprise Knowledge from the left navigation pane.
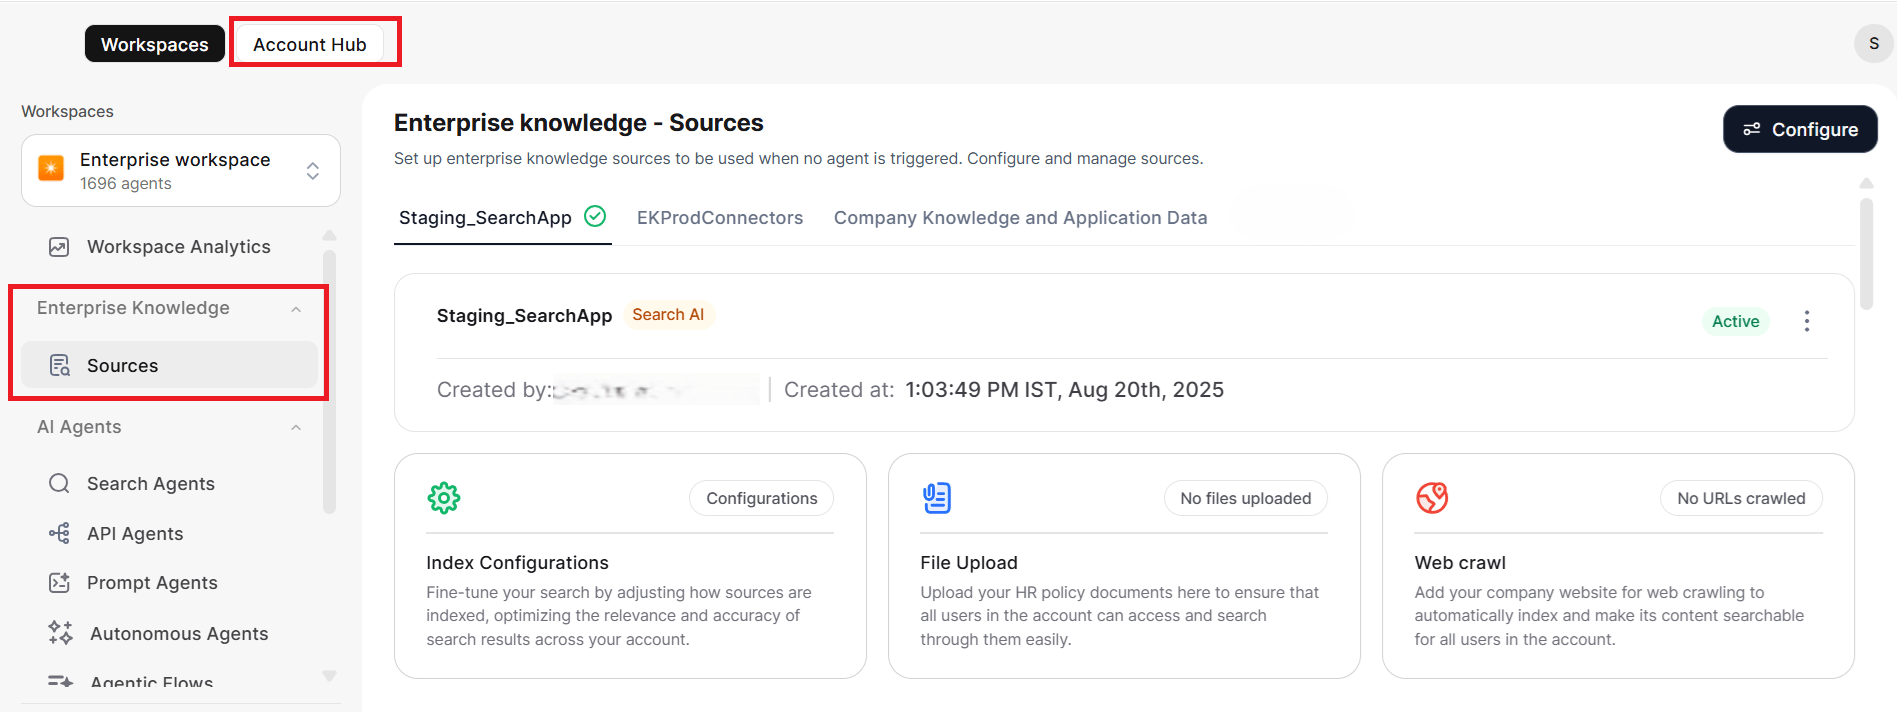
-
Create a new configuration
- Click Configure → Create New.
- Choose Amazon Q as the knowledge source type.
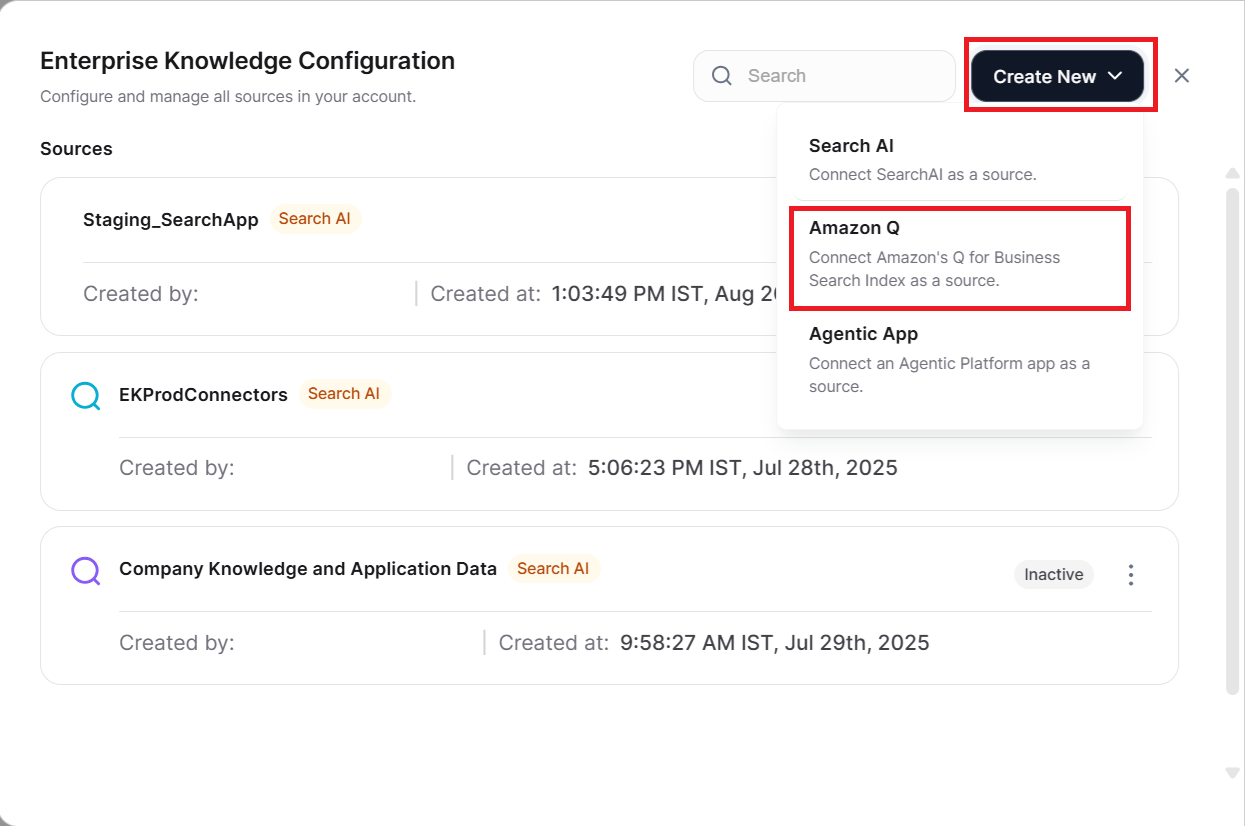
-
Configure basic settings
-
Record the Tenant ID
- Copy the displayed Tenant ID.
- You need this ID during AWS data accessor setup.
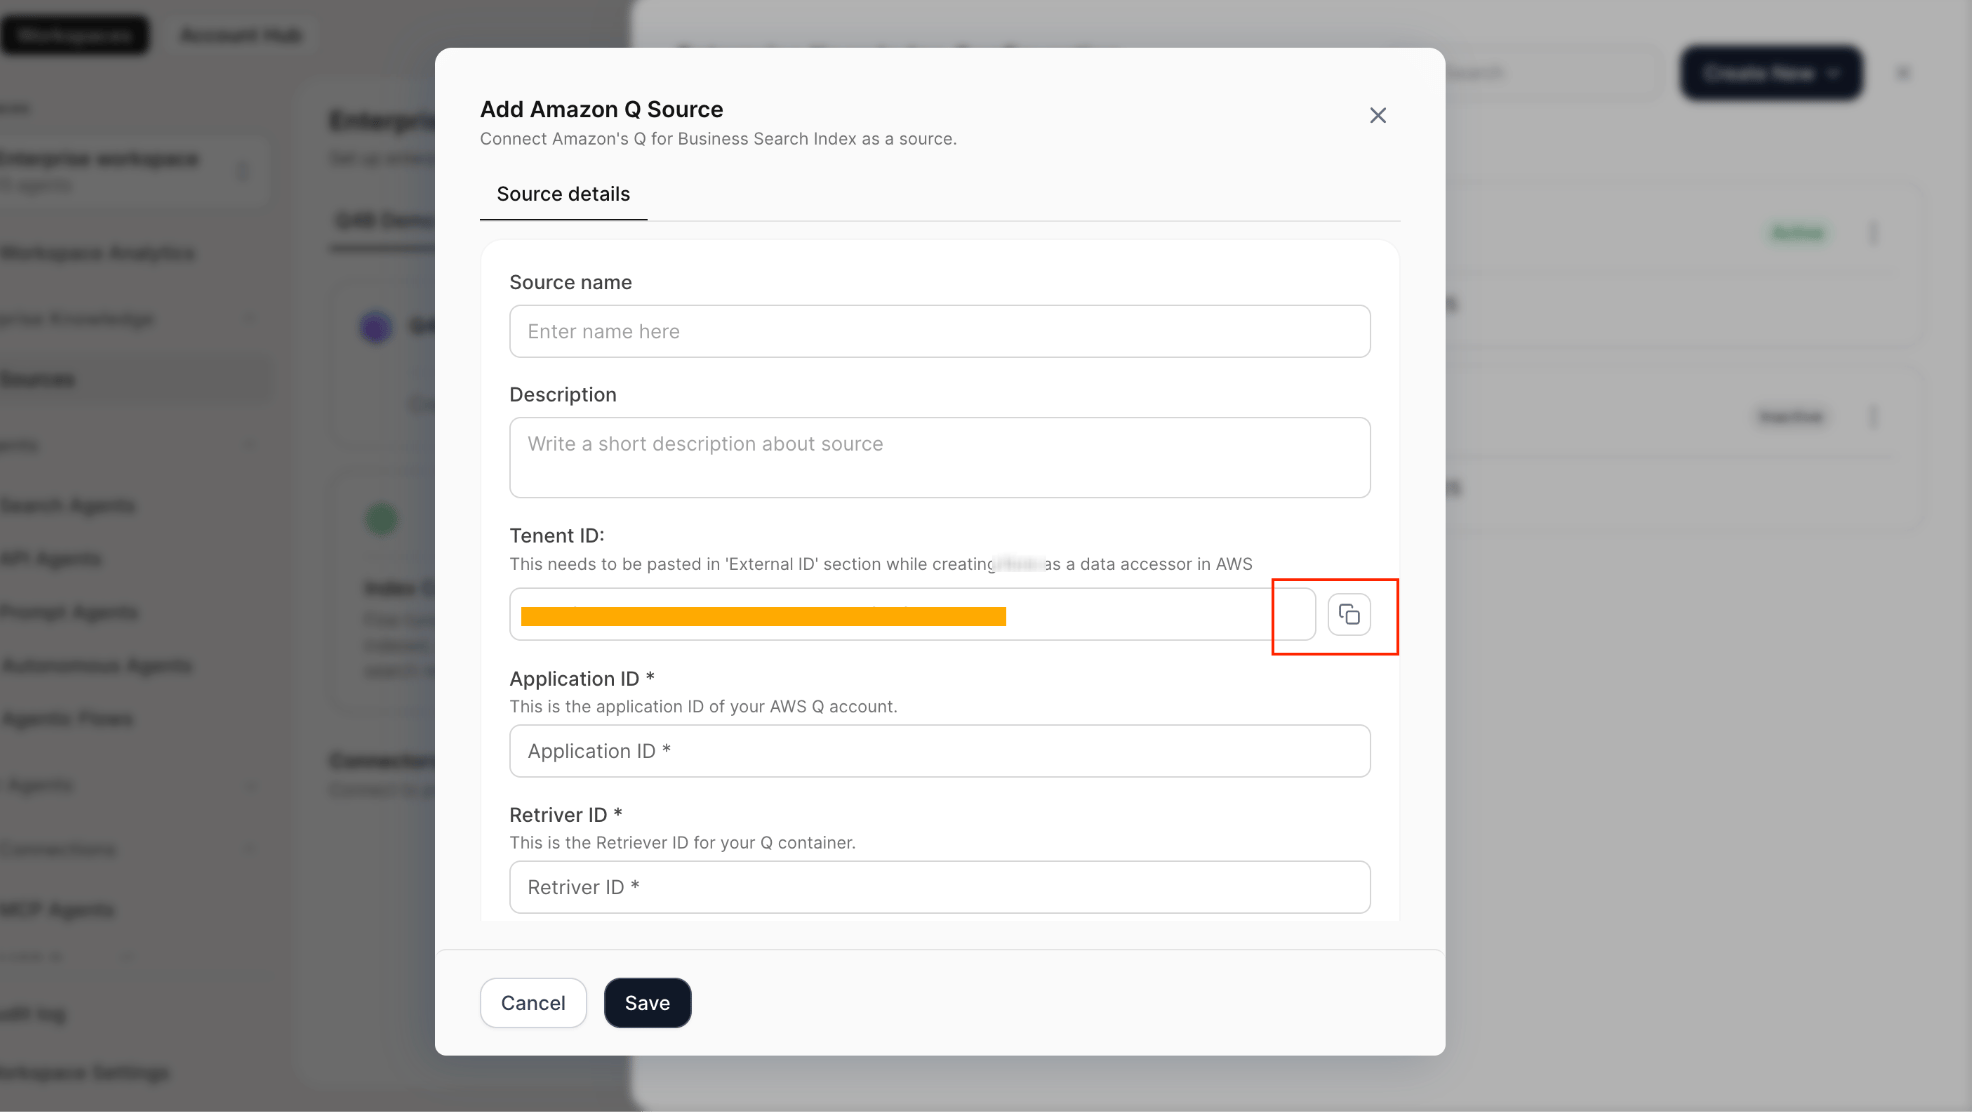
-
Enter AWS connection details
-
Save and activate
- Click Save to store the configuration.
- Mark the source as Active to enable it as the default knowledge source for queries.
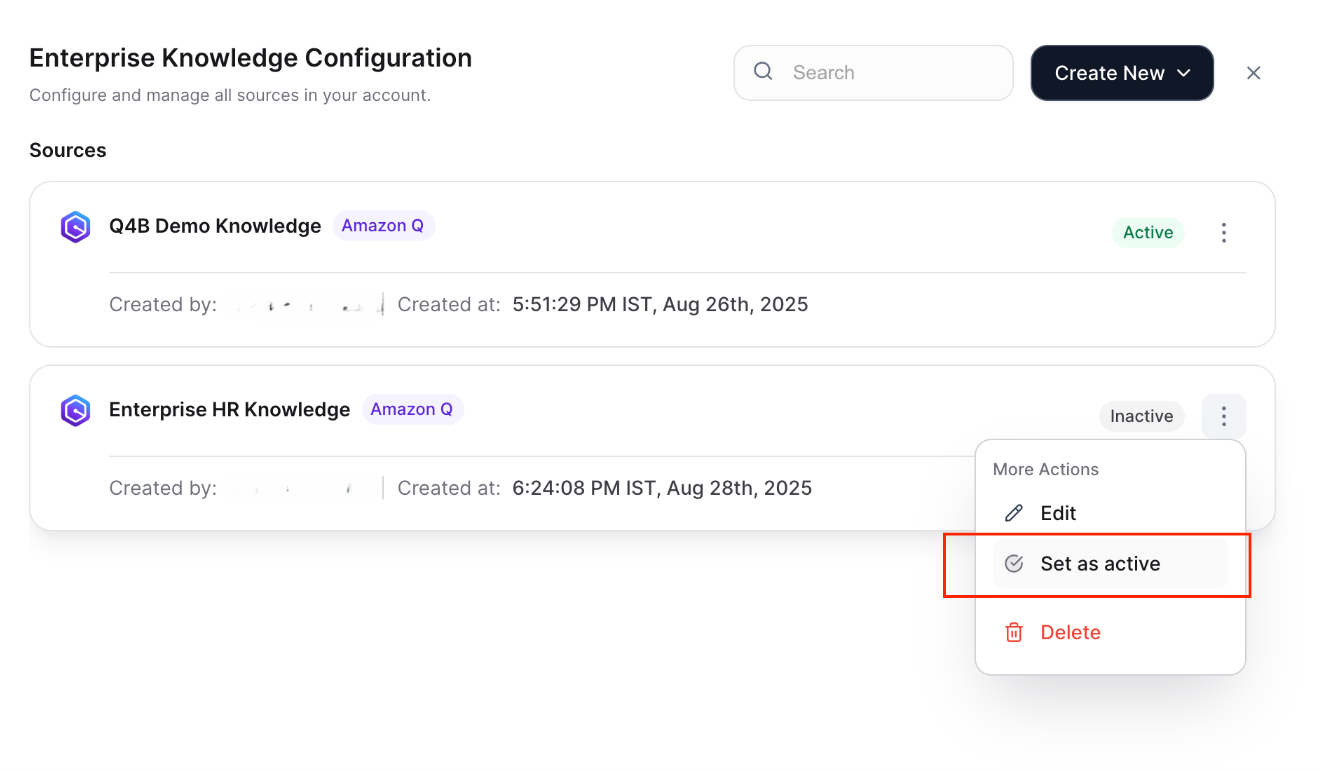
Enterprise Knowledge configured within a specific workspace becomes the default source for all users in that workspace. Select Enterprise Workspace during initial setup if you want all users in the organization to have access.
Search Agent
Use this mode when integrating Amazon Q alongside other search indices, or when you want to control query routing through agent description and intent.-
Create a search agent
- Navigate to the Search Agents section and click Create.
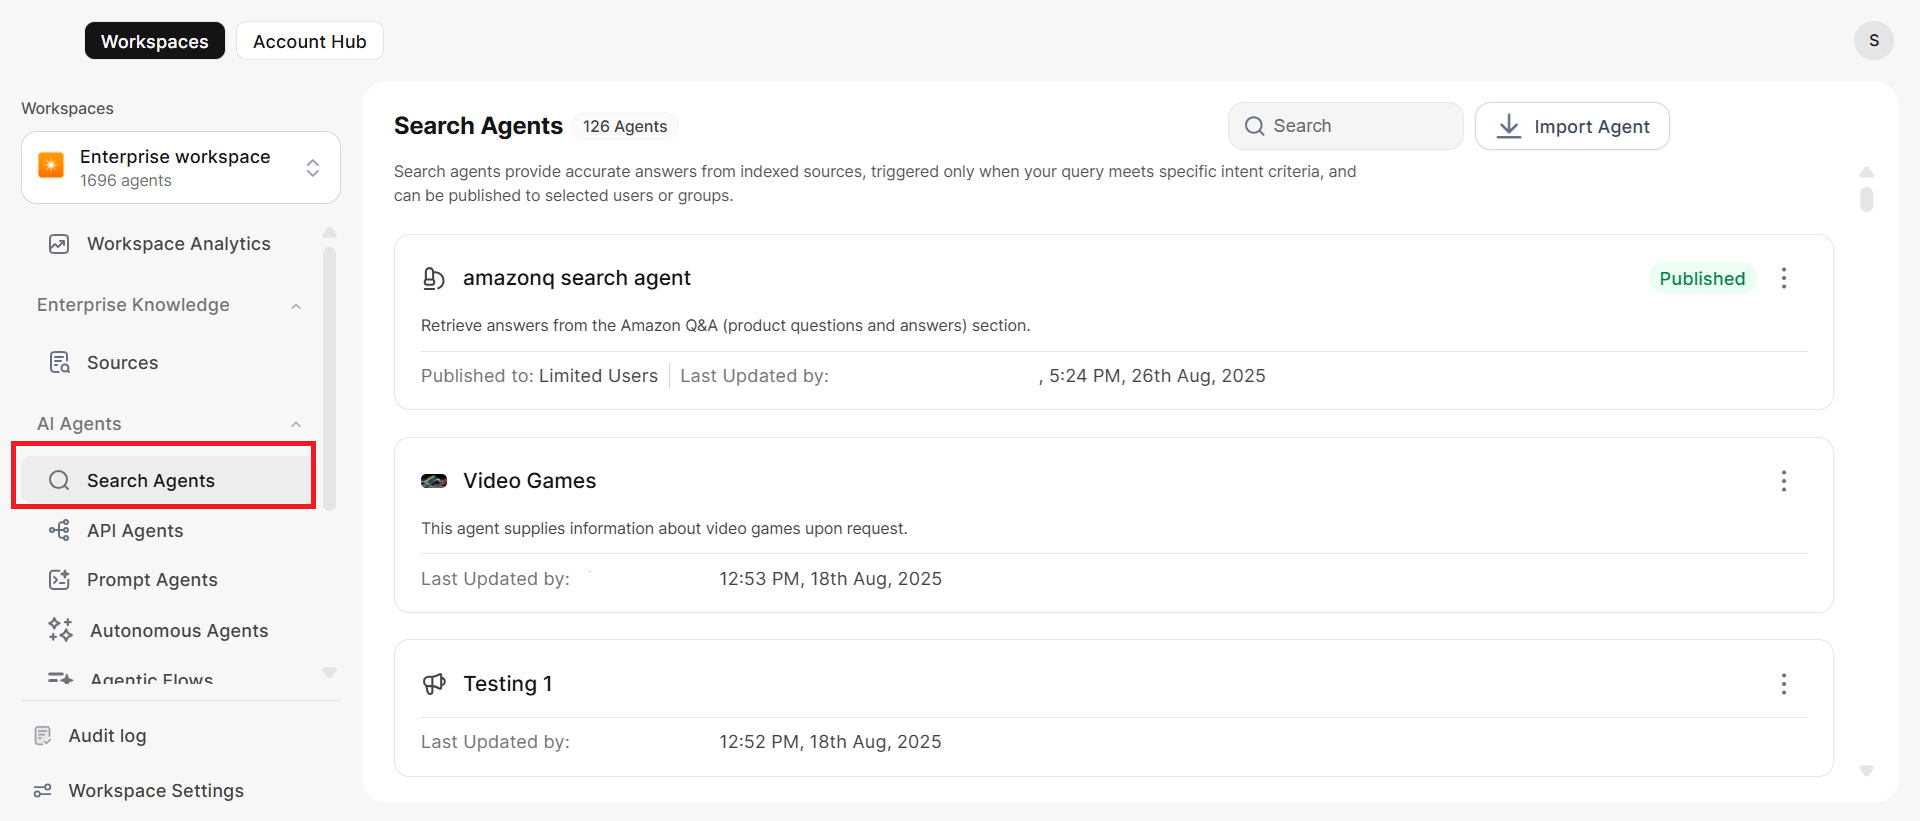
- Enter an Agent Name and Purpose. This description guides the platform when routing relevant queries to this agent.
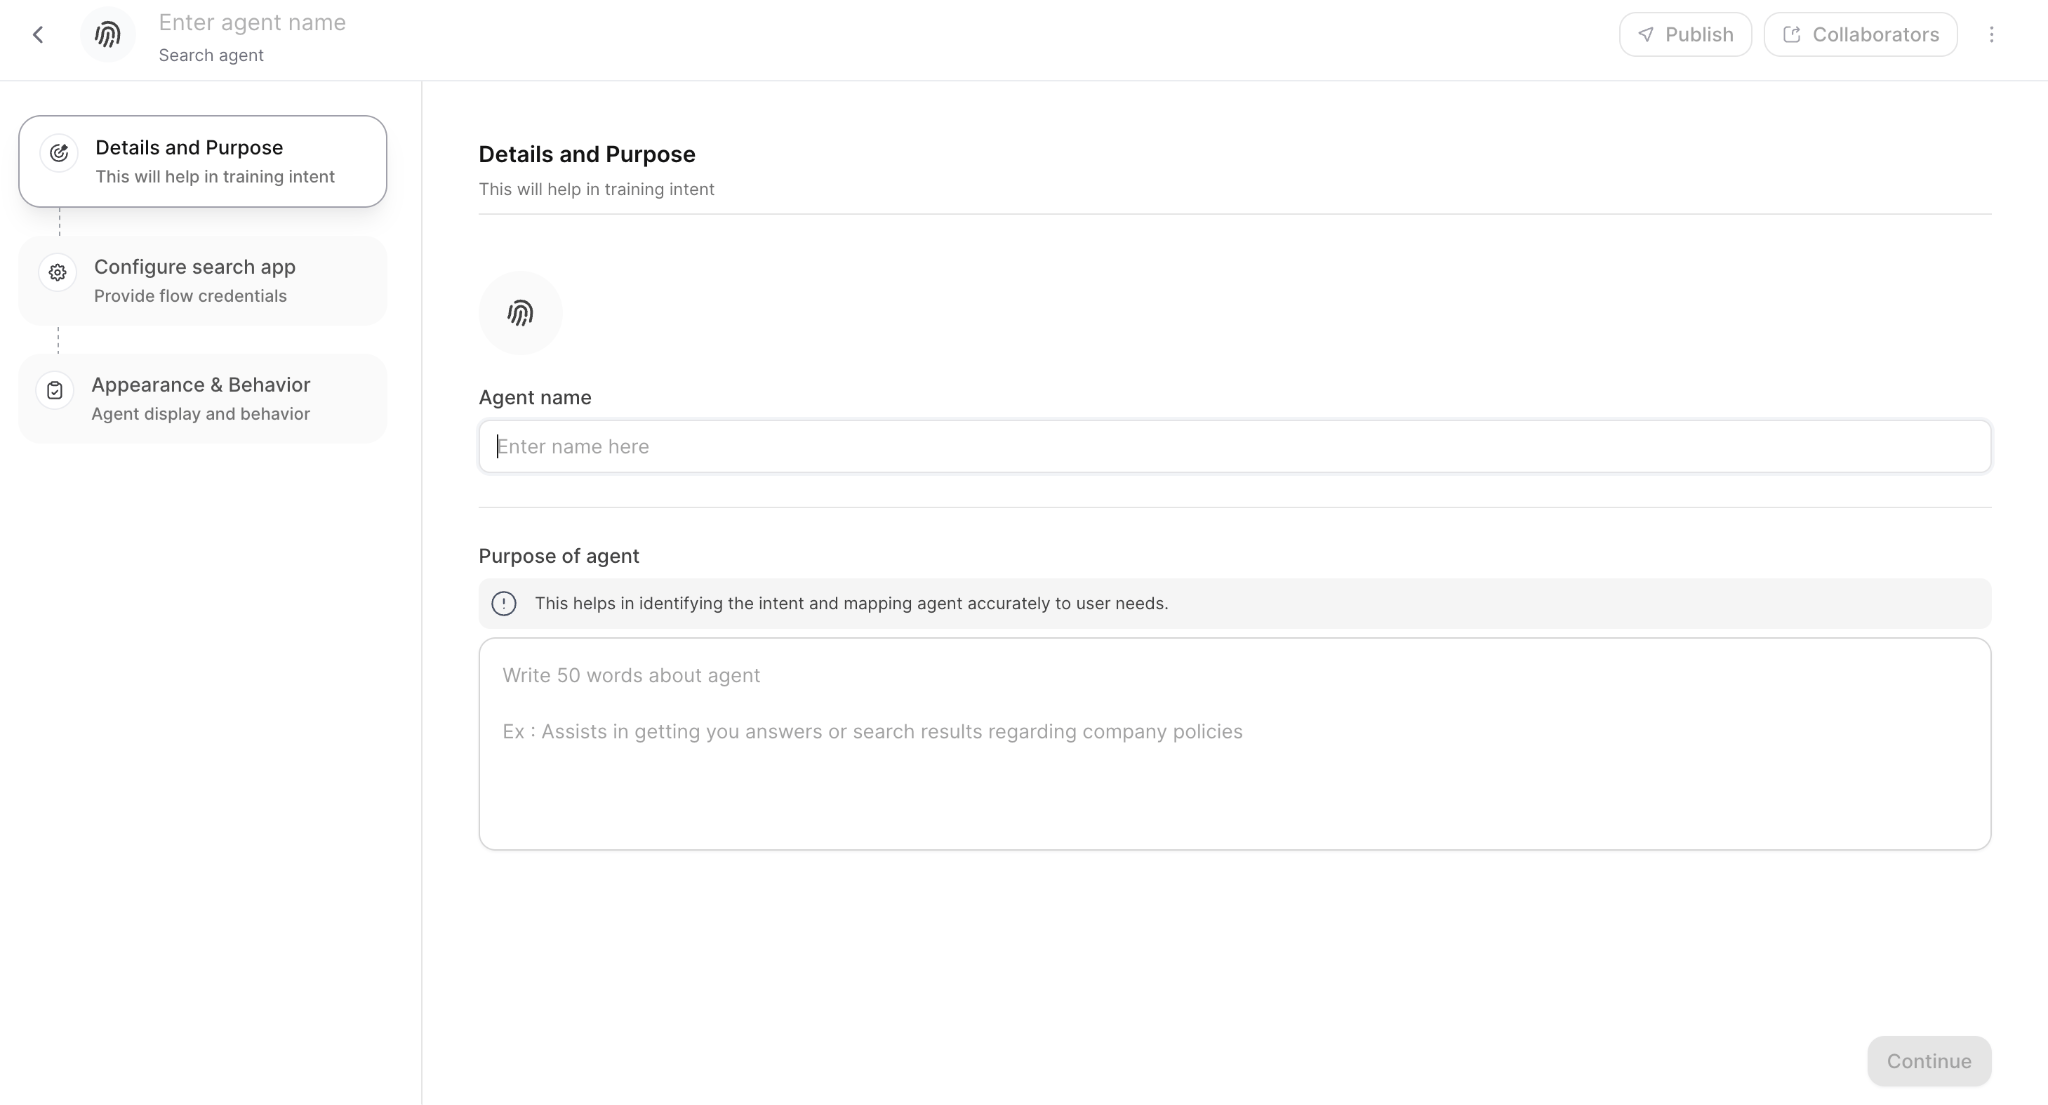
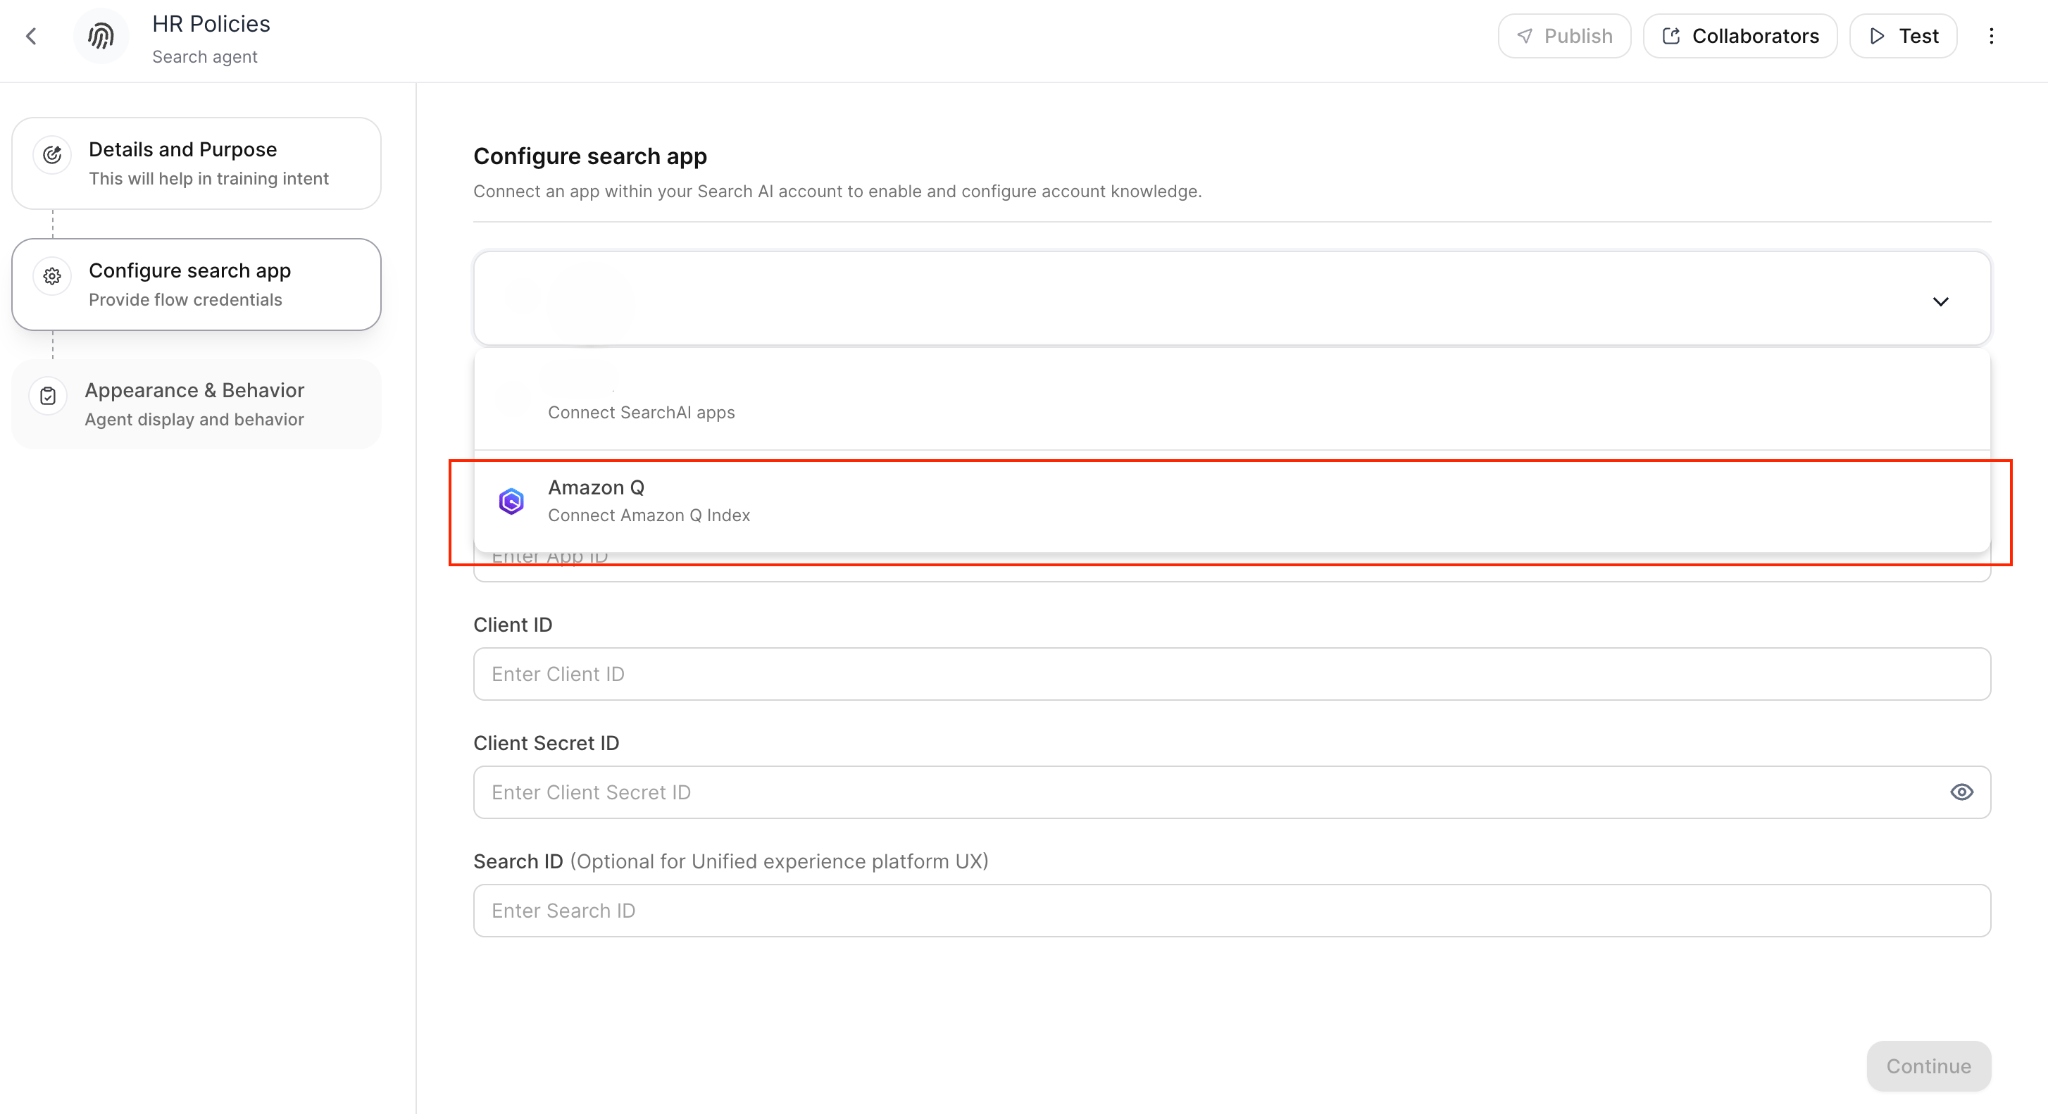
- Select Amazon Q as the Index type.
-
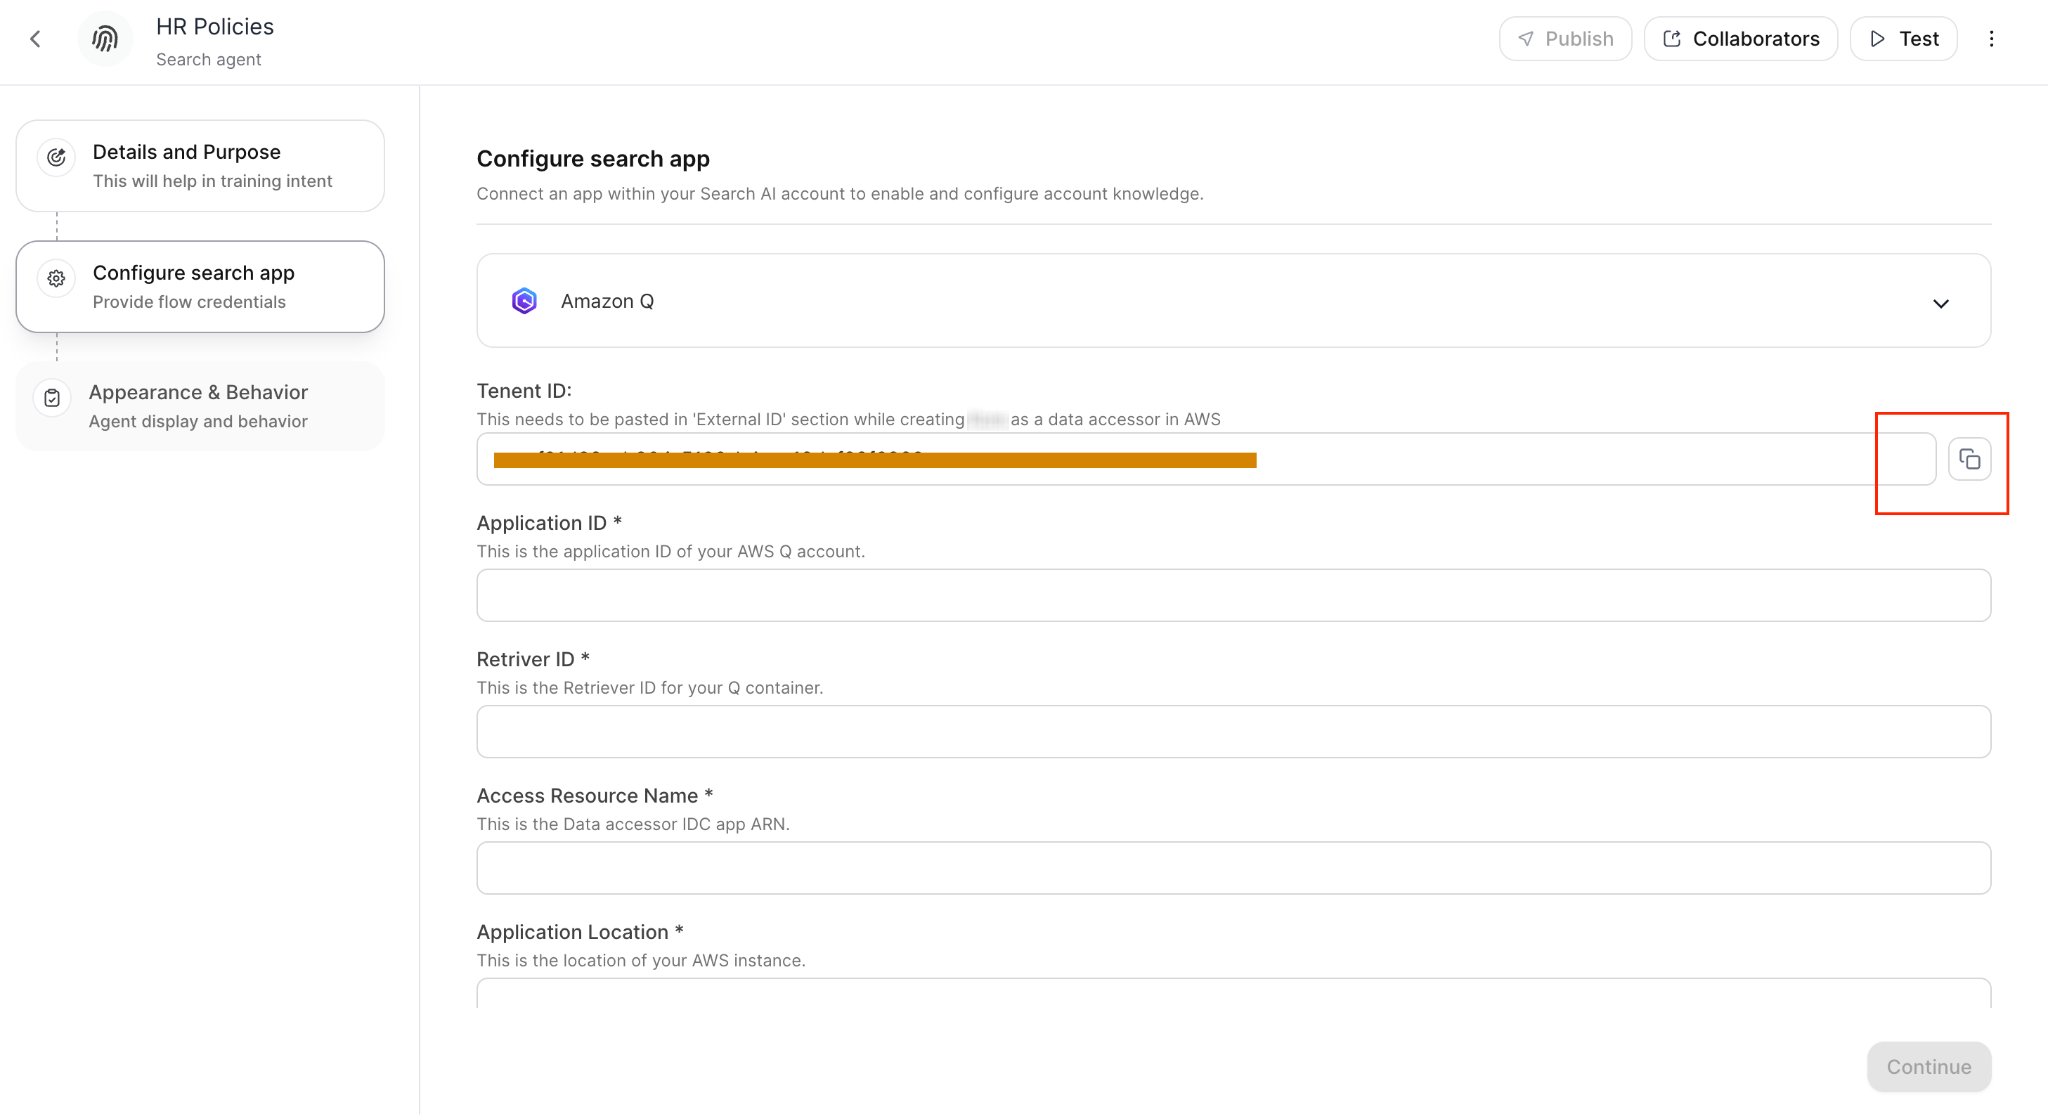
Record the Tenant ID
- Copy the Tenant ID from the configuration screen.
- You need this during AWS data accessor setup.
-
Enter AWS integration details
Configure the Amazon Q Business Application
This is a one-time setup that creates a secure connection between your Identity Provider (IdP) and AWS Identity Center using Trusted Token Issuer (TTI), allowing AI for Work to access your Amazon Q index. For reference, see the AWS configuration blog.Step 1: Set Up a Trusted Token Issuer in IAM Identity Center
- Open the IAM Identity Center console (ensure IAM Identity Center is already enabled).
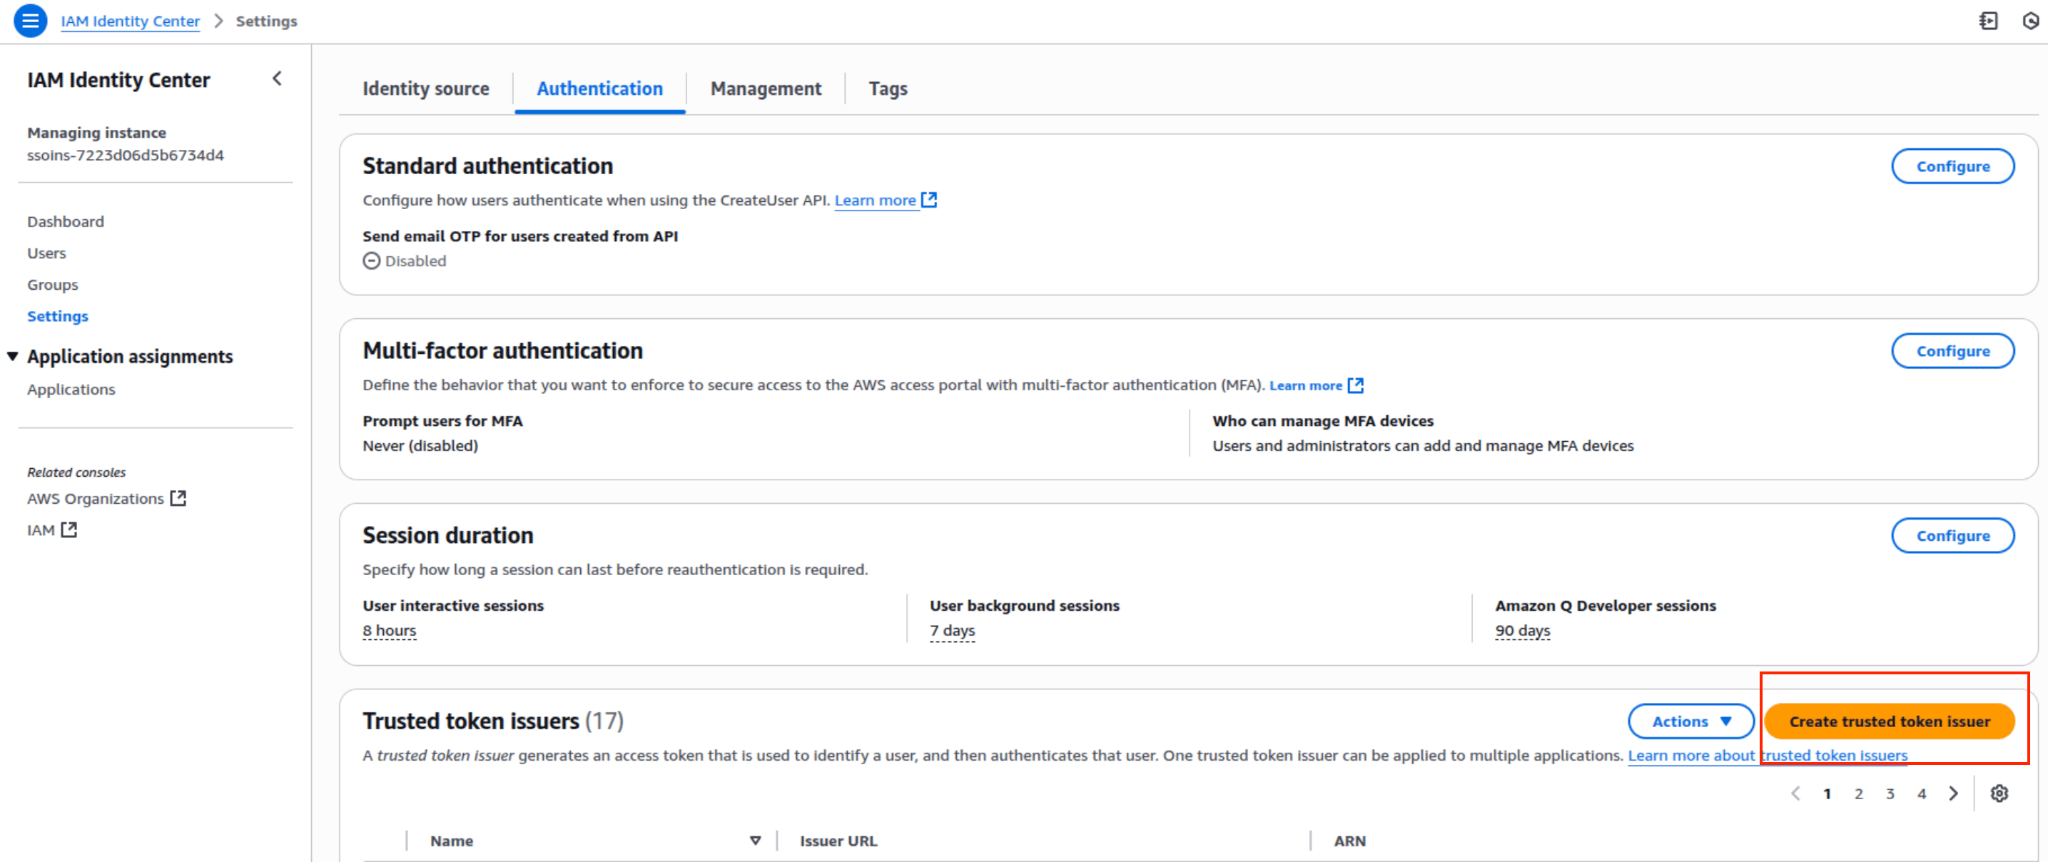
- Go to Settings → Authentication tab.
- Under Trusted token issuers, click Create trusted token issuer.
-
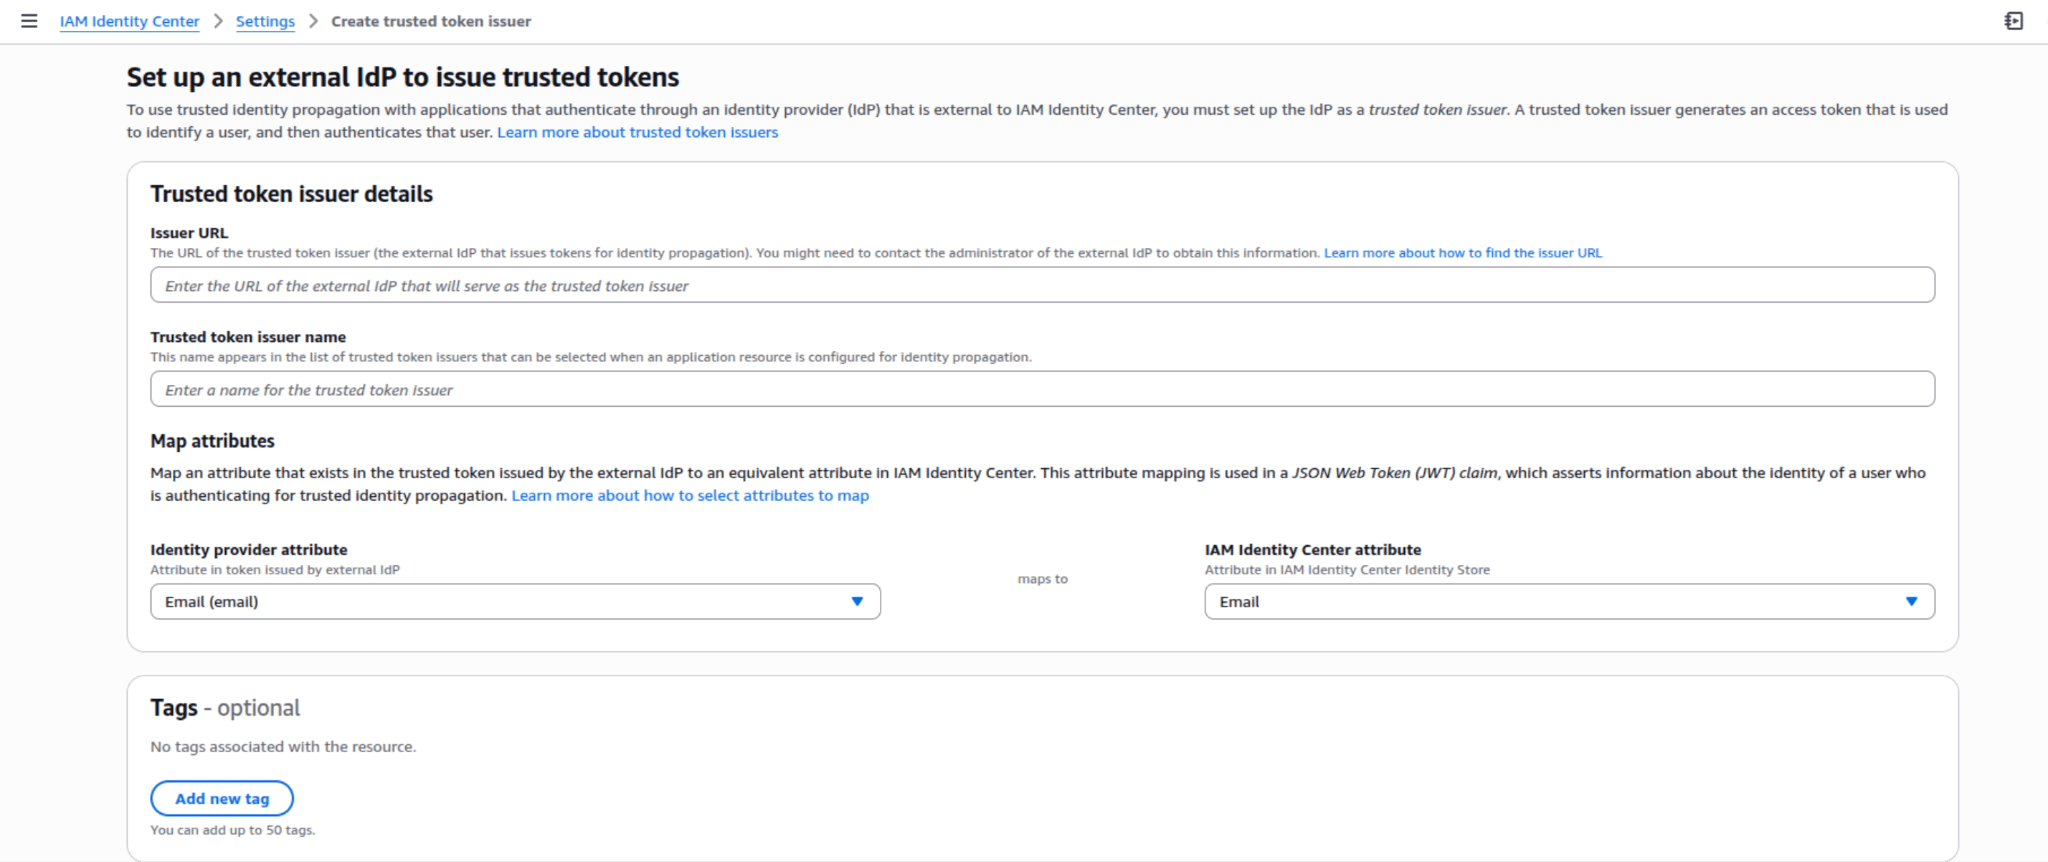
Configure the following:
-
Save the configuration and confirm the TTI was created successfully.
Step 2: Configure Audience Claims
-
Verify that the
audclaim in the IdP-issued token matches your Amazon Q application’s audience requirement in IAM Identity Center. - Update claim mappings in the IdP admin interface as needed.
-
Confirm attribute mapping is established between your external IdP and AWS Identity Center.
Step 3: Add and Assign Users in IAM Identity Center
- Add users in your external IdP and provision them with the mapped attributes from Step 1.
- Authenticate users — the external IdP issues tokens that users exchange through IAM Identity Center for Amazon Q API credentials.
-
Assign users or groups (if required by your access policies):
- Navigate to IAM Identity Center → Applications → [Your Q App].
- Select Assign Users/Groups and complete the assignment.

Step 4: Set Up the Q Business Application
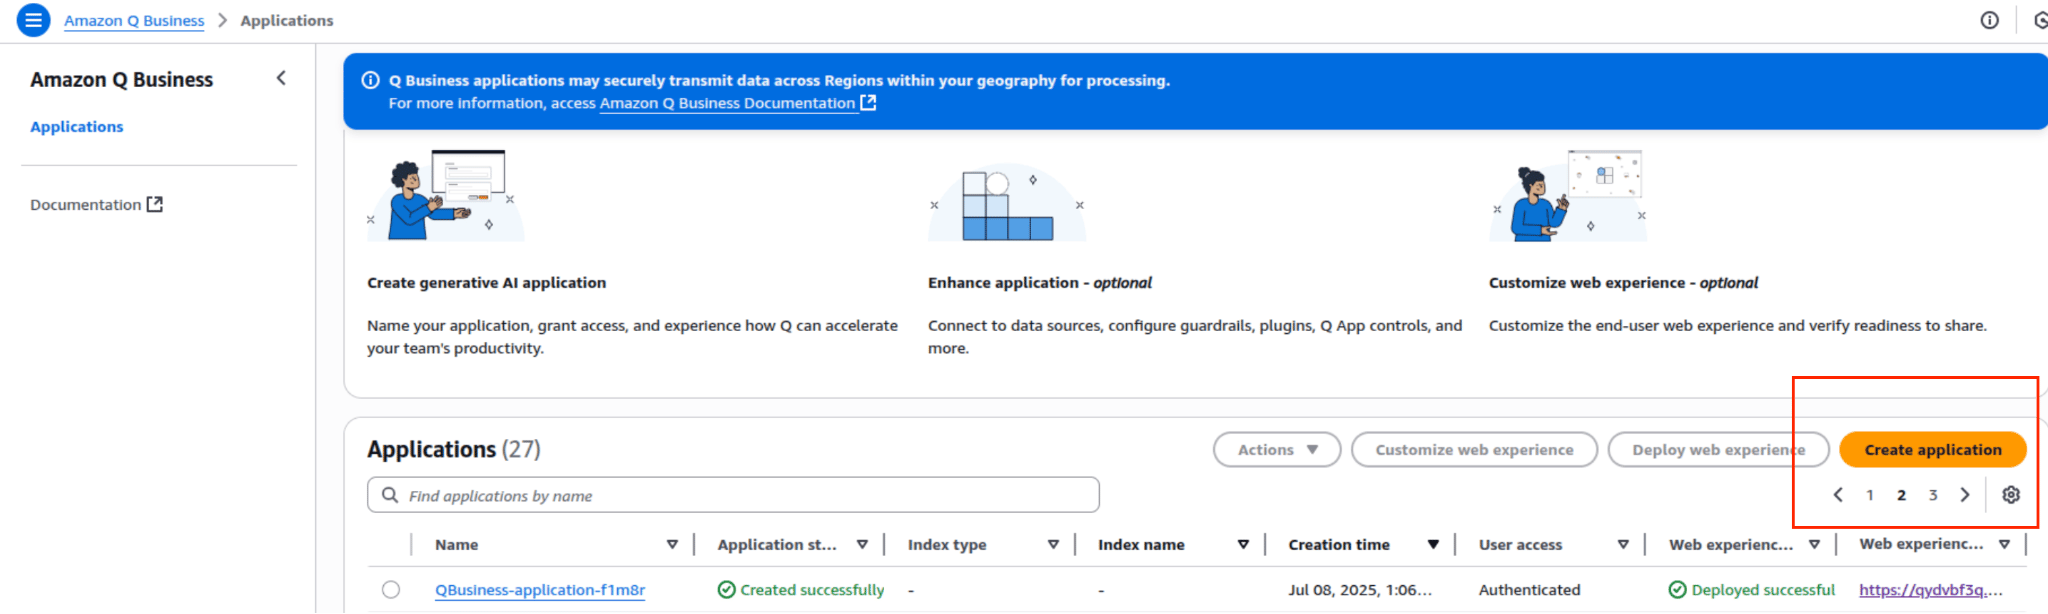
- Create a new Q Business Application or open an existing one in the AWS console.
-
Add all users who need search access within the Q Business application.
Step 5: Add Data Sources to the Amazon Q Index
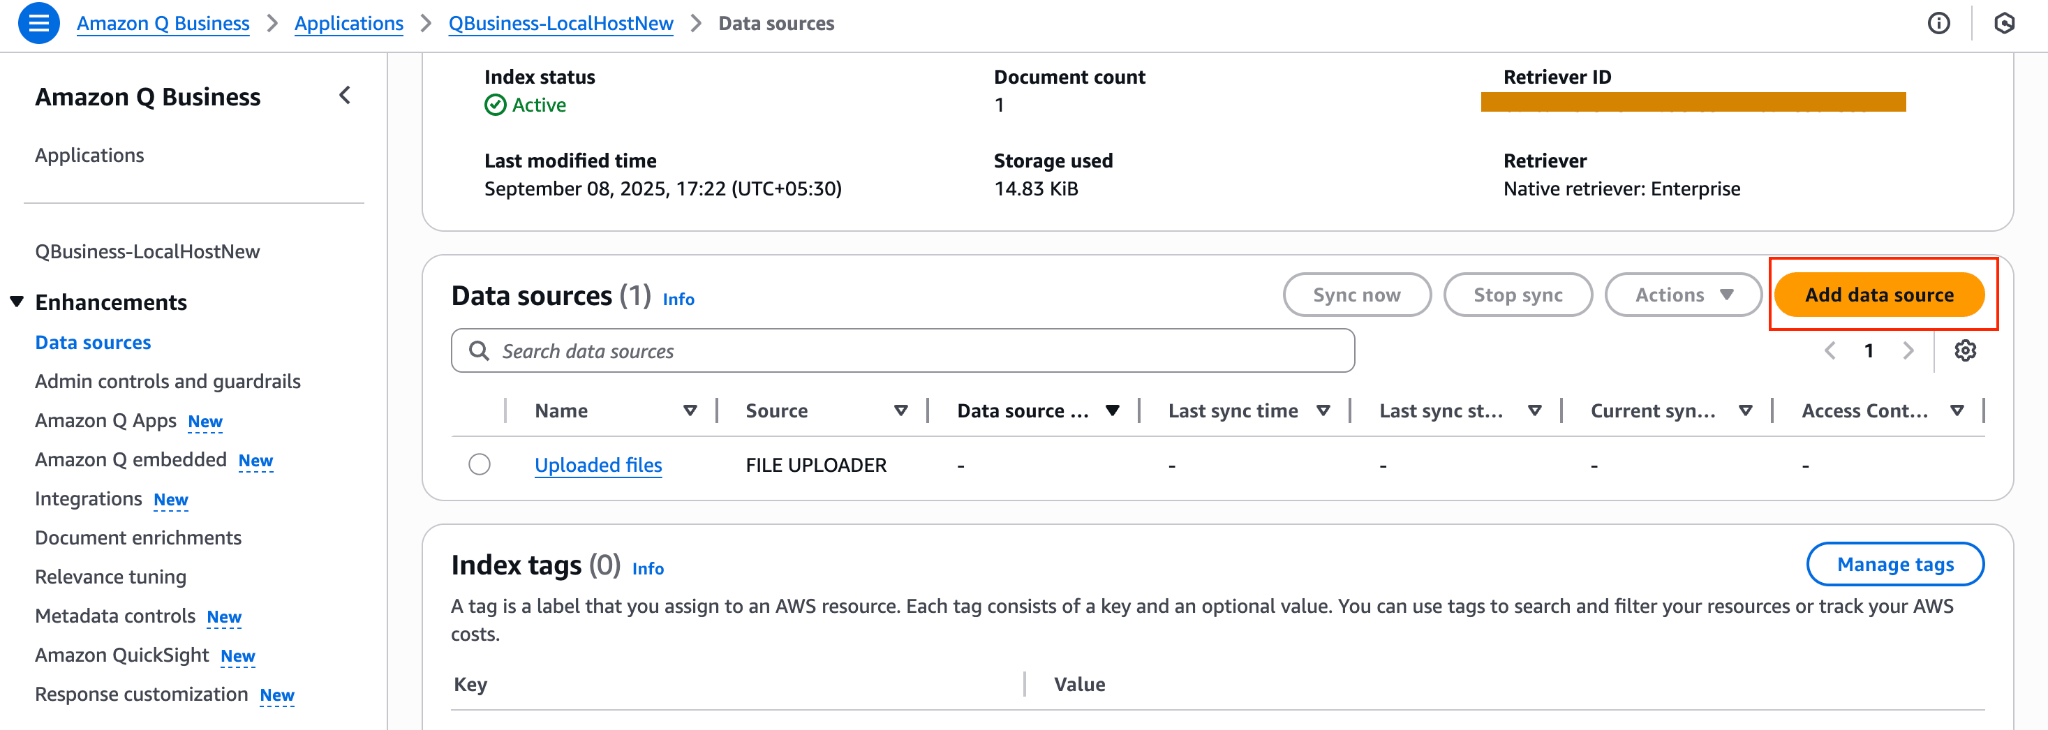
- In the Q Business application, create an index by adding the relevant data sources.
- Add data sources such as Google Drive, JIRA, Amazon S3, or other enterprise systems.
-
Configure each data source connection following the AWS documentation.
Step 6: Add Kore.ai as a Data Accessor
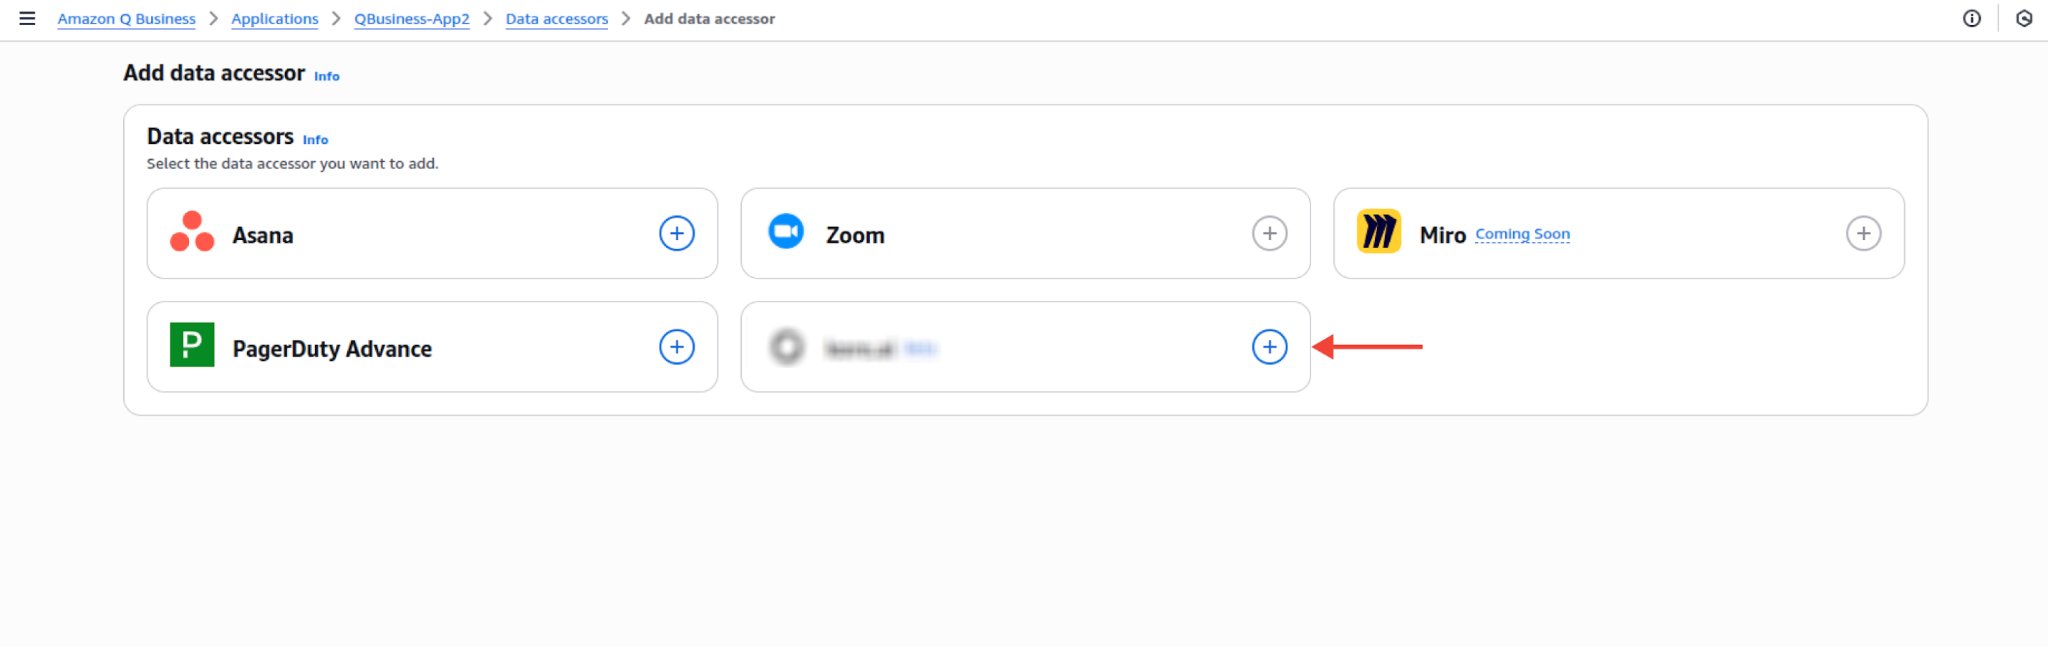
This step completes the integration by registering Kore.ai as a data accessor using the Tenant ID from the platform.- In the Q Business Application console, go to Data Accessors → Add Data Accessor.
-
Select Kore.ai from the available options.
-
In the External ID field, paste the Tenant ID from your Platform configuration screen.
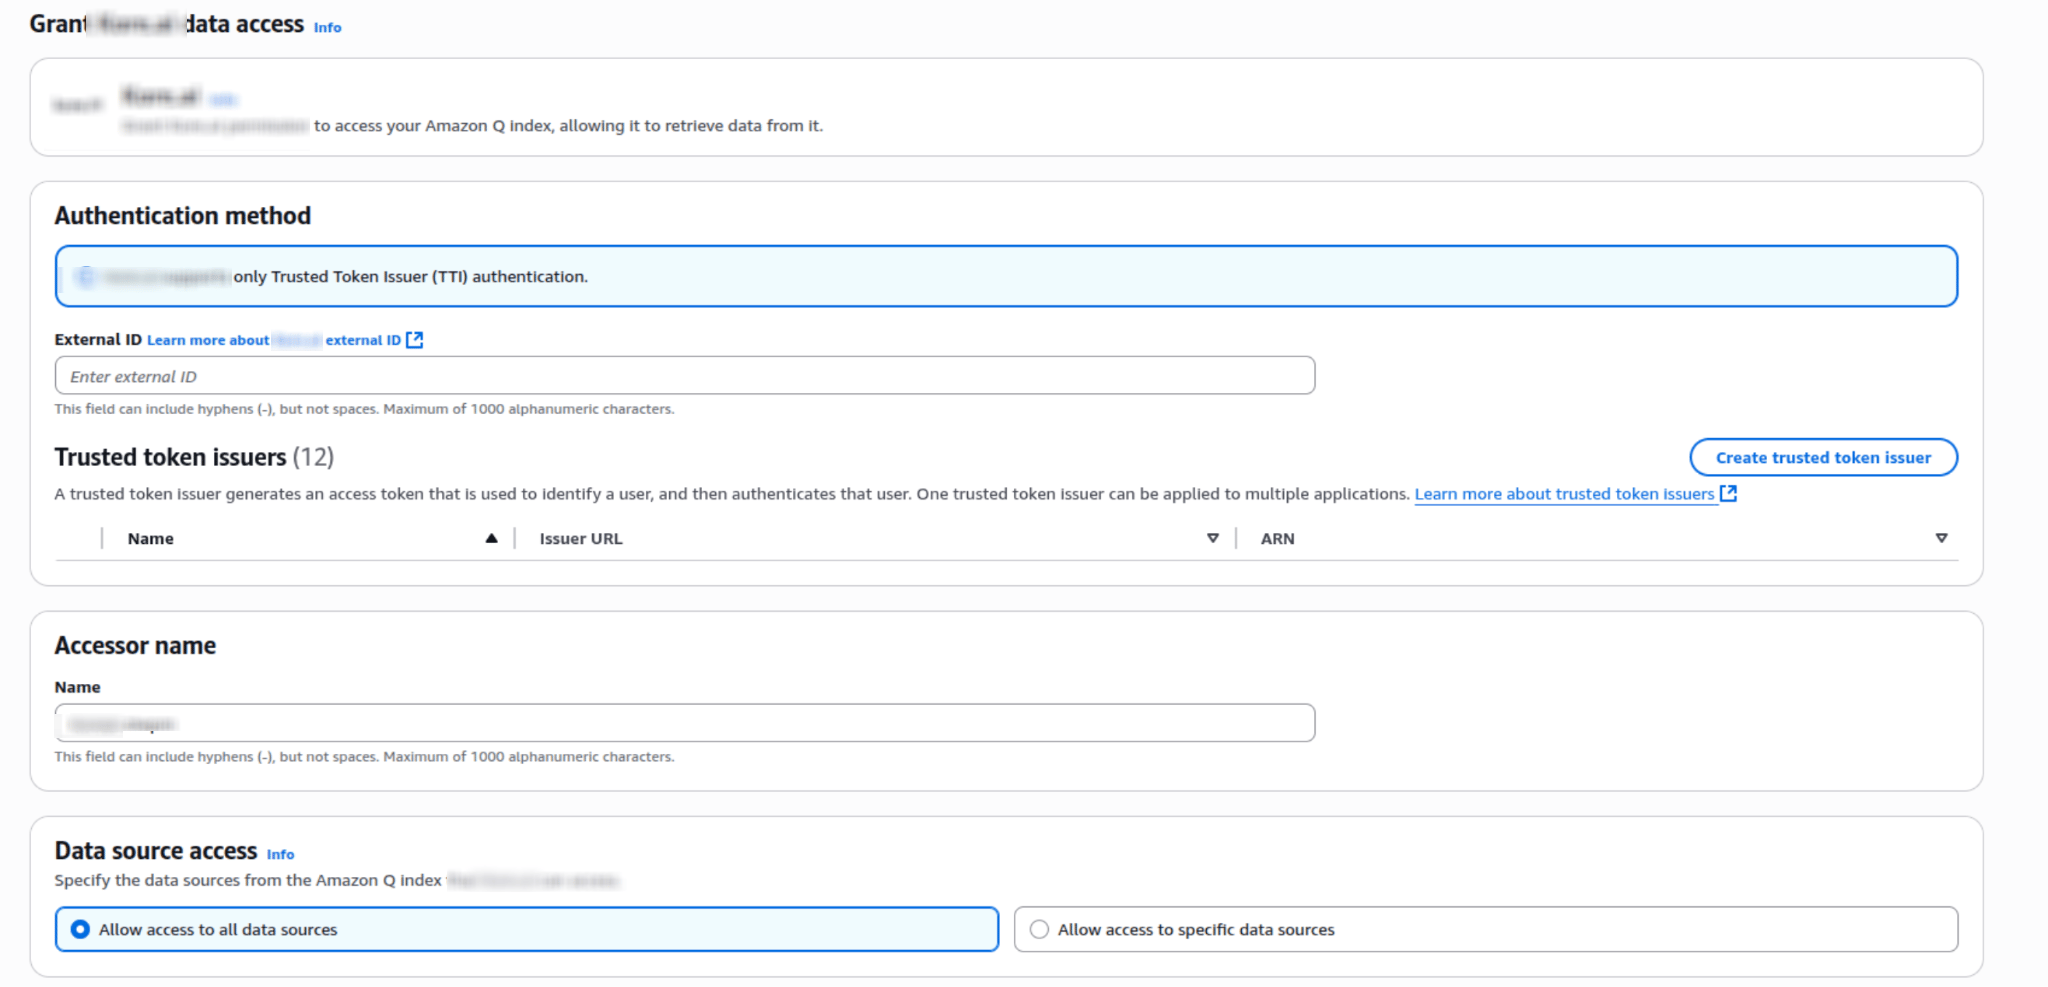
- Configure the Trusted Token Issuer — use an existing TTI or create a new one.
-
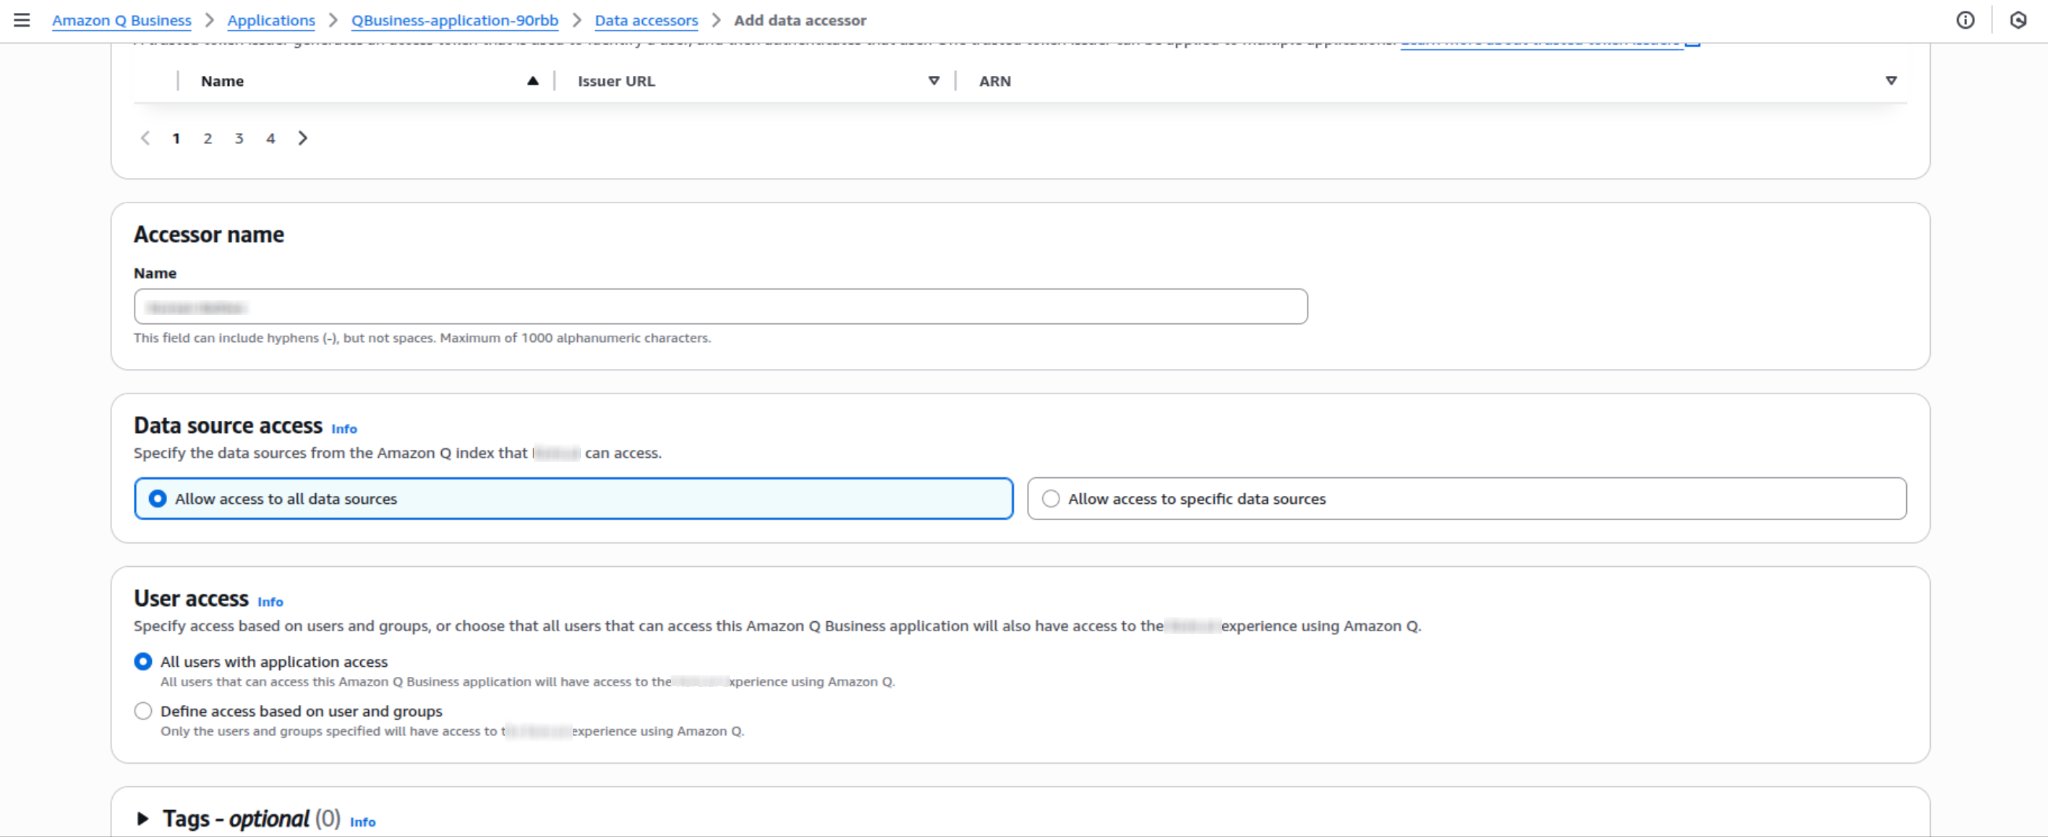
Set Data Source Access permissions:
-
Set User Access permissions:
-
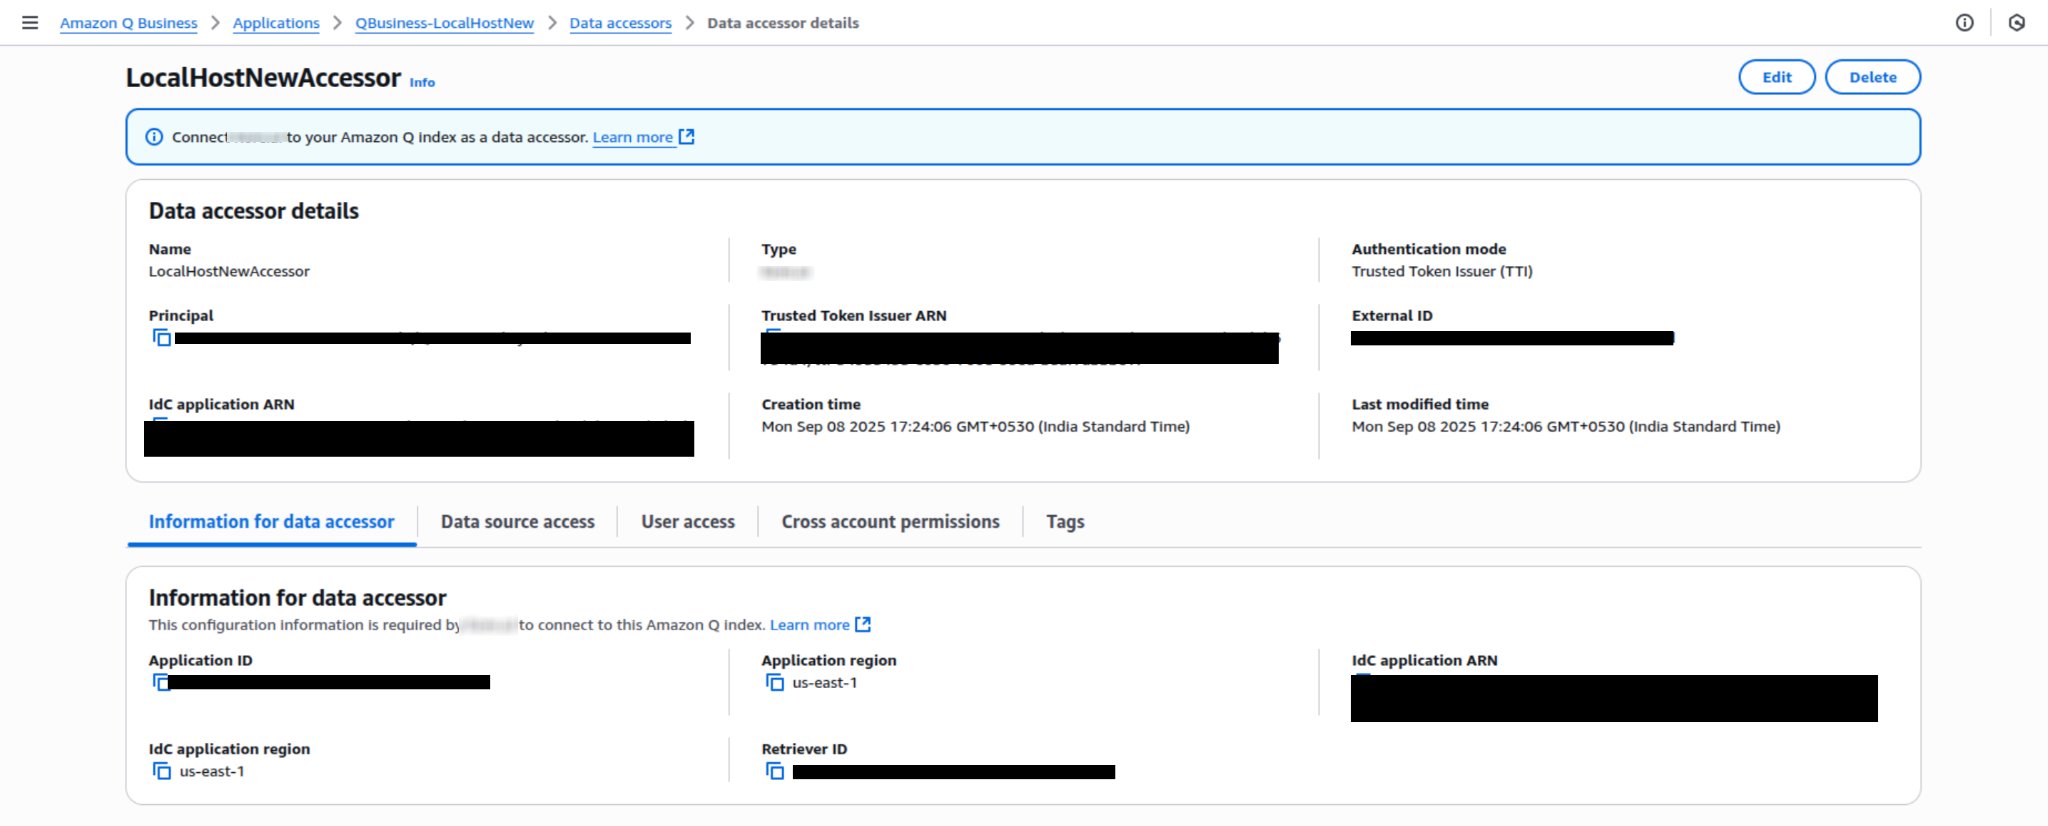
Copy the Data Accessor Details from the AWS console and paste them into your Platform configuration screen to complete the integration.
Technical Reference
Architecture
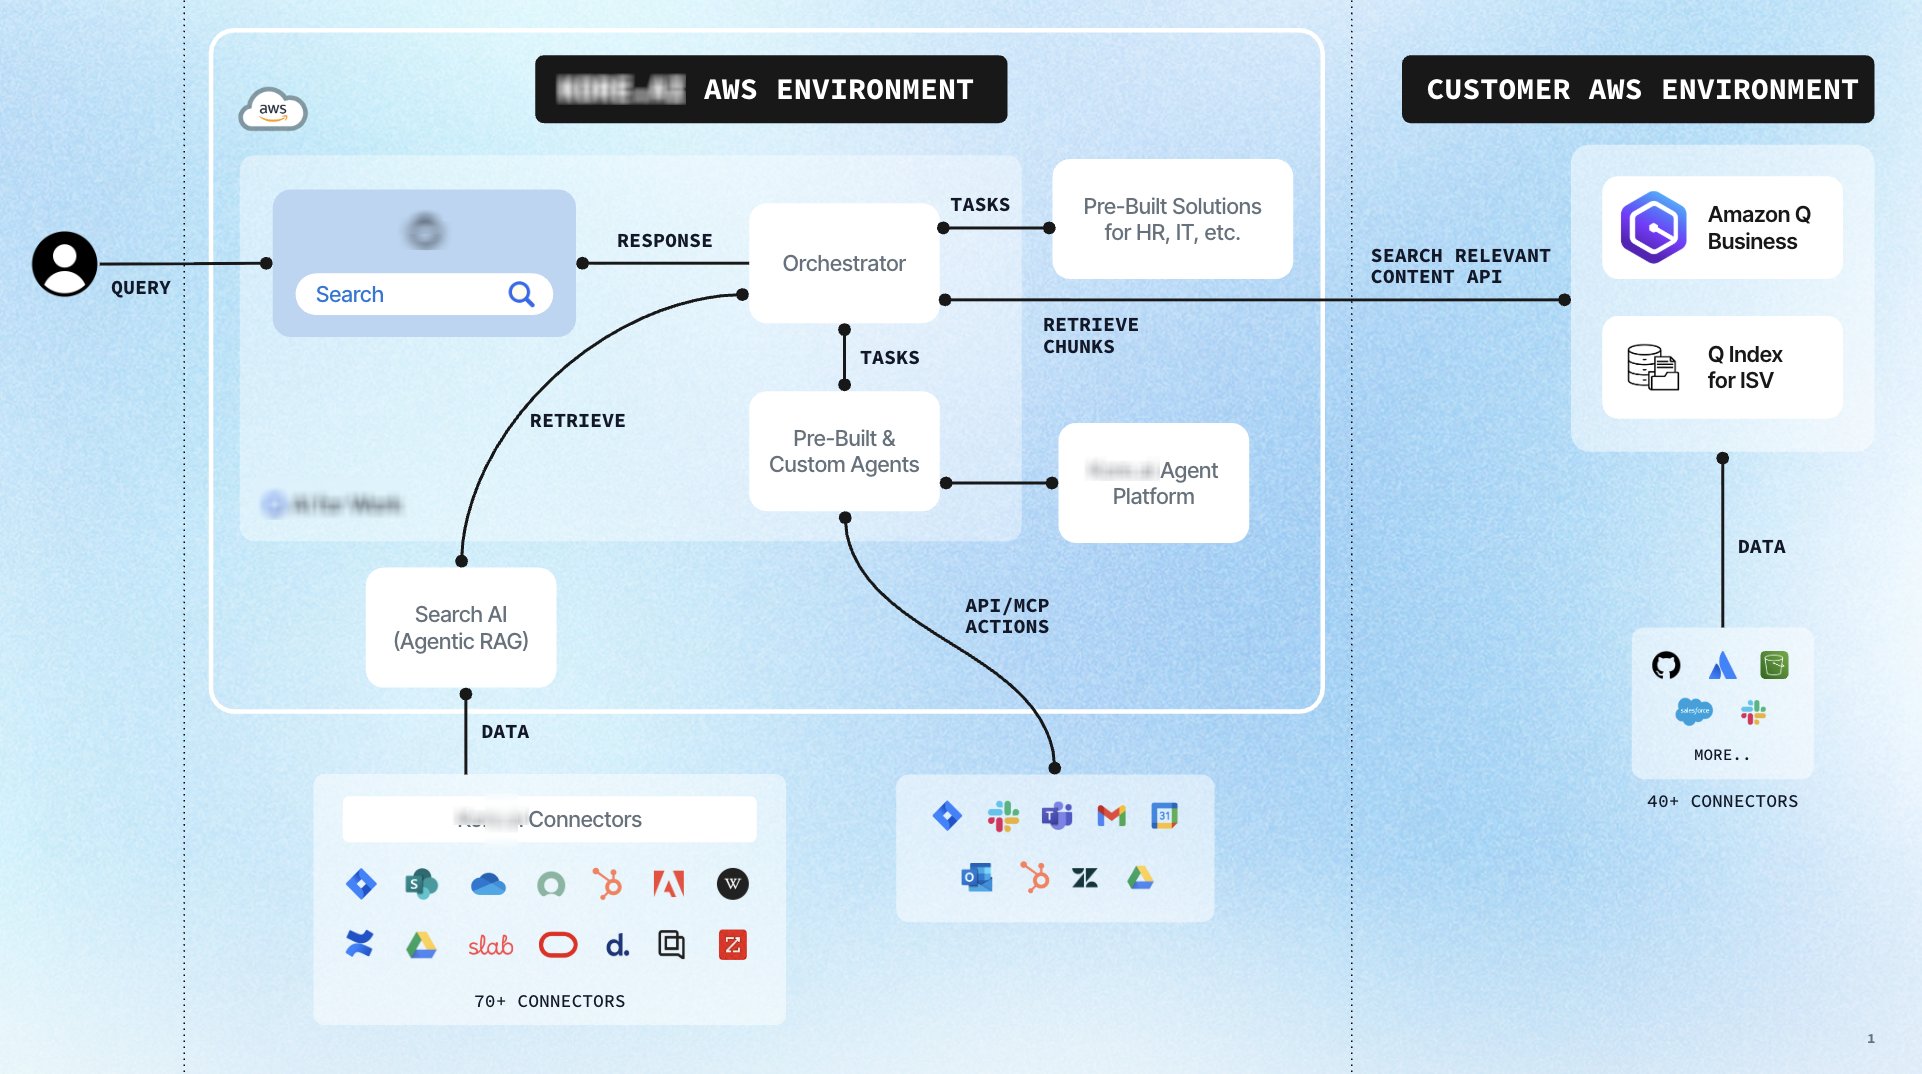
Components communicate over HTTPS using RESTful APIs signed with AWS Signature Version 4 (SigV4). The platform routes each query to either Kore’s native retrievers or Amazon Q Index based on predefined routing rules. Amazon Q responses include relevant document snippets with source references — not complete documents — for security and performance.
Security and Authentication
AI for Work uses the TTI (Trusted Token Issuer) model for Amazon Q authentication. This lets organizations use OIDC-compliant external IdPs without issuing separate AWS credentials to each user. Authentication flow:- The user authenticates with their organization’s IdP, which issues a signed OIDC token.
- AI for Work presents the token to AWS IAM Identity Center.
- IAM Identity Center verifies the token’s validity, issuer, and claims against the pre-configured TTI.
- If valid, IAM Identity Center issues temporary AWS credentials scoped to Amazon Q index operations.
- AI for Work uses these credentials to query Amazon Q index APIs.