

Prerequisites
Components Required
The integration requires the following components:- Amazon Connect
- Custom Contact Control Panel (CCP)
- Agent AI Platform
Lambda, Kinesis, and streaming services aren’t required for chat-only integrations.
Set up an Amazon Connect Instance
- Sign in to your Amazon Connect instance.
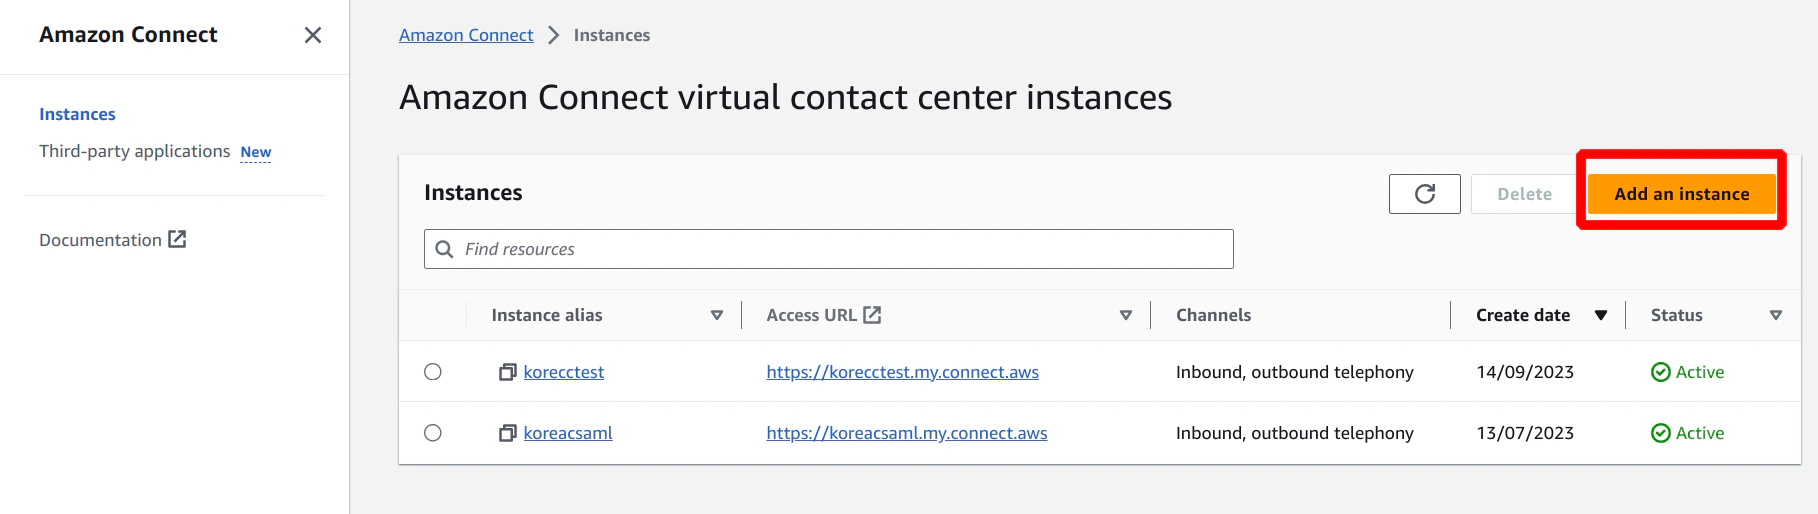
- Go to Amazon Connect > Instances.
-
Click Add an instance to create a new Amazon Connect instance.
-
Select an option in the Identity management section, and enter the Amazon Connect instance name in the Access URL field.
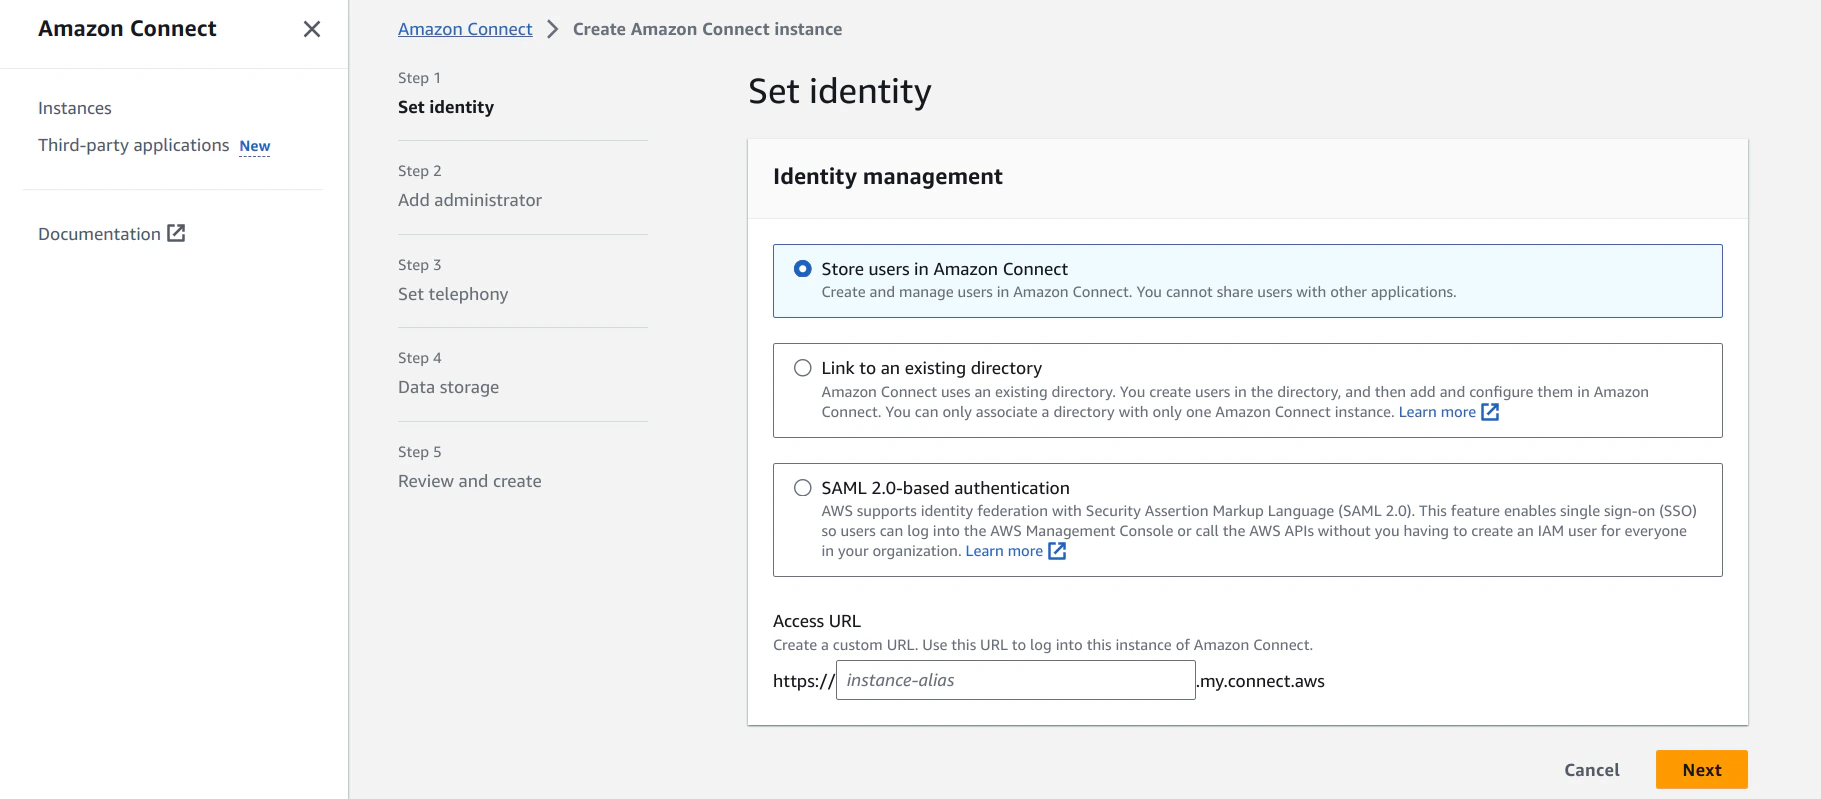
- This step creates an Amazon Connect host URL: https://<instance-name>.my.connect.aws.
- Click Next.
-
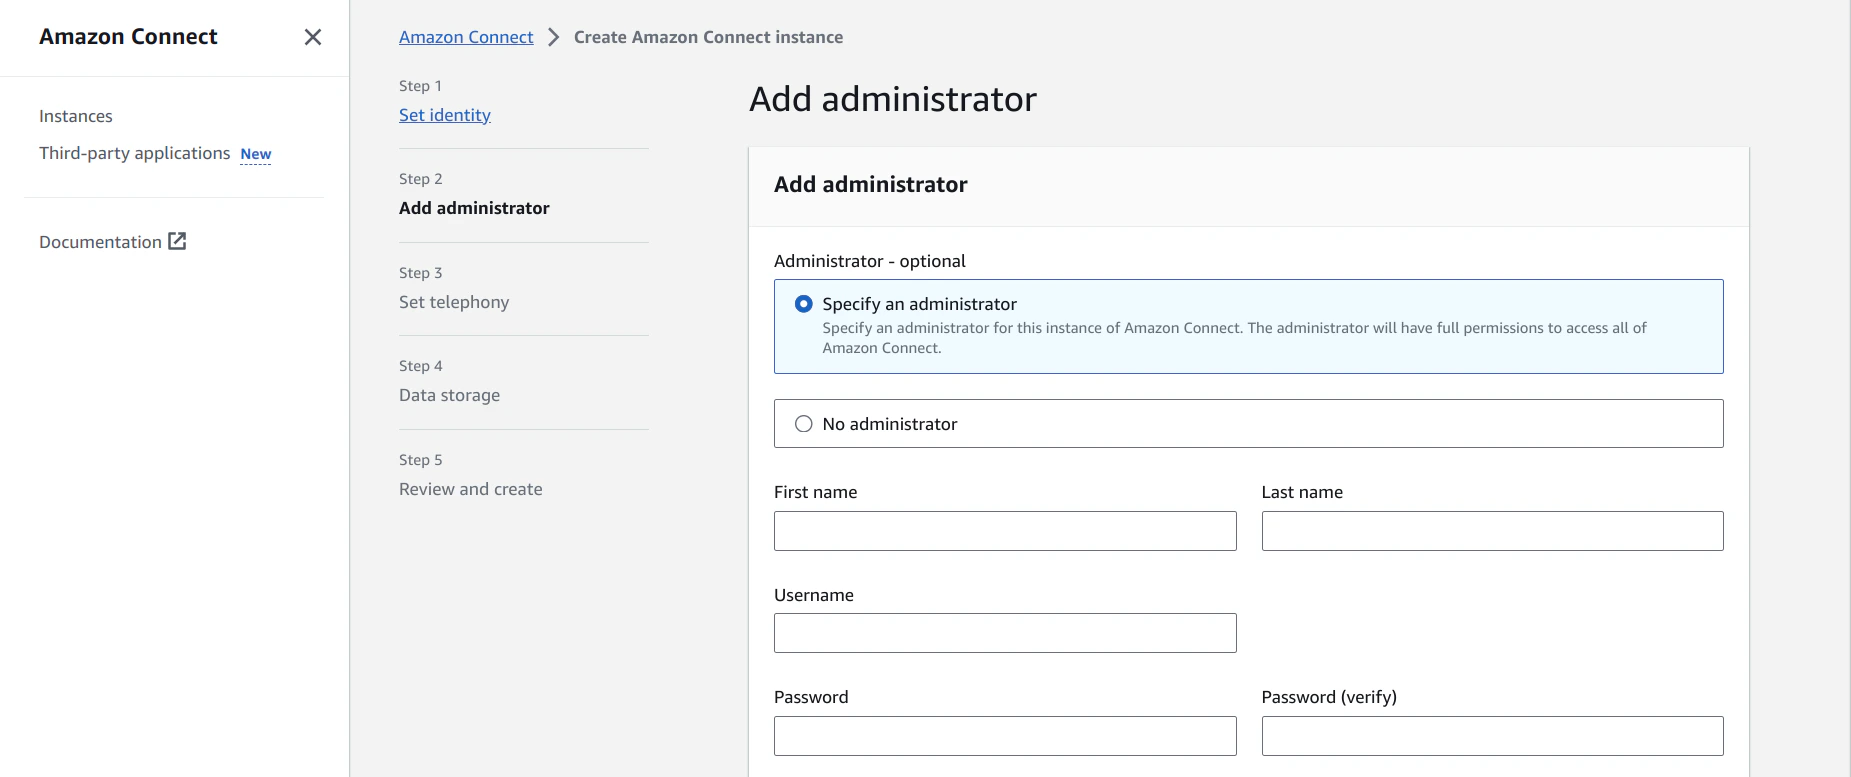
Select Specify an administrator, and enter the admin details in the following fields:
- First name: First name of the administrator.
- Last name: Last name of the administrator.
- Username: Username for the administrator to sign in.
- Password: Password for the administrator to sign in.
- Password (verify): Re-enter the password.
- Click Next.
-
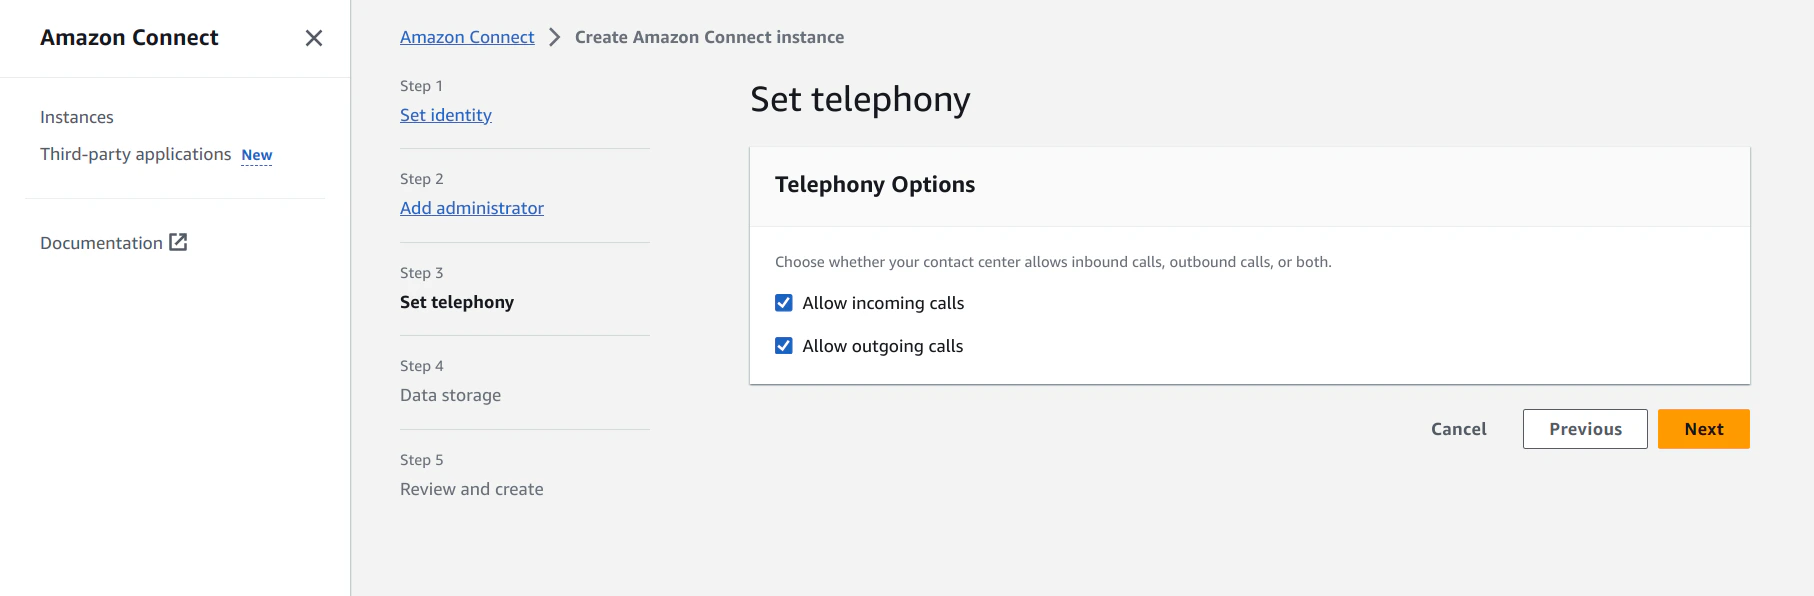
Select option(s) in the Telephony Options section.
- Click Next.
-
Select an option on the Data storage page.
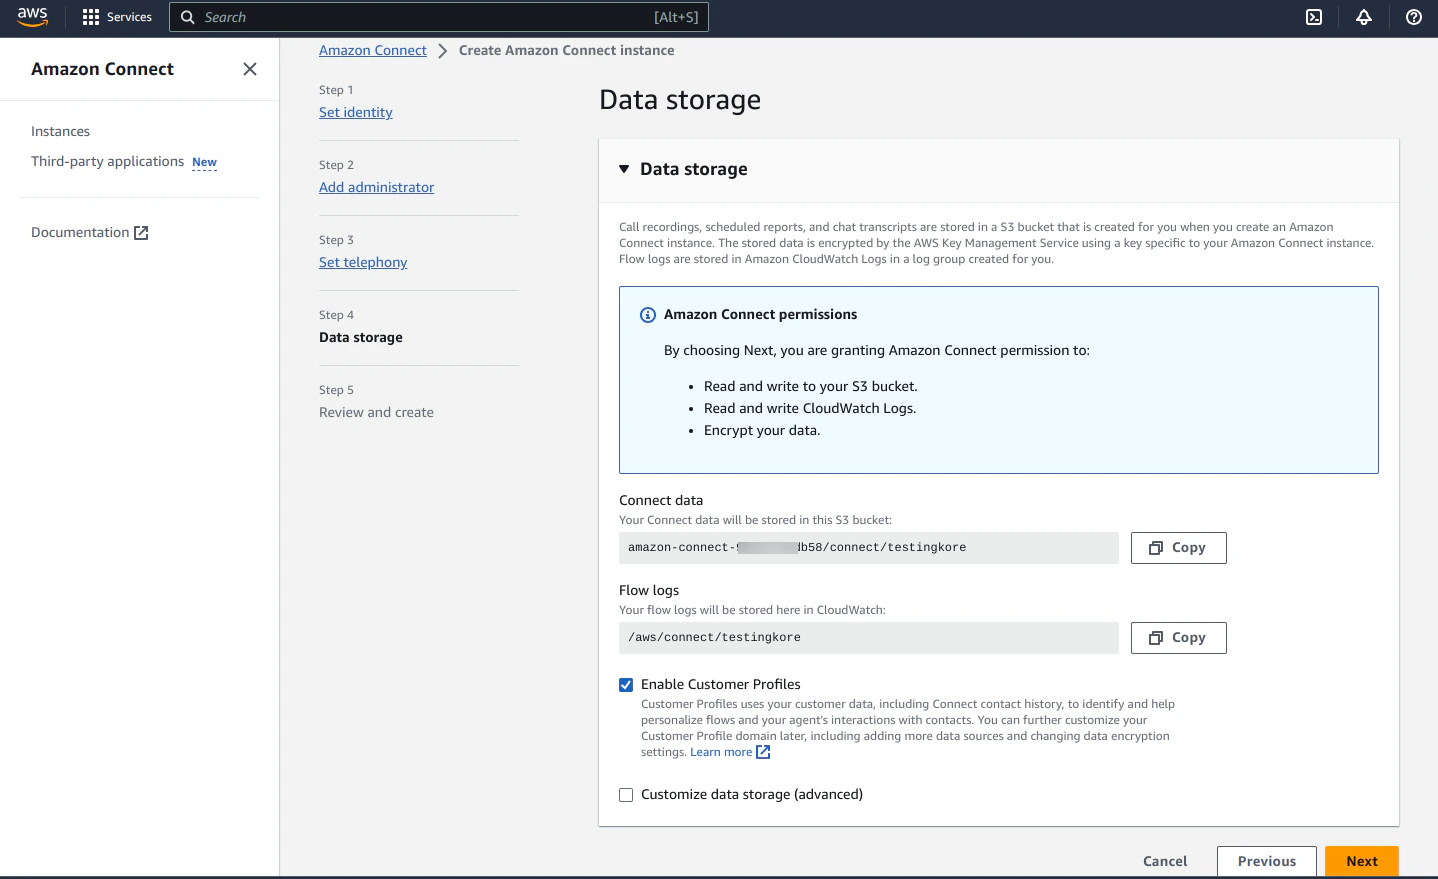
- Click Next.
-
Review and click Edit to change your input.
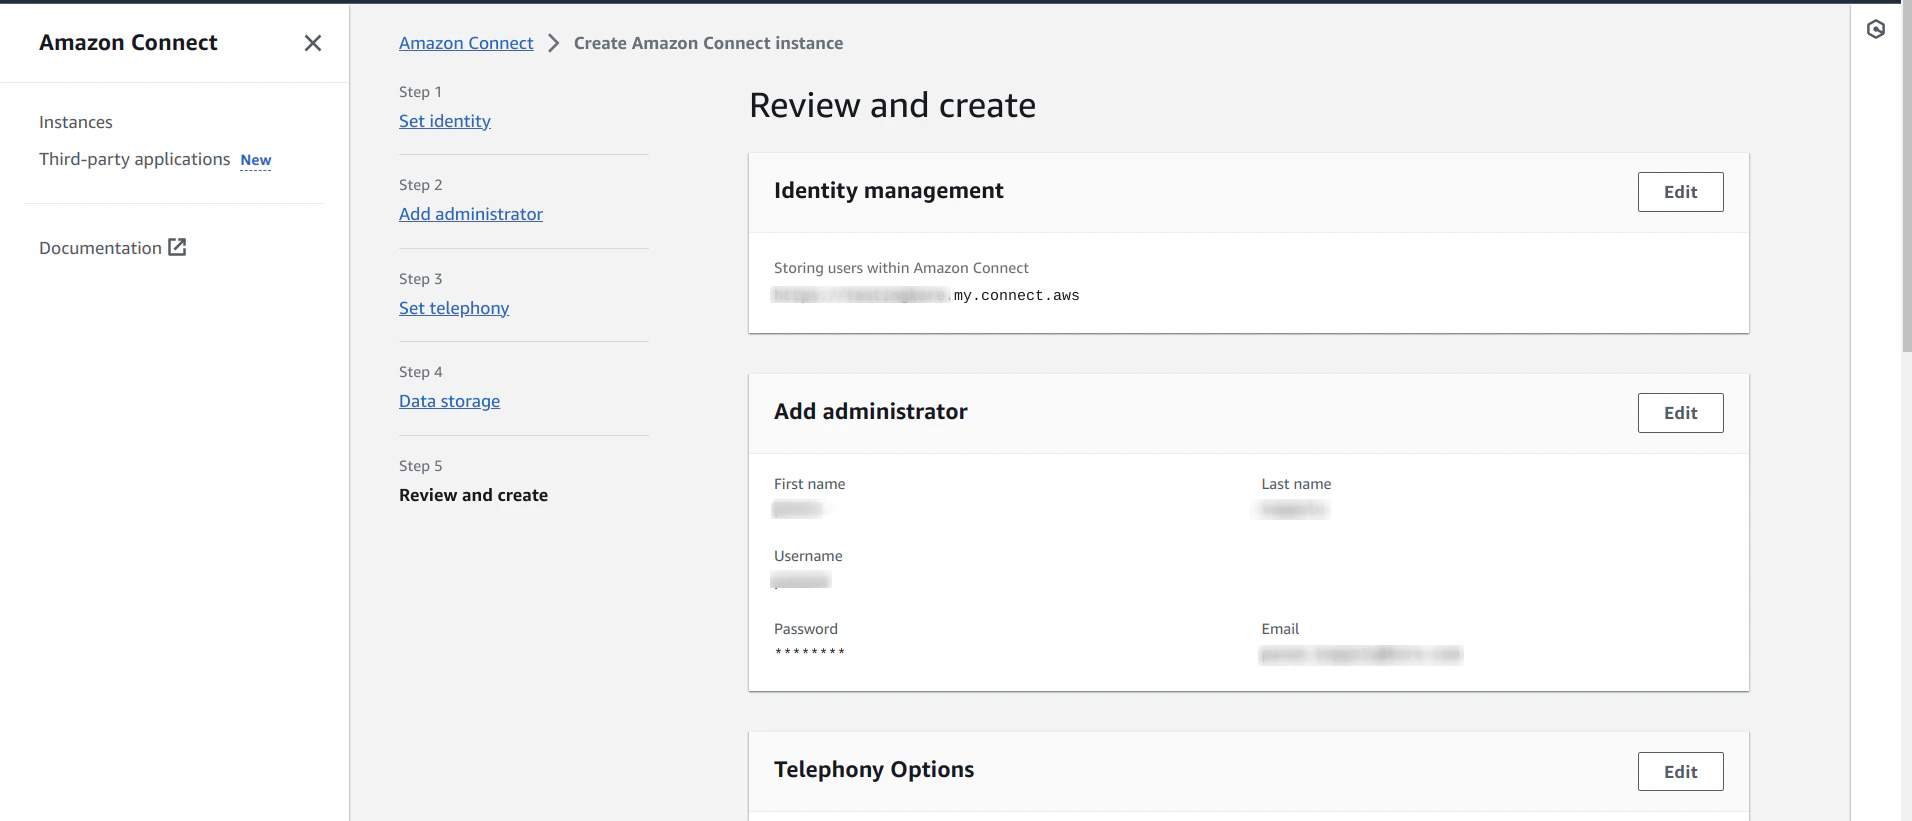
- Click Create.
Sign in as an Administrator
The new instance you created is listed in Amazon Connect.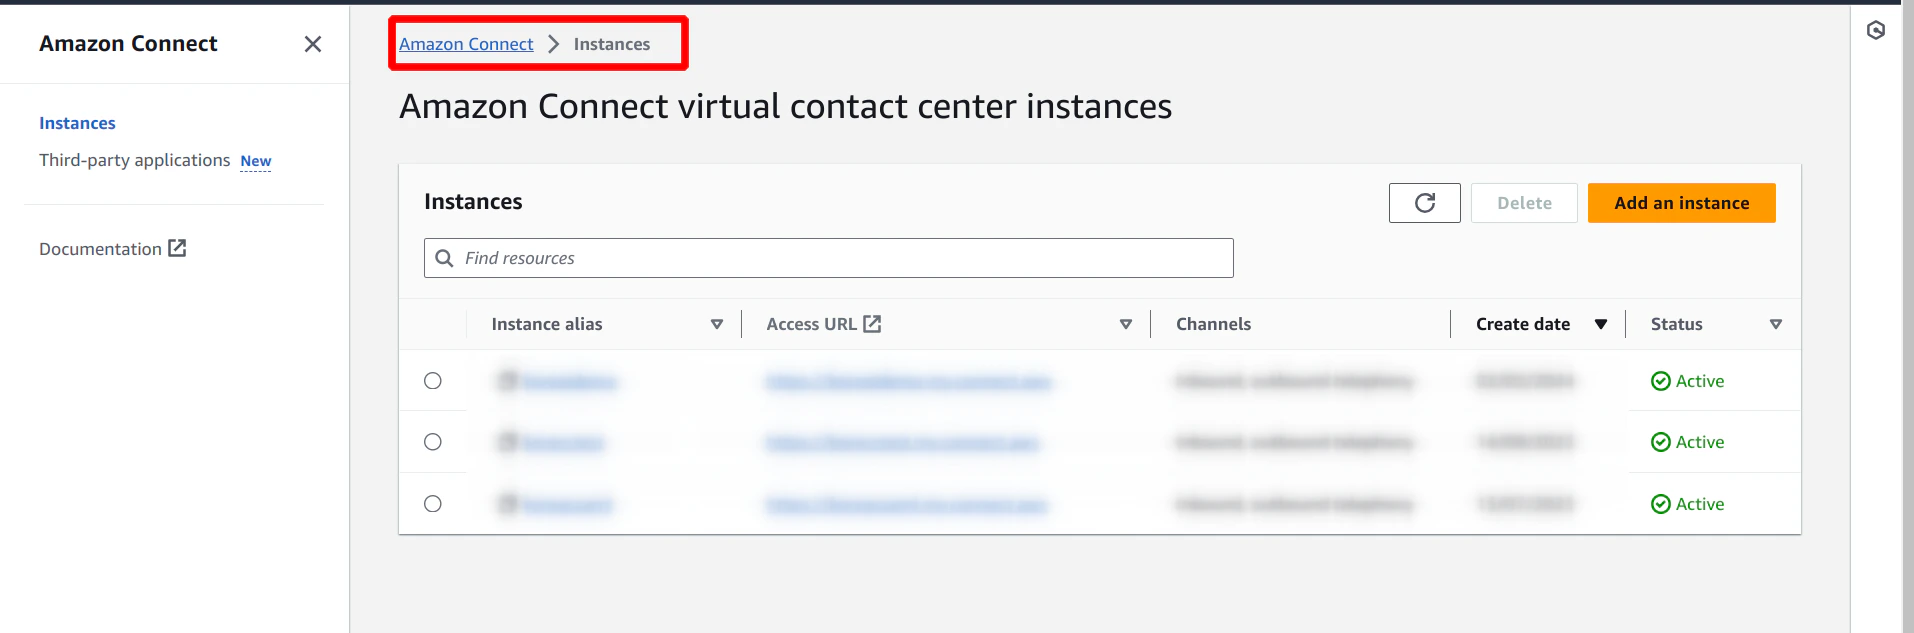
- Click the instance alias.
-
Add allowed origins by clicking Approved origins, as shown in the following screenshot:
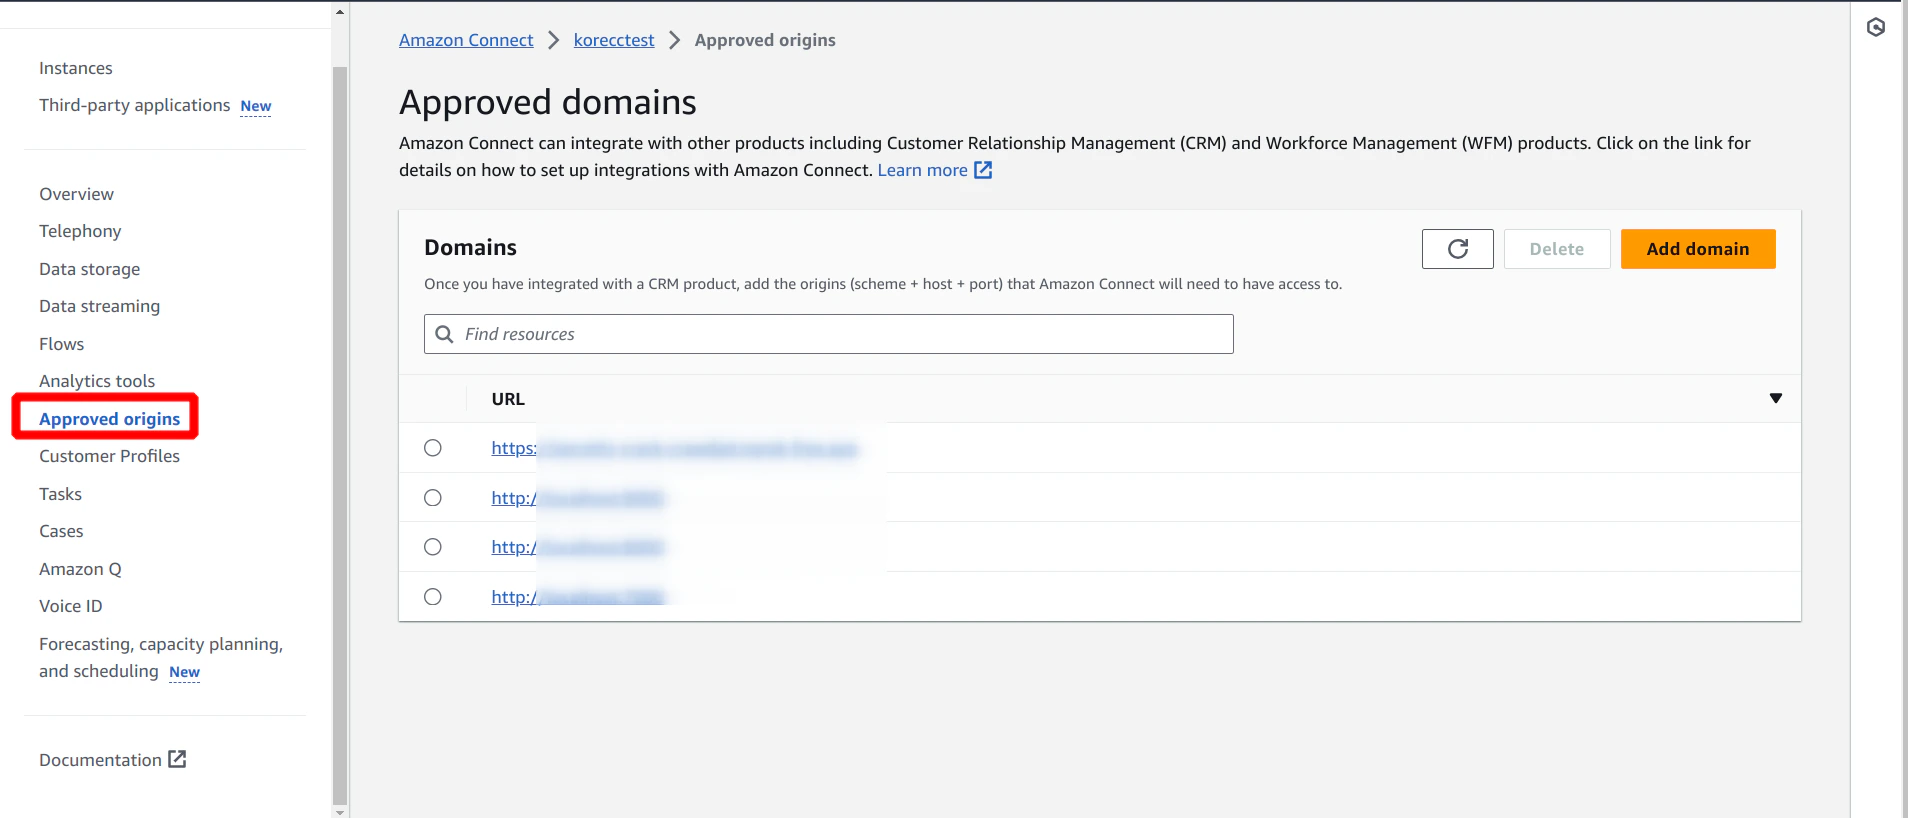
-
Go to the Overview option of the current instance, and click the URL. A new web page opens in a different tab:
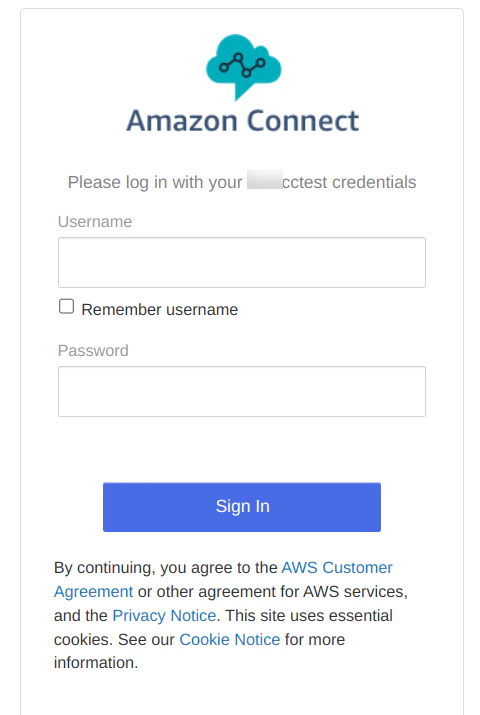
- Sign in with the Administrator credentials you created during instance setup. These credentials give you admin access to the contact center, allowing you to modify flows and groups as needed.
Run the Code Base
- Get the code base from this URL.
- Change the backend URL in config.js under the scripts/config folder. This backend URL provides the bot details and Agent AI iframe token.
- Change the ccpUrl in initCCP.js. The ccpUrl format is: https://[amazon-connect-instance].my.connect.aws/connect/ccp-v2
-
Run a lightweight server to access this as a web page.
Example:
python -m http.server [port-number] -
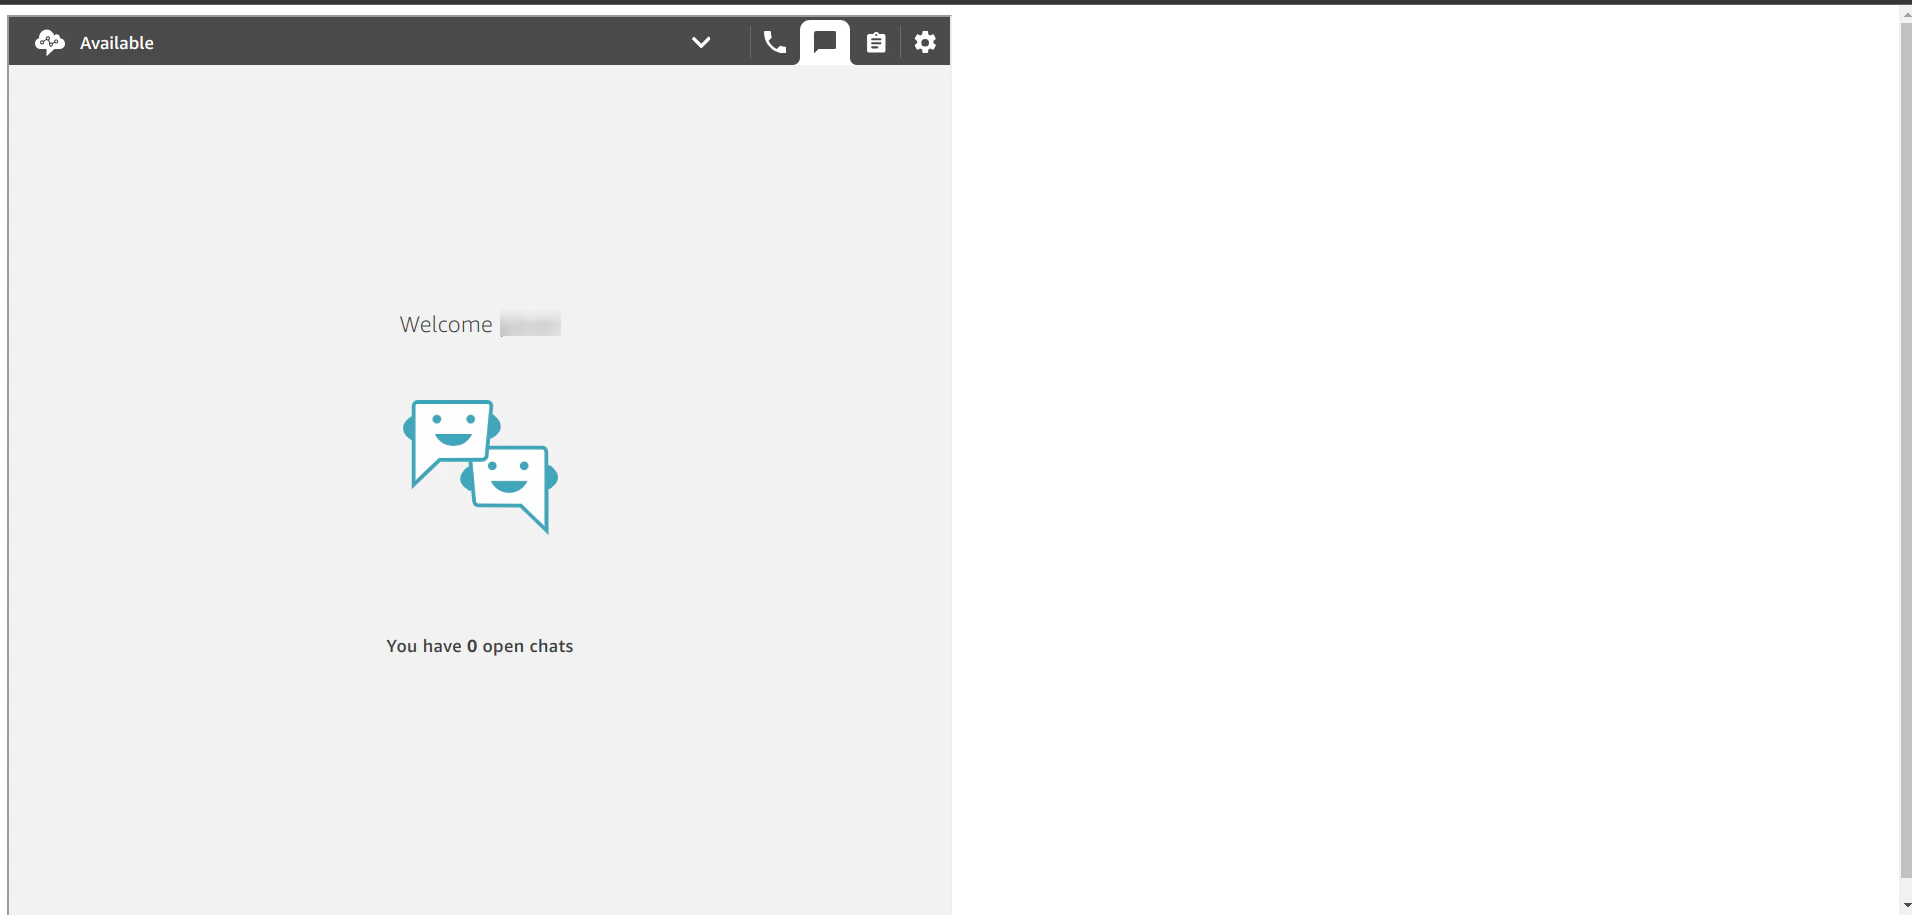
After entering the local host URL, you see the following screen:
-
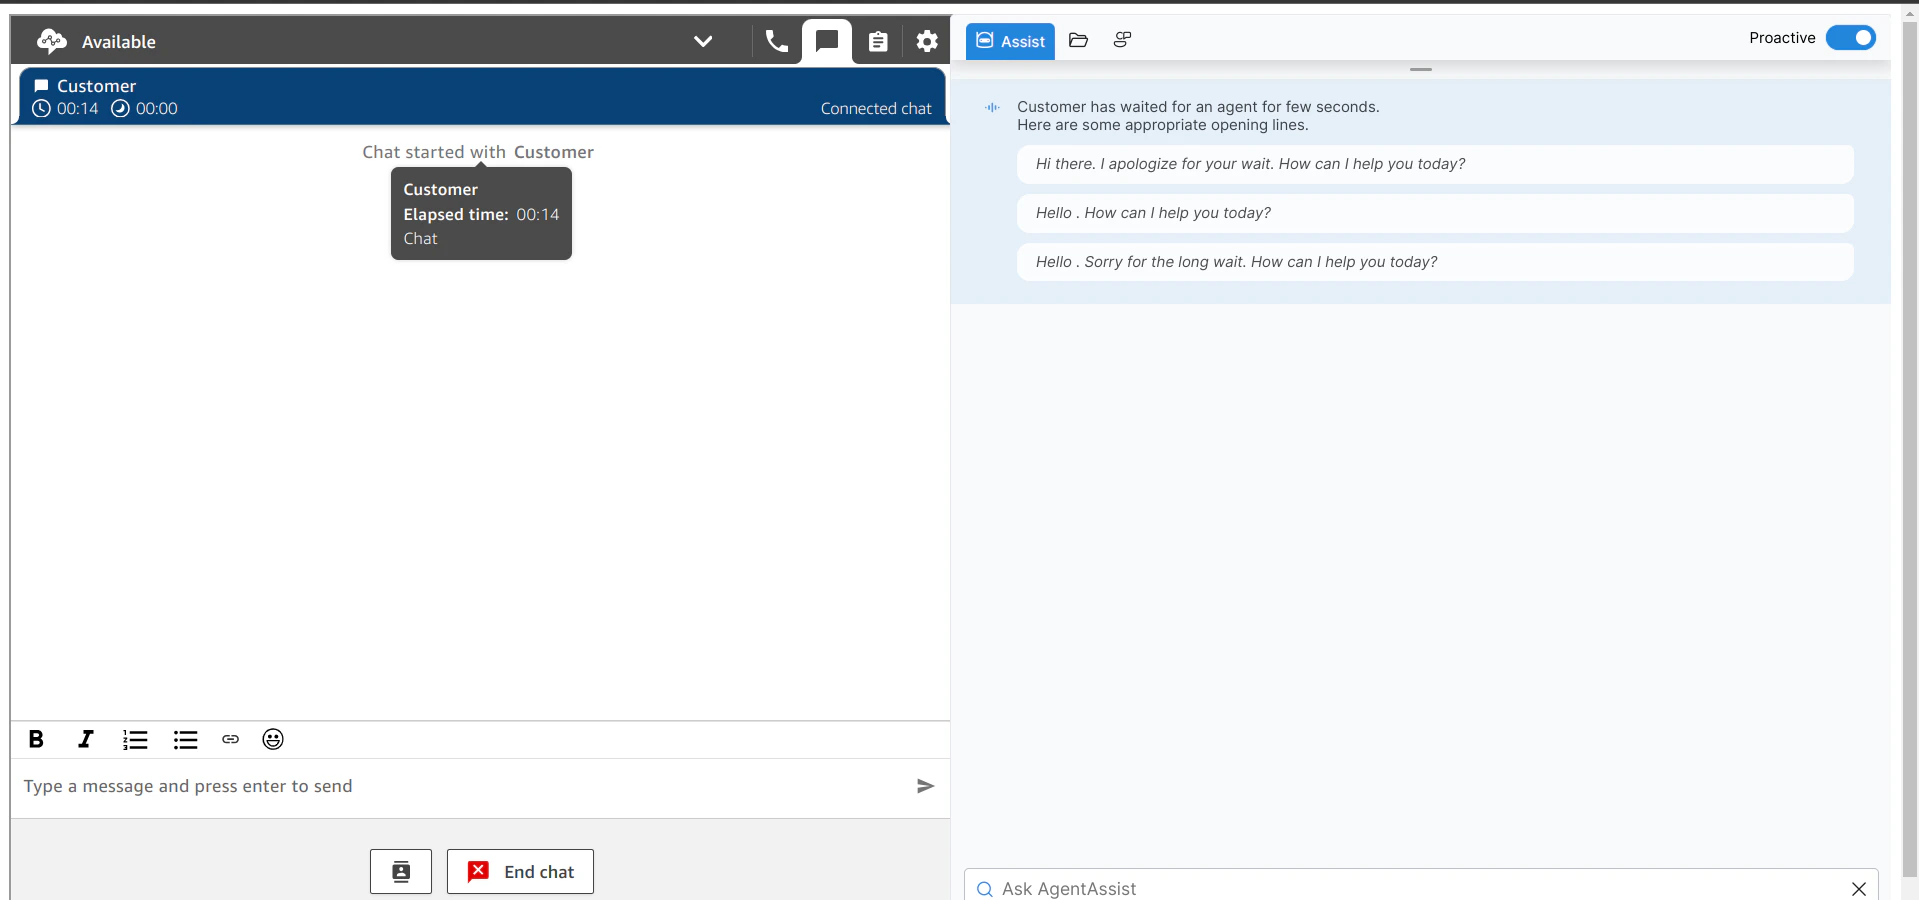
When you initiate a chat, you see the following screen (Agent AI on the right):
Chat Widget in Amazon Connect
- Sign in to the Amazon Connect instance.
-
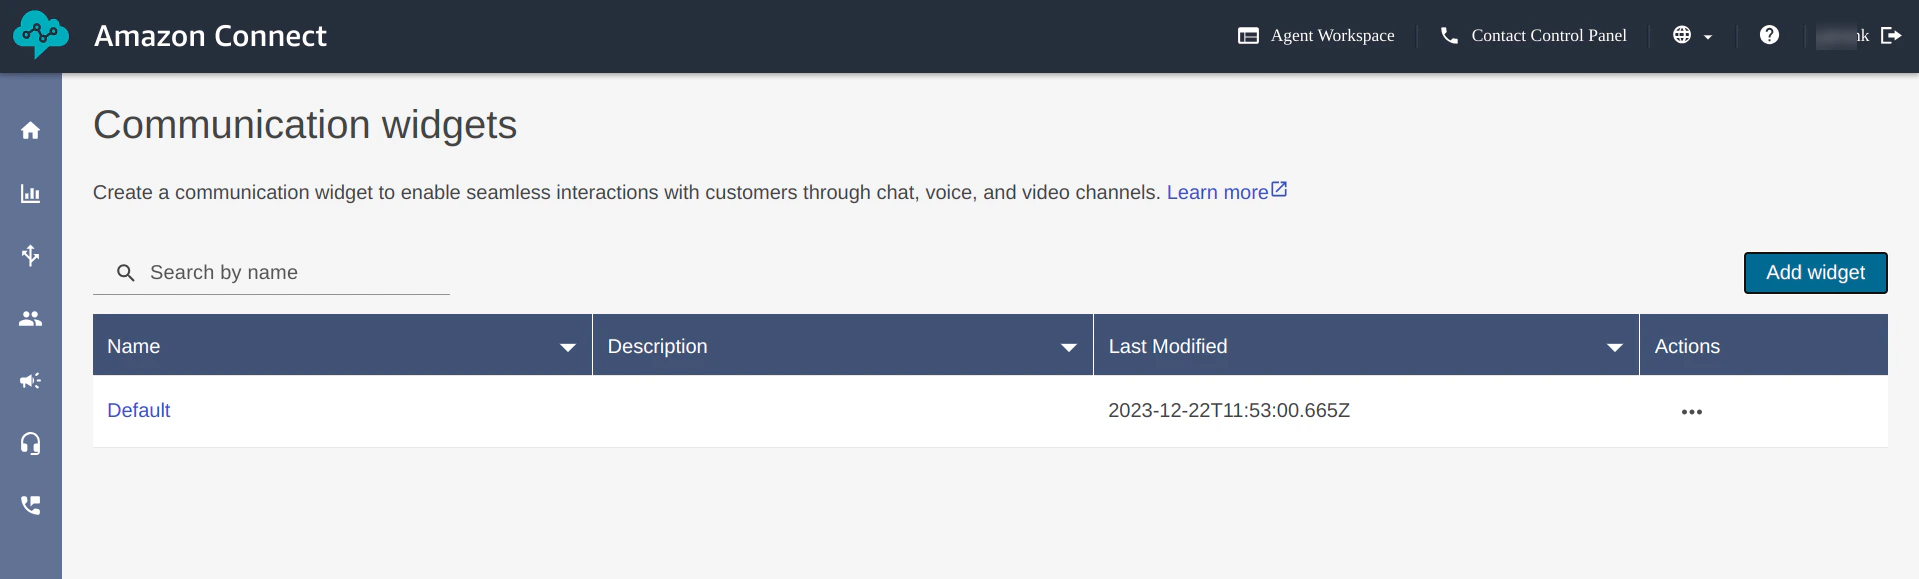
Go to Channels > Communication widget.
The default widget is available here. Create a new widget by clicking Add widget.
-
Click the required widget.
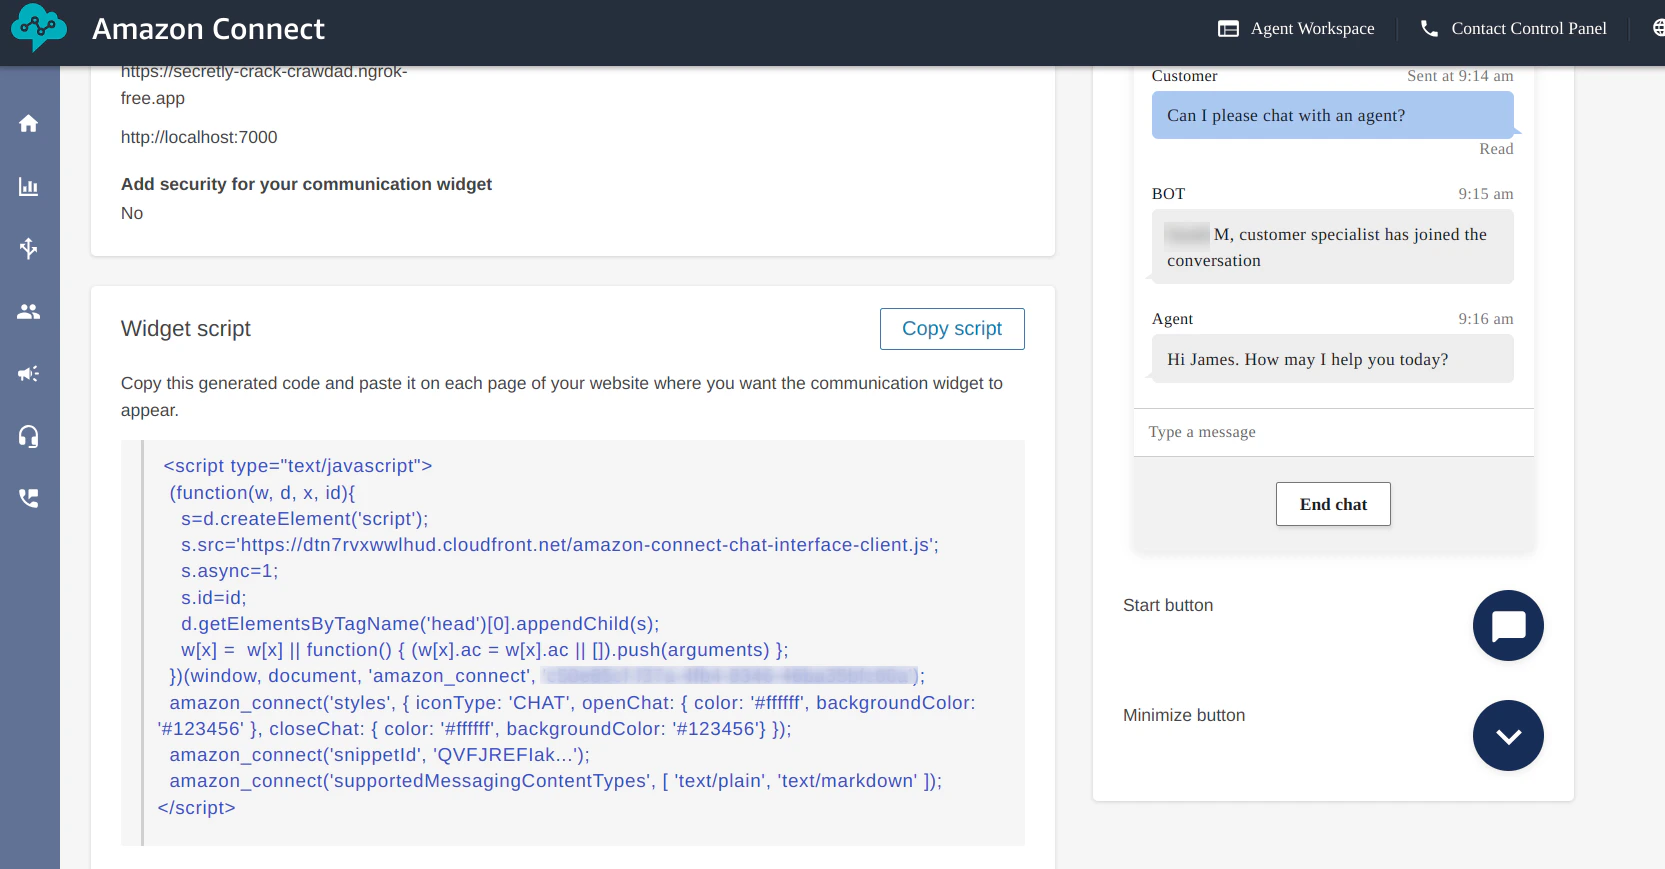
The JavaScript sample code to run the widget on your local device is shown here. Copy the code.
-
Paste the code into any HTML file, and run a sample application server.
python -m http.server [port-number] -
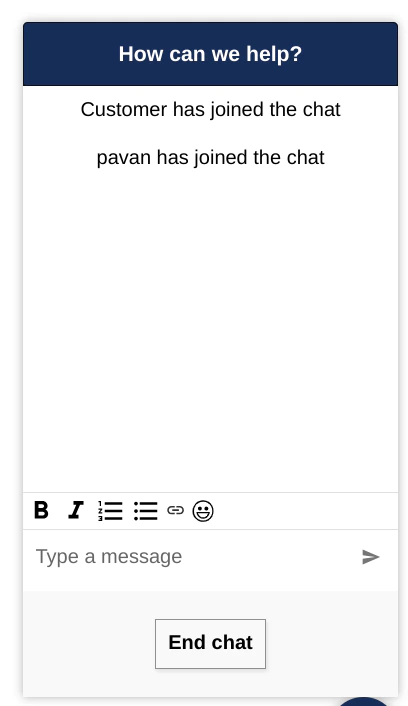
You see the following screen for the chat widget:
-
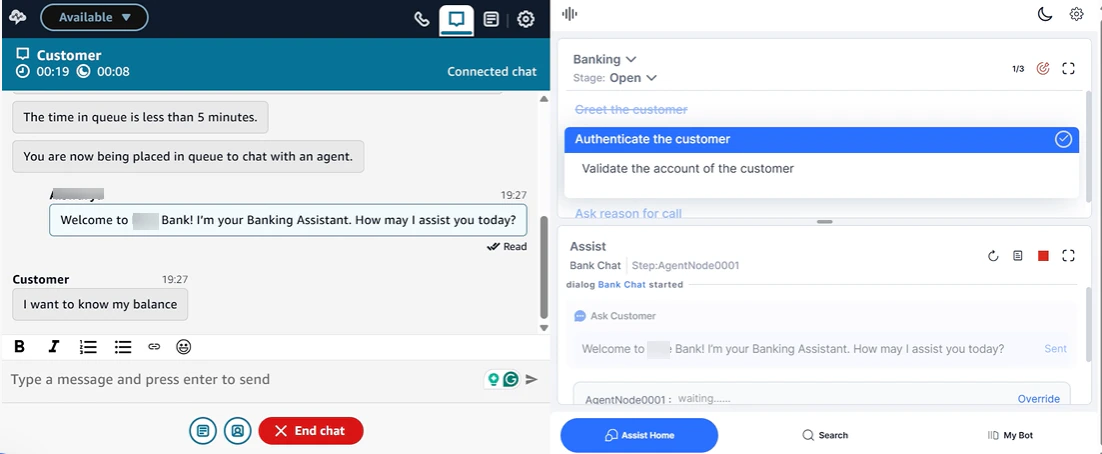
The following screenshot shows Amazon Connect integrated with Agent AI:
- Click here for a demo video.
-
The following screenshot shows Amazon Connect integrated with Agent AI: