

- Data Definition: Create tables and views, control access, and define apps for secure API access.
- Data Manipulation: Perform CRUD operations on tables and views using Service Nodes or public APIs.
Data Tables
A Data Table stores structured data in rows and columns. Tables can be shared with AI Agents, apps, and process assistants.Create a Data Table
-
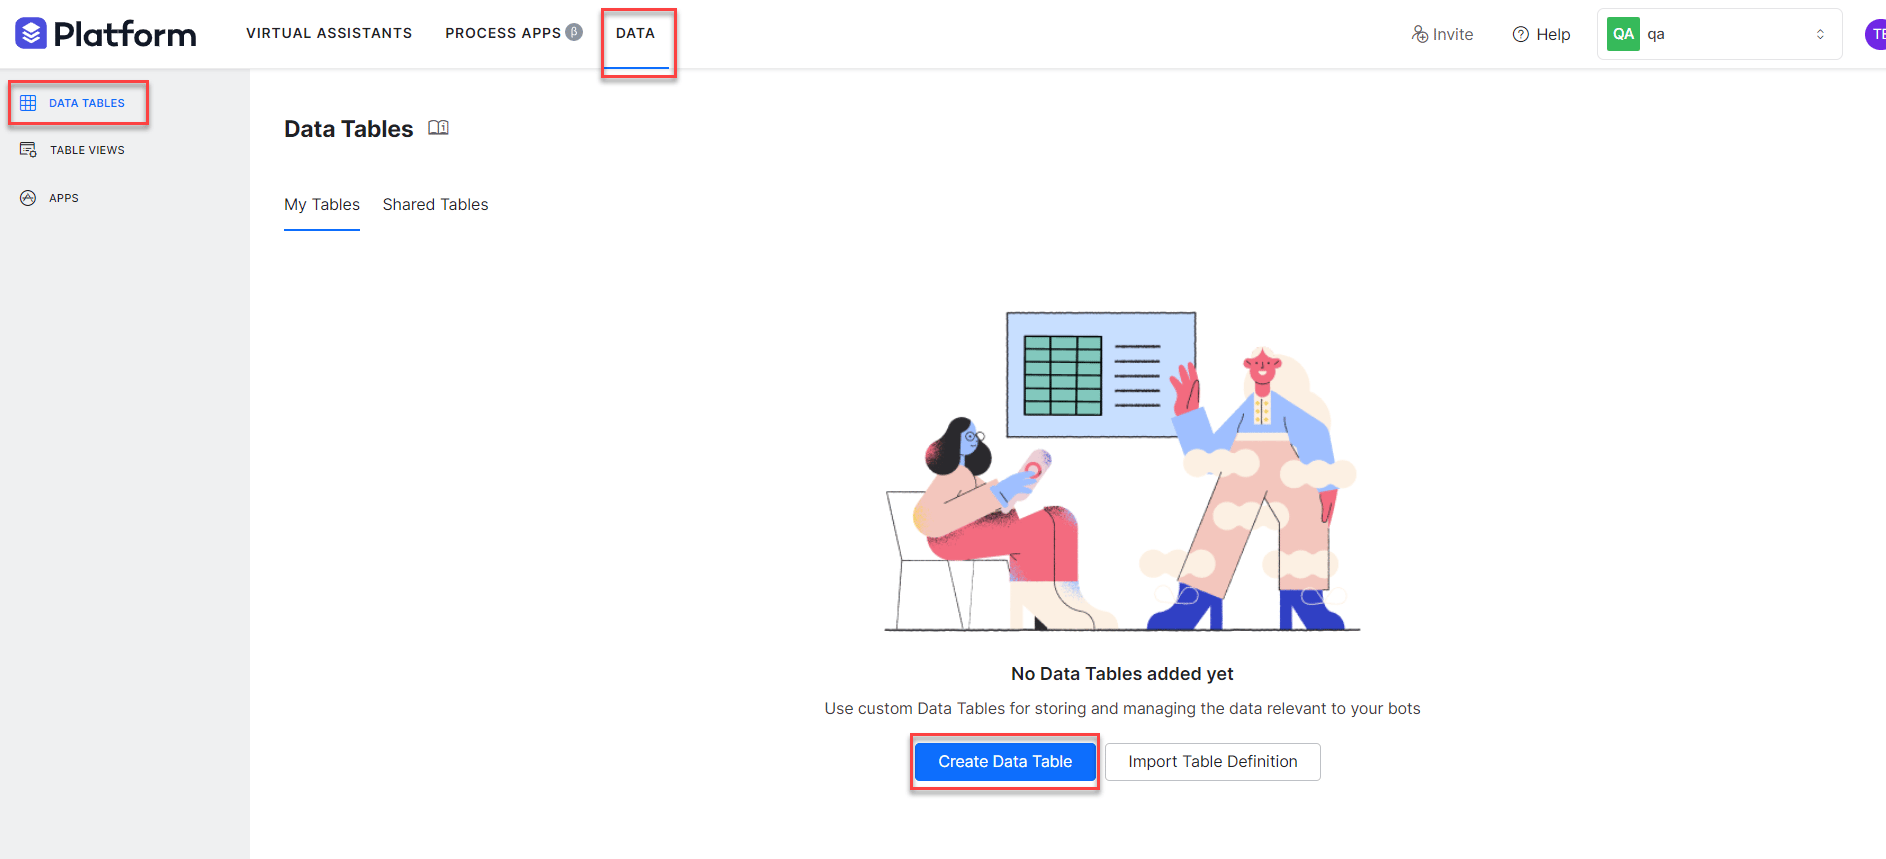
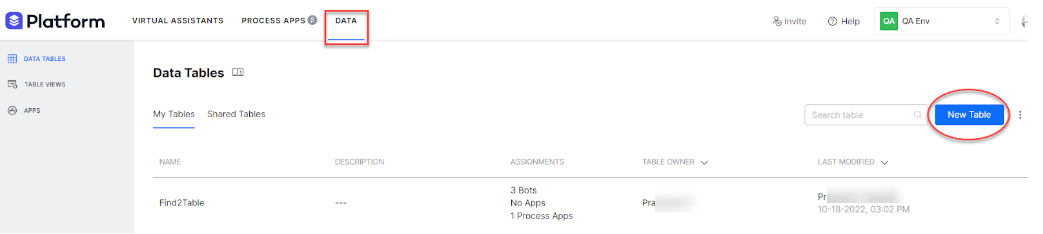
Go to Data > Data Tables and select Create Data Table.
-
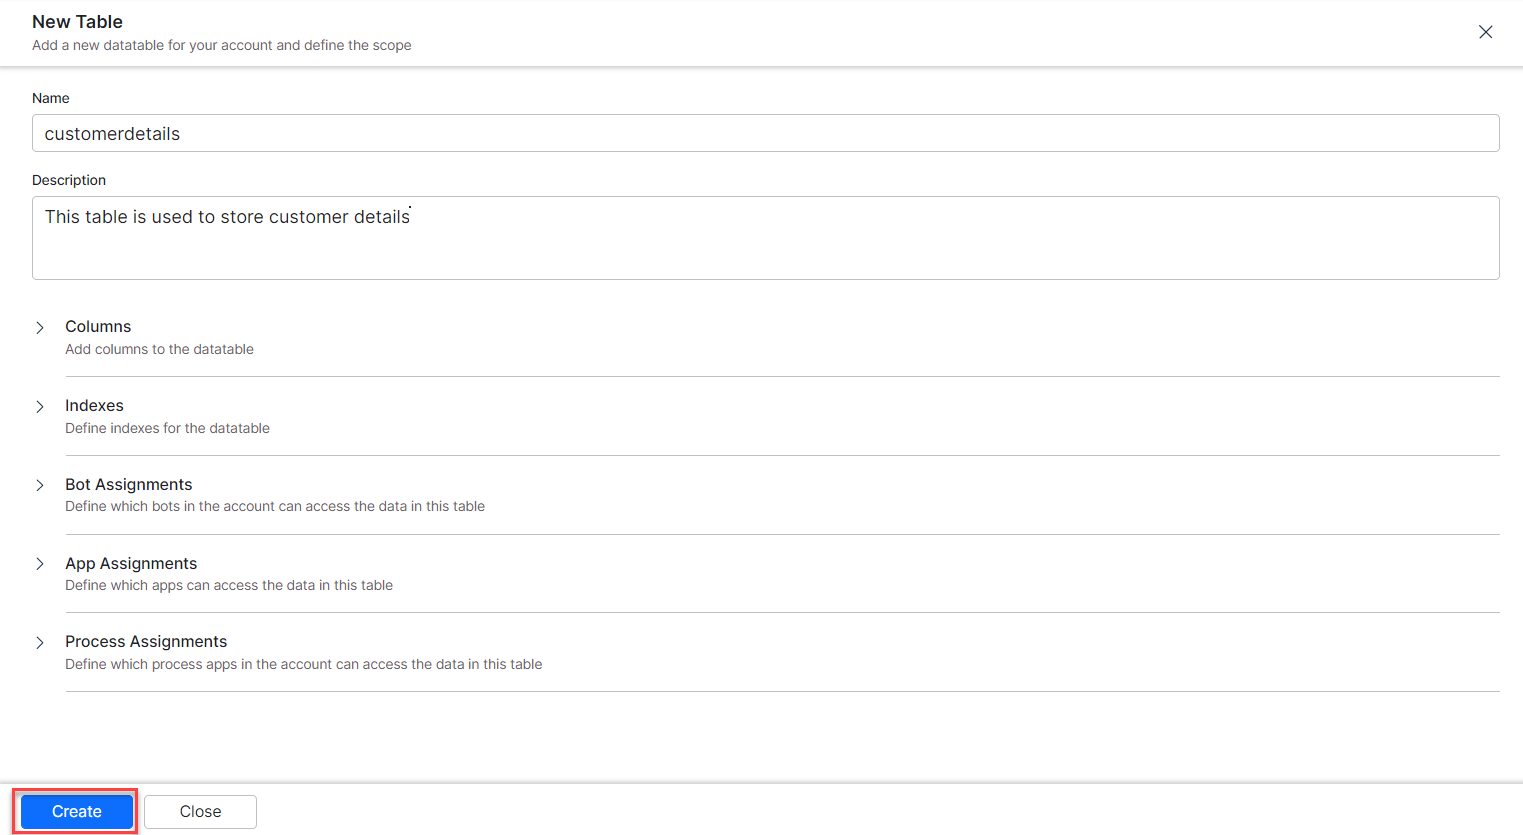
Enter the following details and select Create.
Columns
Define the columns for your table.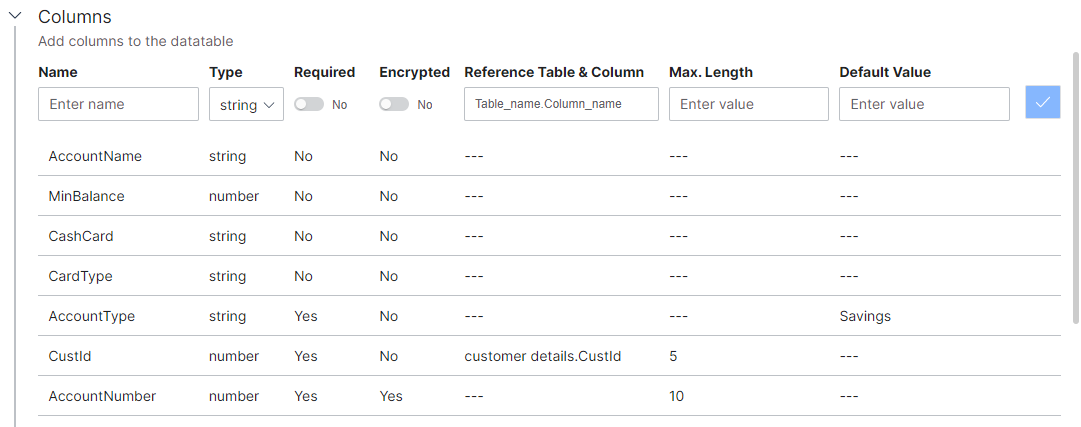
The platform automatically adds these system columns to every table:
Indexes
Add indexes to improve search and retrieval performance.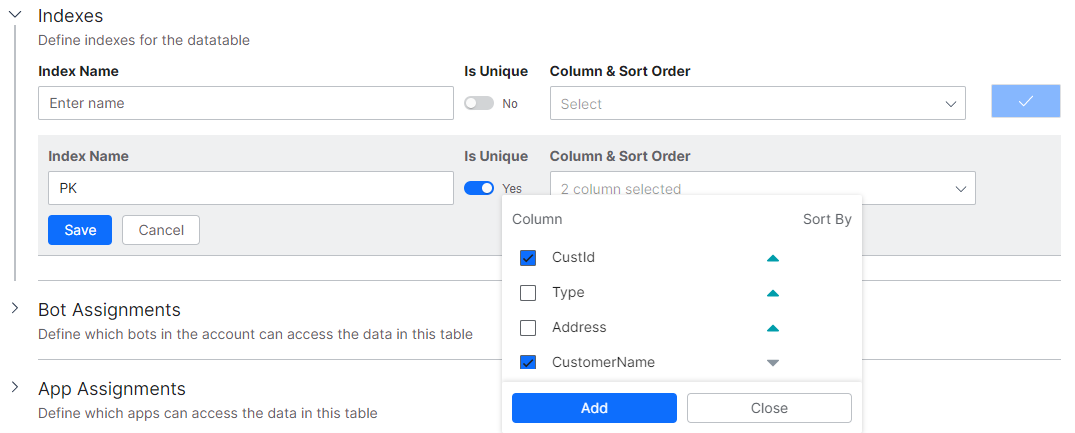
Assignments
Control which apps, AI Agents, and process apps can access the table.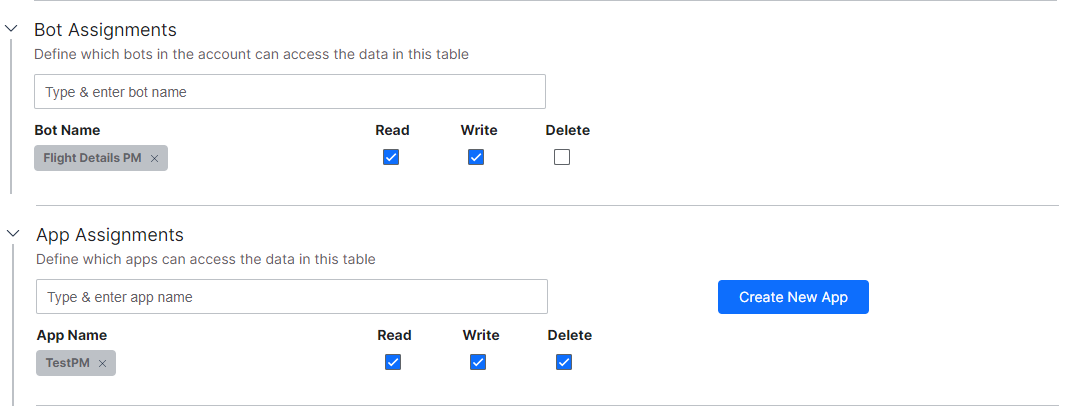
- AI Agent assignments: Grant Read, Write, and Delete permissions. Assigned AI Agents can access table data through Service Nodes in Dialog Tasks.
- App assignments: Grant Read, Write, and Delete permissions. Only assigned apps can use the CRUD APIs for this table.
- Process app assignments: Grant Read, Write, and Delete permissions to process apps.
Import and Export
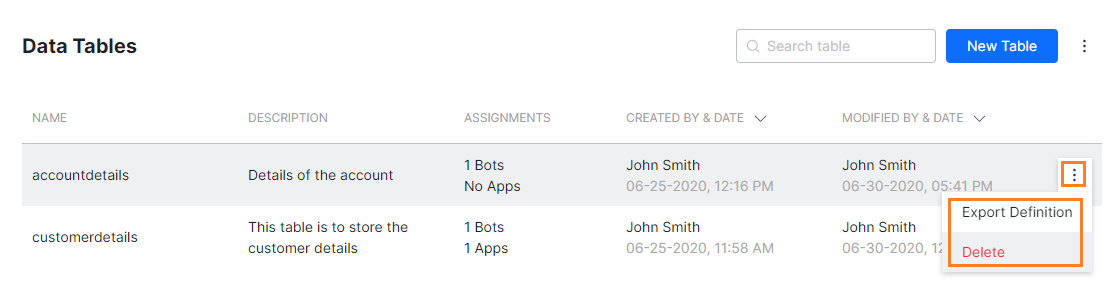
Export and import Data Table definitions as JSON files to transfer them between environments. Export a Data Table:- Hover over the table and select the ellipsis (…) icon.
- Select Export Definition.
-
A JSON file is generated and downloaded.
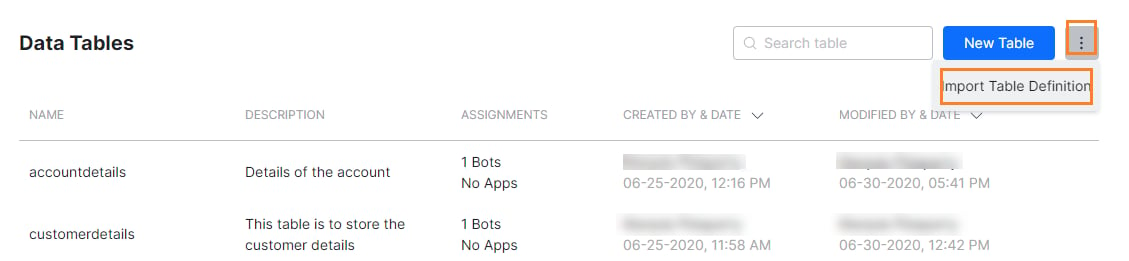
- Select the down arrow next to New Table and choose Import Table Definition.
- Enter a Table Name and select the JSON file.
-
Select Import.
Change Table Owner
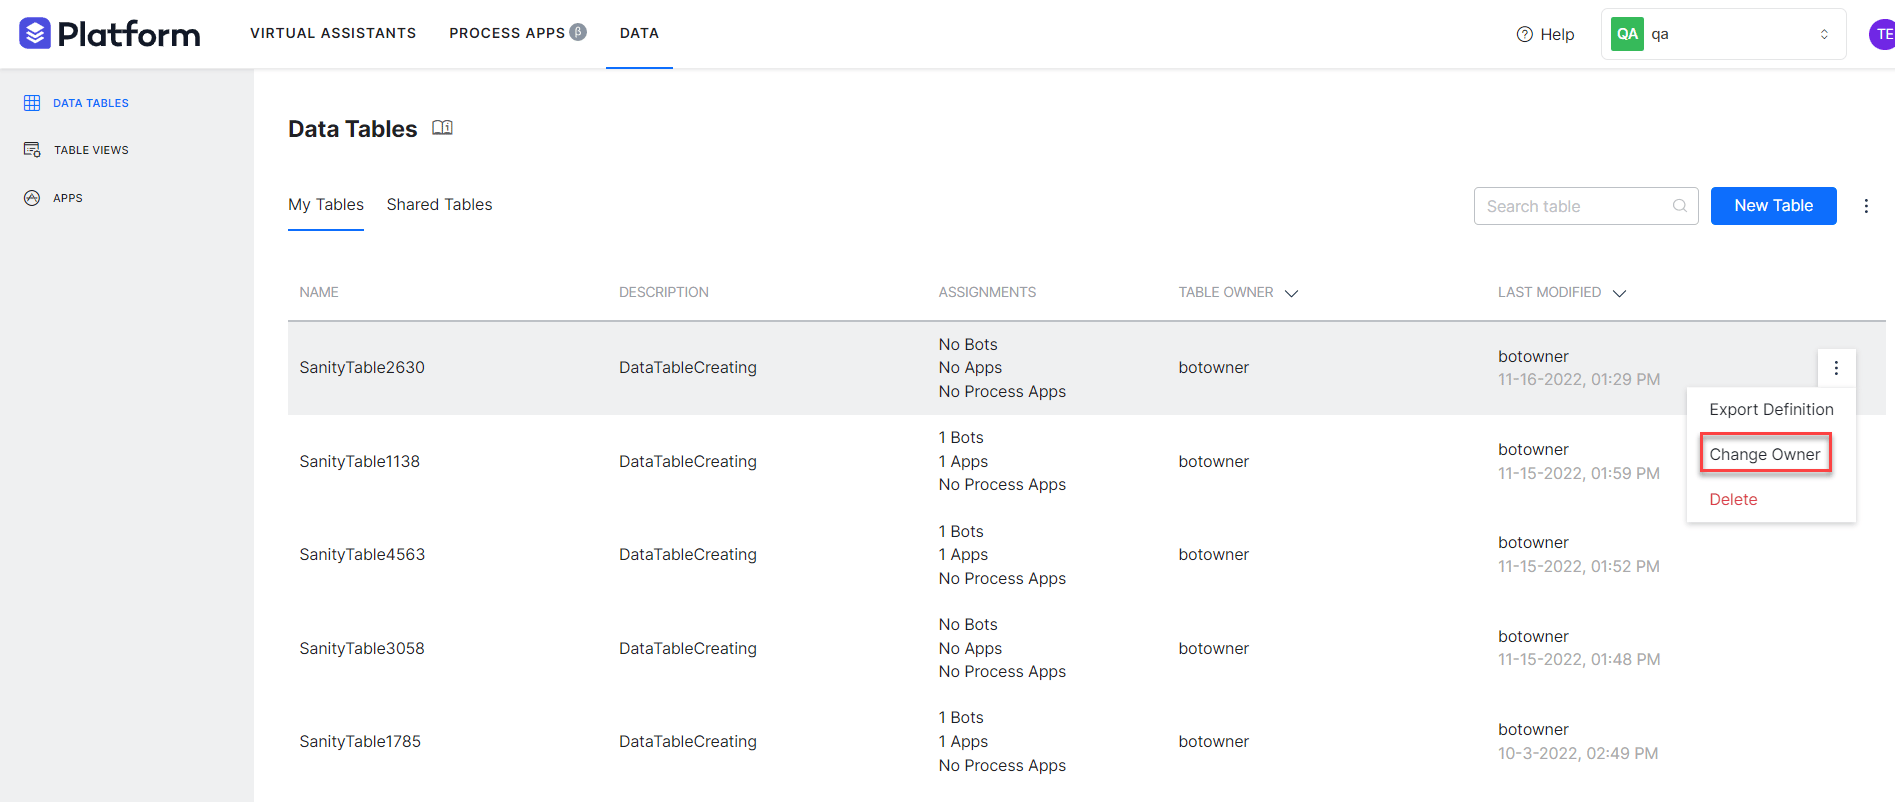
The table owner or an account administrator can transfer ownership to another user. When ownership changes, all related tables and views are also transferred, and all app assignments for those tables are lost.- Hover over the table and select the ellipsis (…) icon.
-
Select Change Owner.
-
Select the new owner and select Proceed.
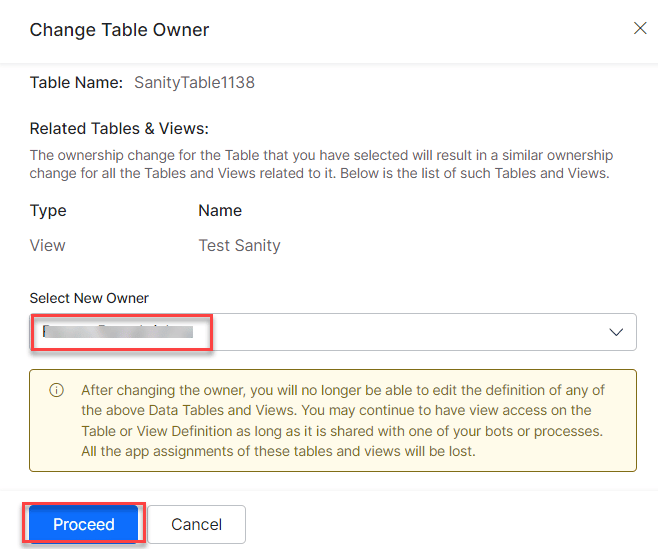
- A confirmation message appears. Review any related tables and views that are also affected.
Share Data Tables
Assign a Data Table to AI Agents, process apps, or apps to share it. Users with shared access can view the table definition but can’t edit or update it.In the Shared Tables tab, you see only the tables shared with users who have view permission.
Table Views
A Table View creates a virtual dataset by querying one or more Data Tables. It supports filters, grouping, sorting, and joins.Create a Table View
-
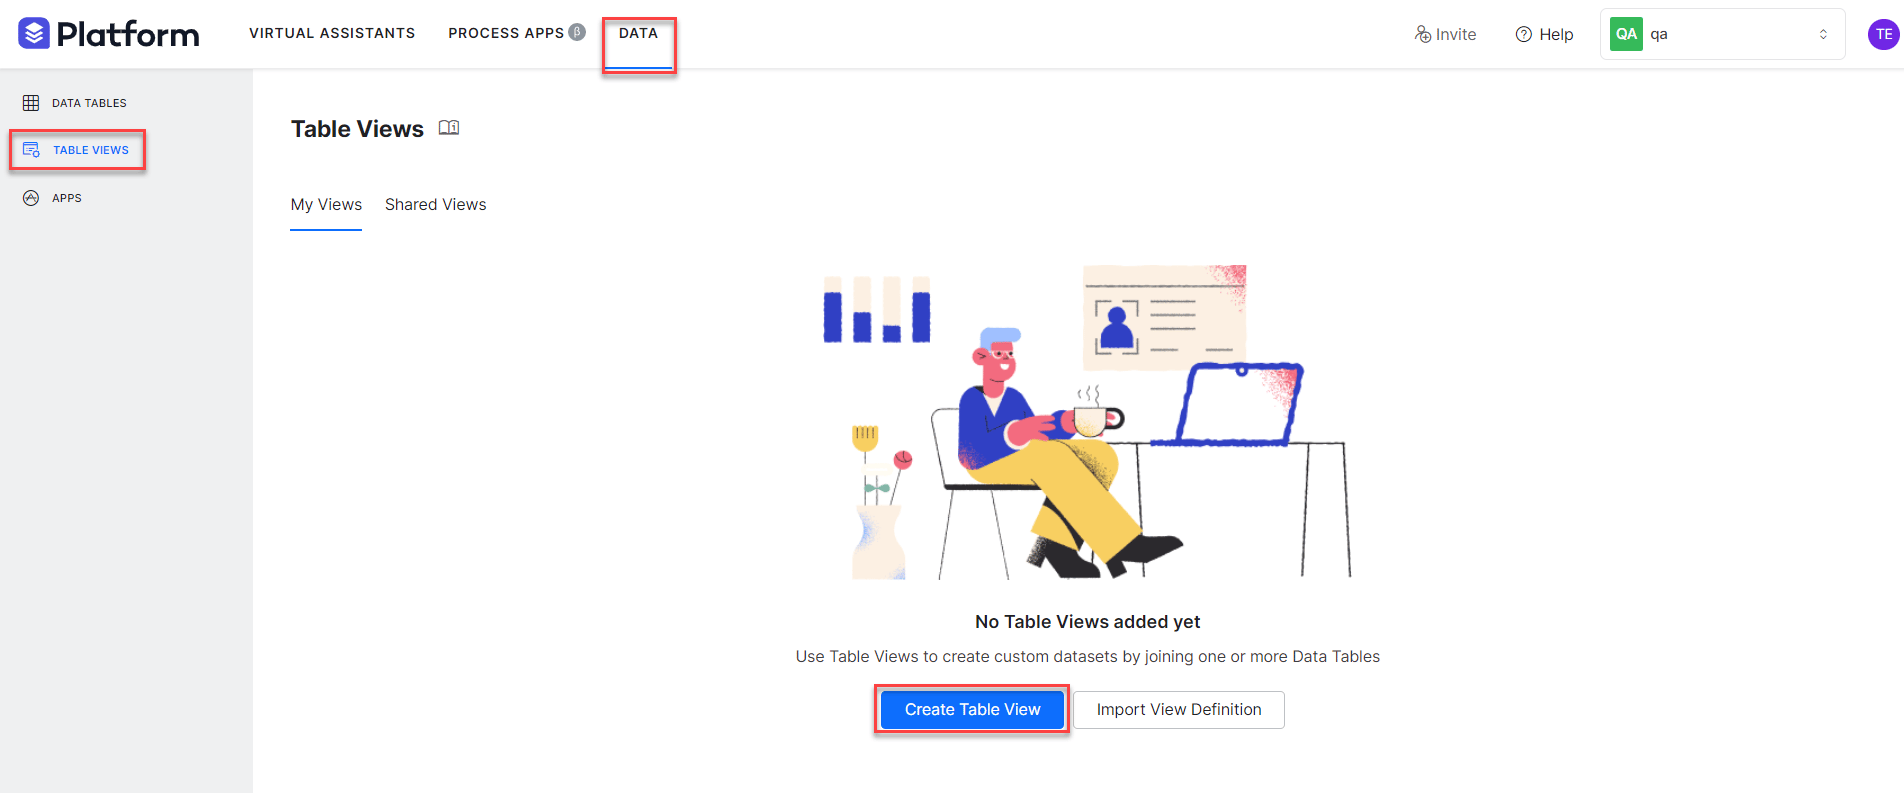
Go to Data > Table Views and select Create Table View or New View.
-
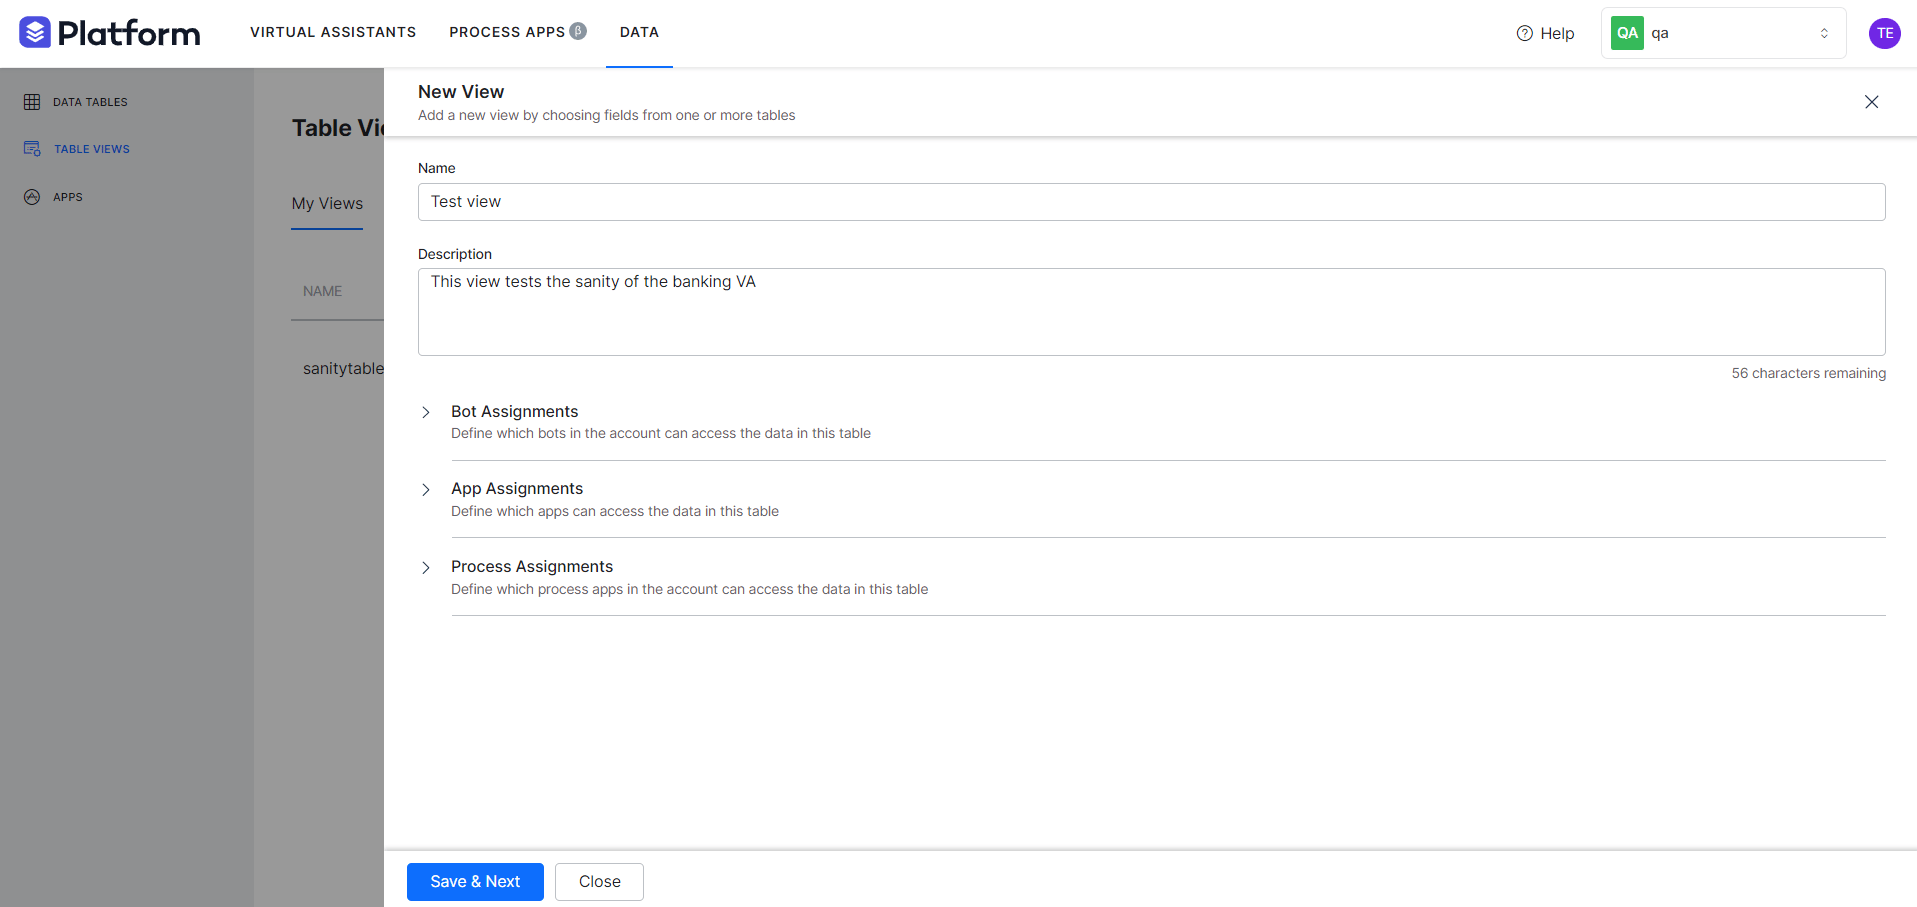
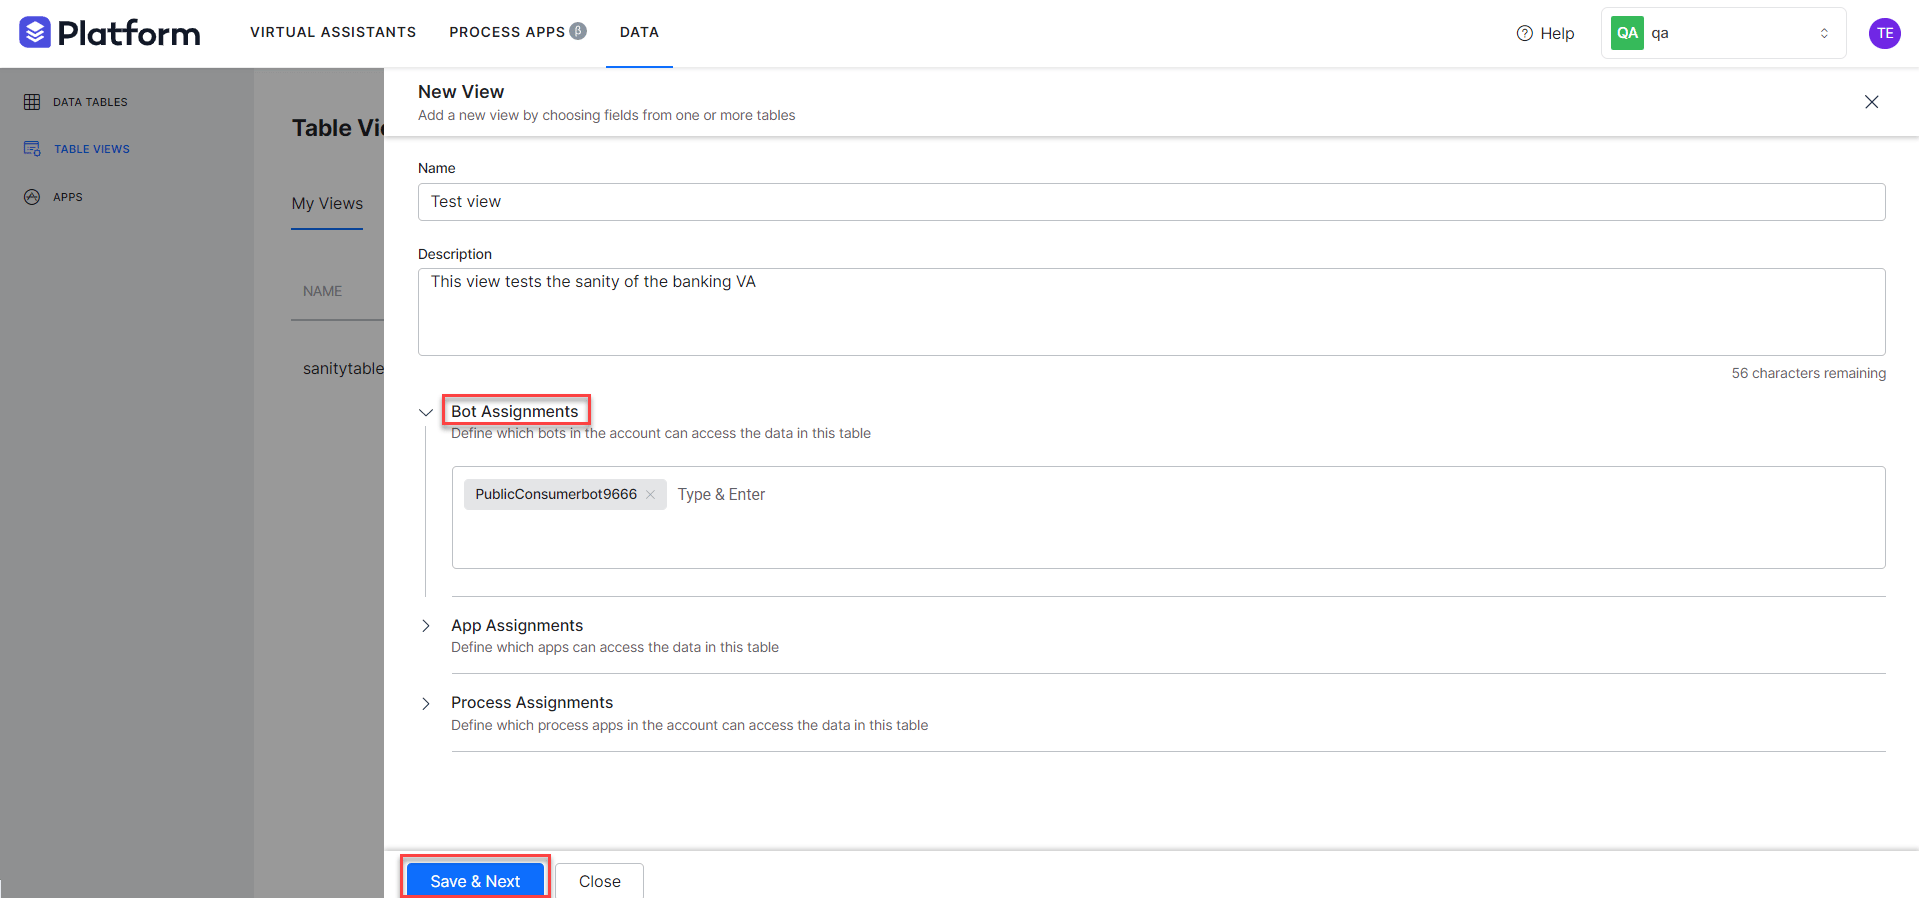
Enter the view details:
- Name — Name for the table view.
- Description — Up to 100 characters.
- Assignment — Apps that can access this view.
-
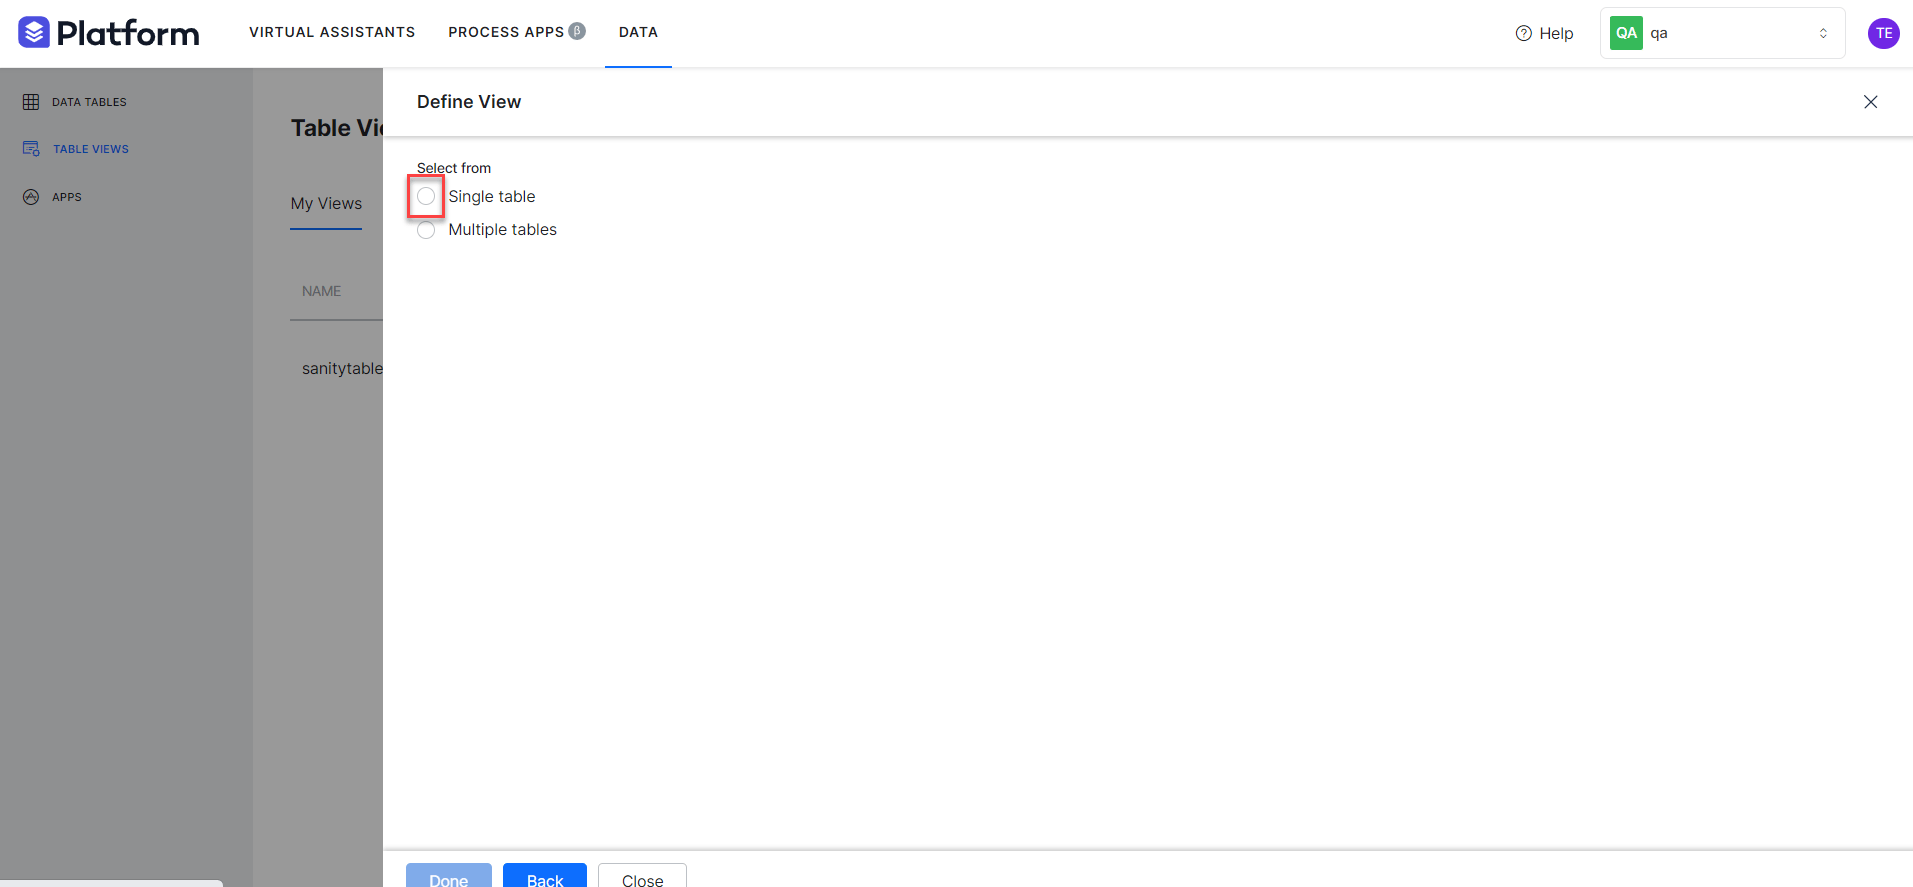
Choose Single Table or Multiple Tables.
-
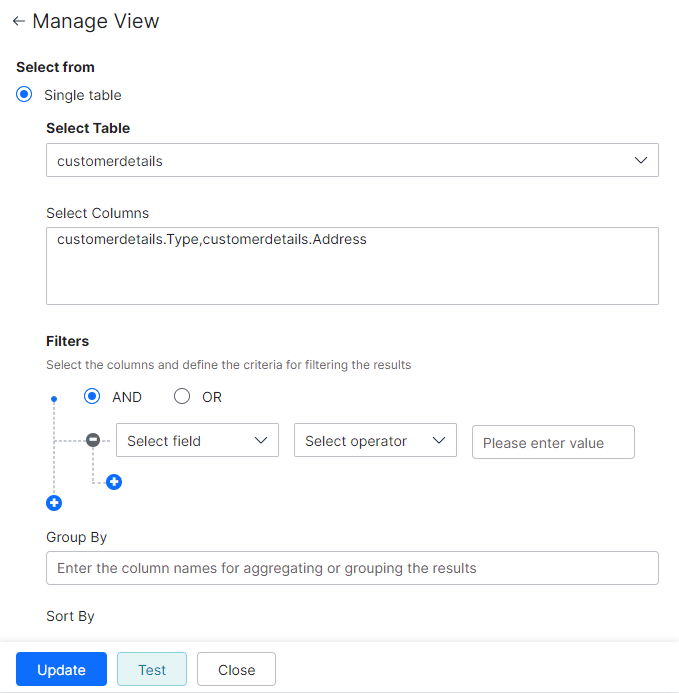
Configure the view definition:
-
For Multiple Tables, also configure join rules:
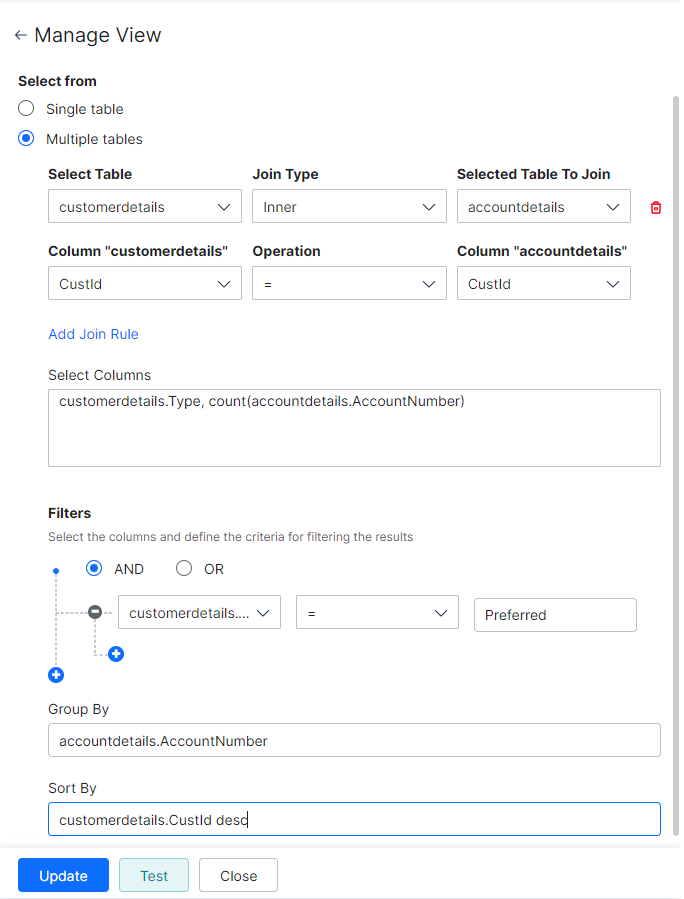
You can add up to 4 join rules per view.
Import and Export
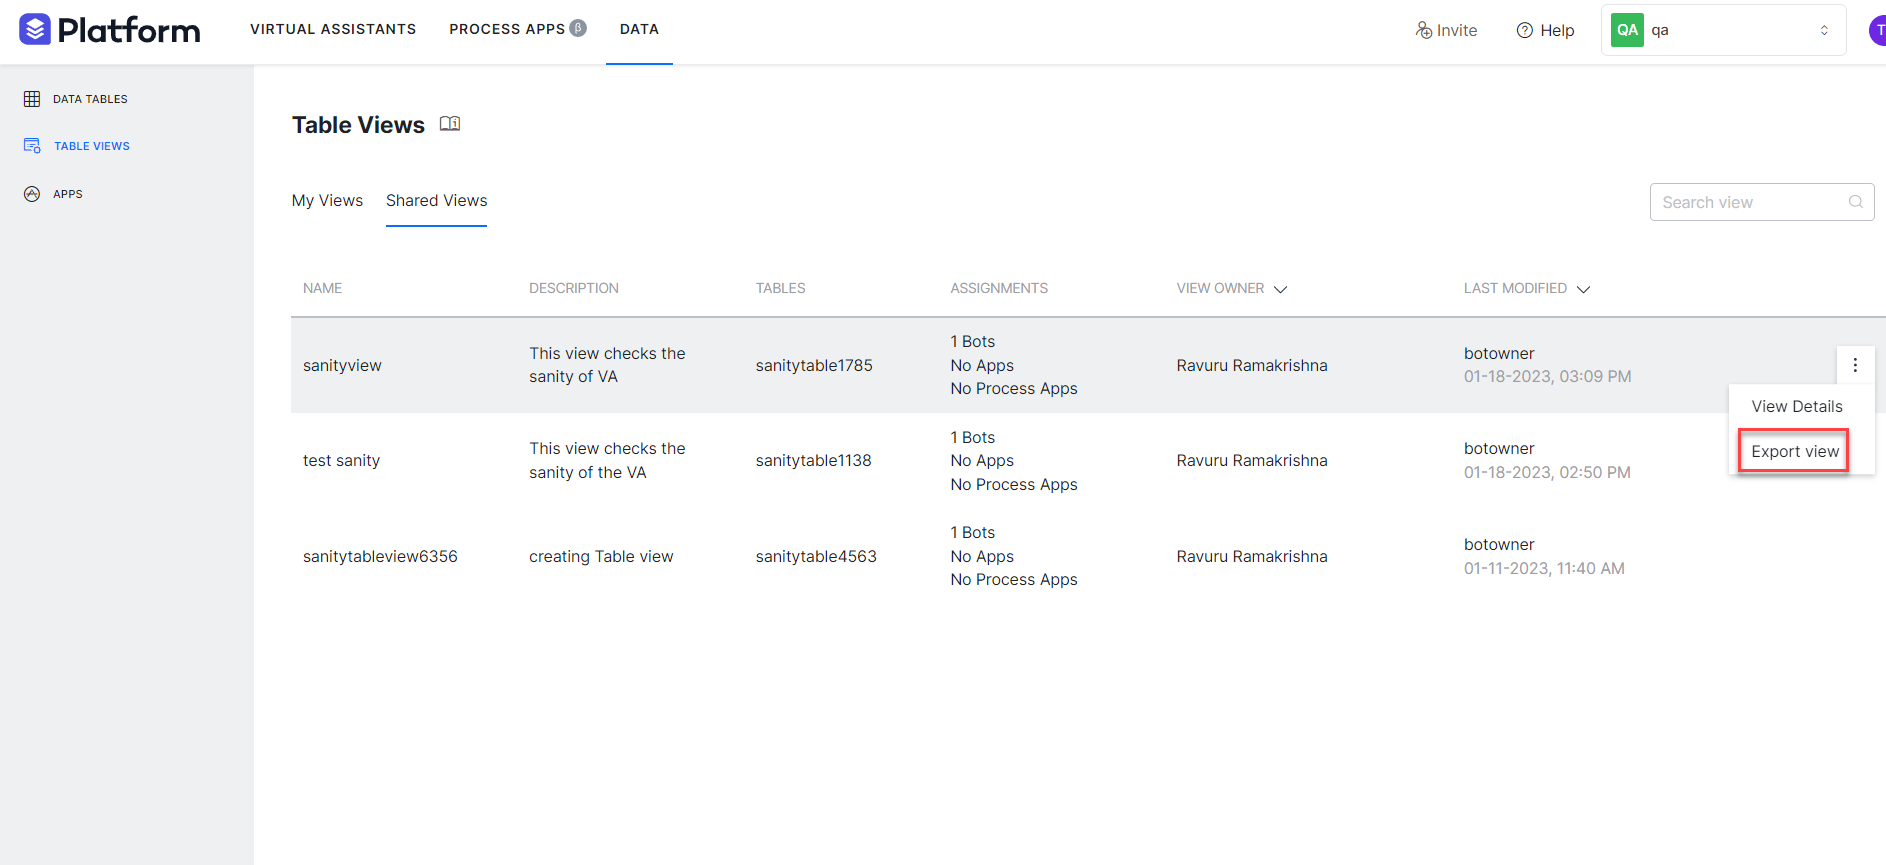
Export and import Table View definitions as JSON files. Export a Table View:- Hover over the table view and select the ellipsis (…) icon.
-
Select Export View.
-
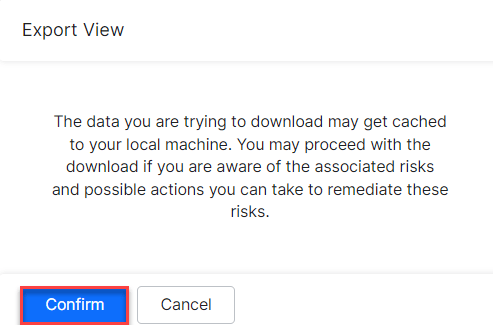
Select Confirm on the dialog. A JSON file is downloaded.
-
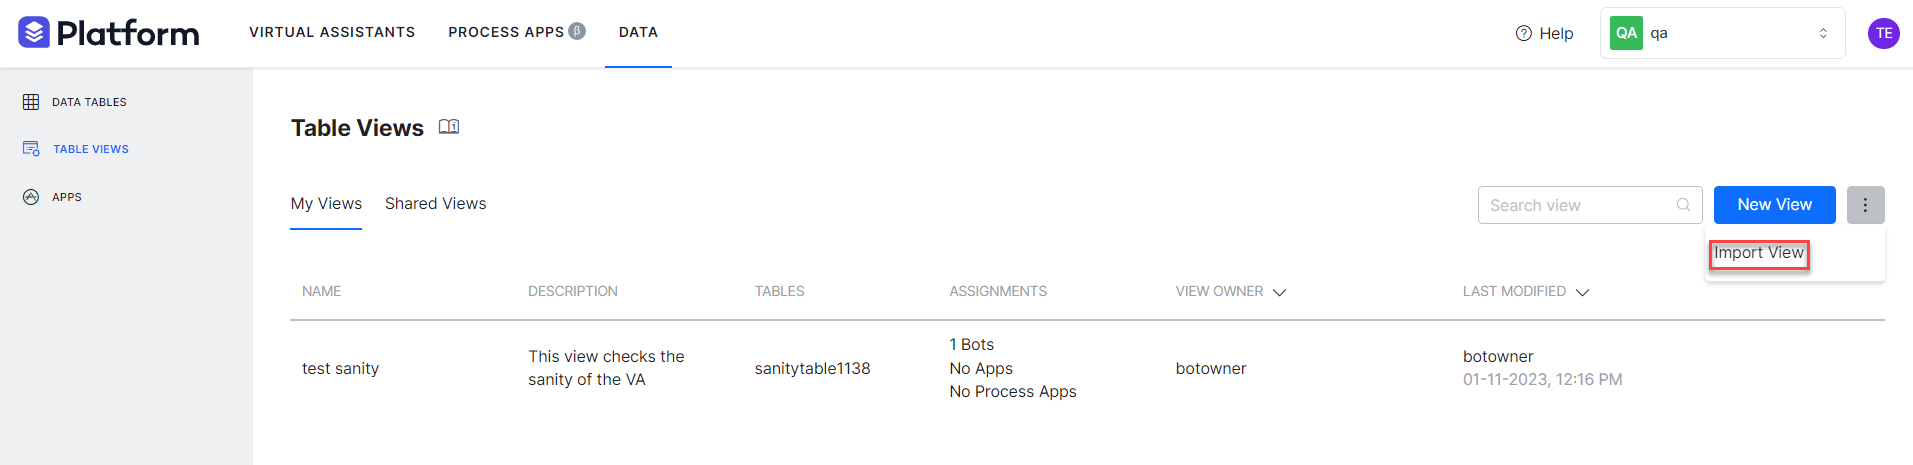
Select the down arrow next to New View and choose Import View.
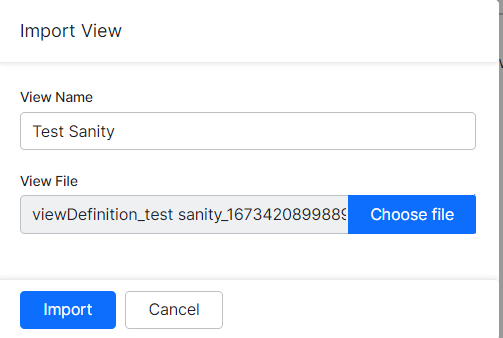
- Enter a View Name and select the JSON file.
-
Select Import.
- In the import dialog, select the table view and the columns to map.
Change View Owner
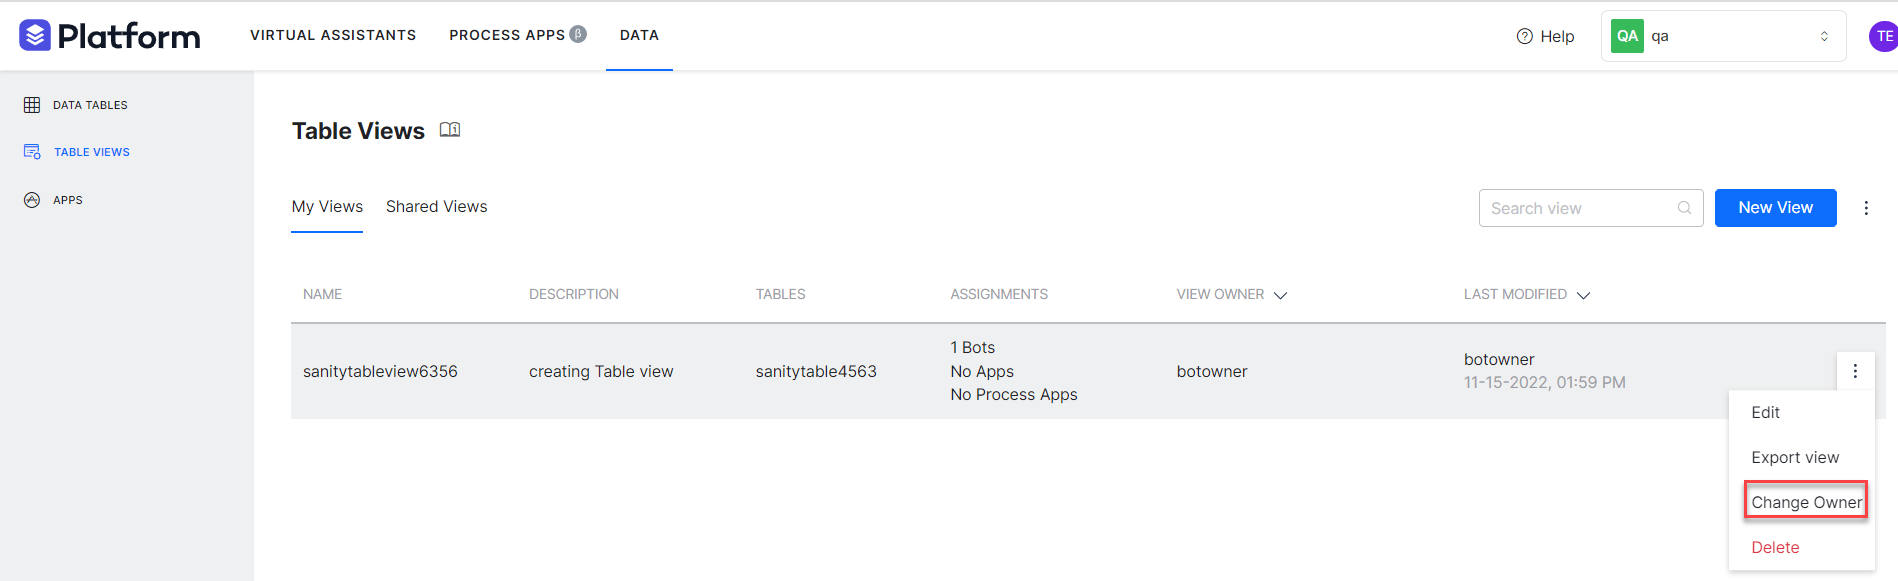
The view owner or an account administrator can transfer ownership to another user.- Hover over the table view and select the ellipsis (…) icon.
-
Select Change Owner.
-
Select the new owner and select Proceed.
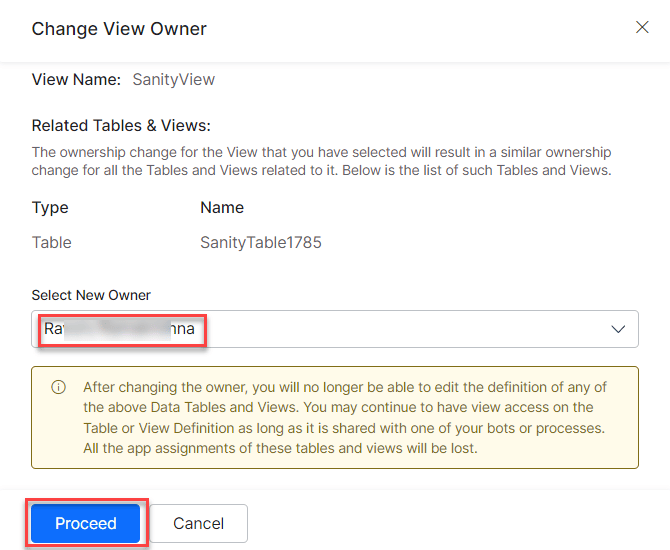
- A confirmation message appears. Review any related views that are also affected.
Share Table Views
Assign a Table View to apps, process apps, or apps to share it. Users with shared access can view the view definition but can’t edit or update it.In the Shared Views tab, you see only the views shared with users who have view permission.
App Definition
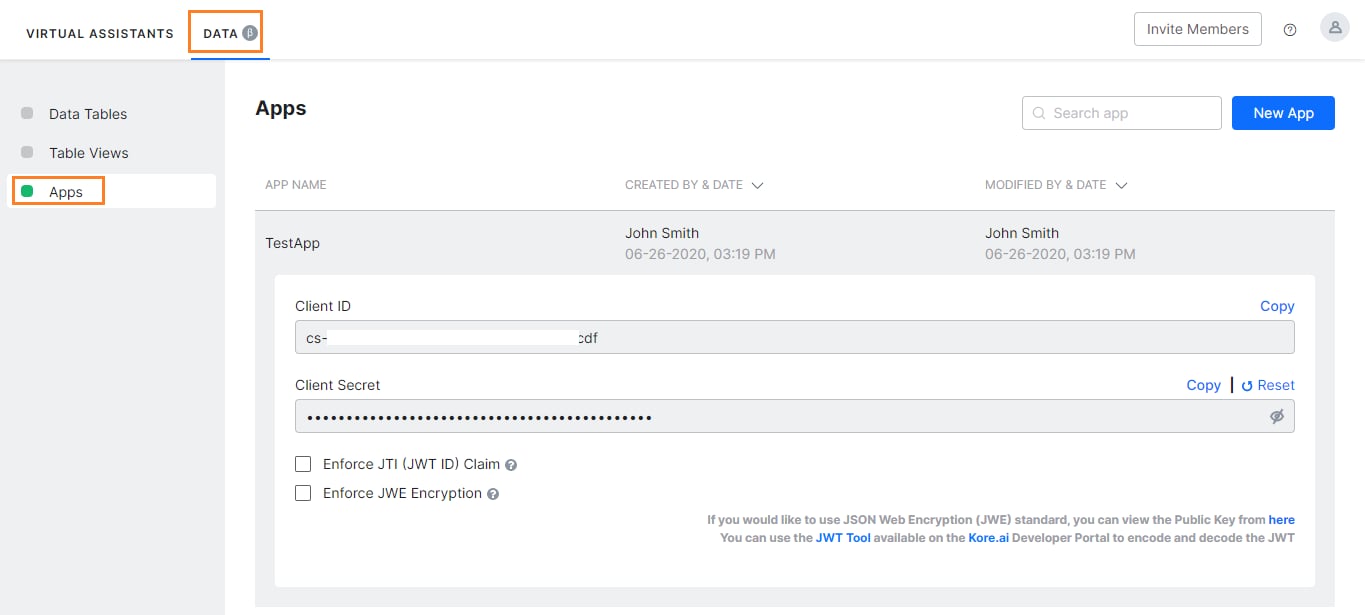
Create an app to securely access Data Tables and Table Views through public APIs. Apps are used for:- Querying data tables and views via API.
- Importing and exporting table and view definitions.
- Enter an App Name.
-
Optionally enforce JTI/JWE as required by your security policy.
Data as a Service
Use a Service Node in a Dialog Task to read and write data in tables and views from within your AI Agent.Service Call — Table
Configure a Service Node to perform CRUD operations on a Data Table. Steps:- Open the app and the Dialog Task where you want to access data.
- Add a Service Node at the appropriate point in the flow.
-
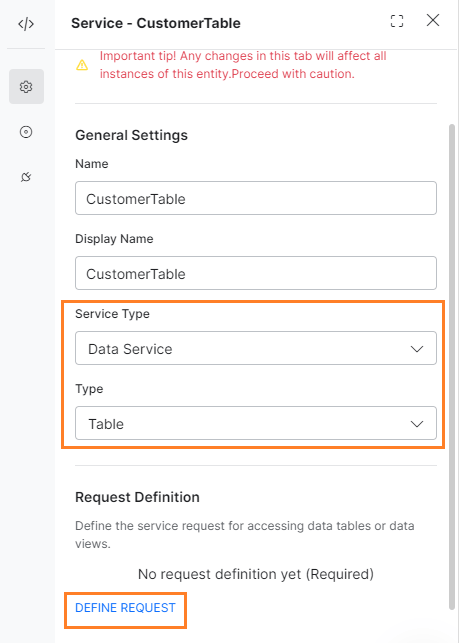
In the Component Properties, configure General Settings:
-
Select Define Request and configure the request:
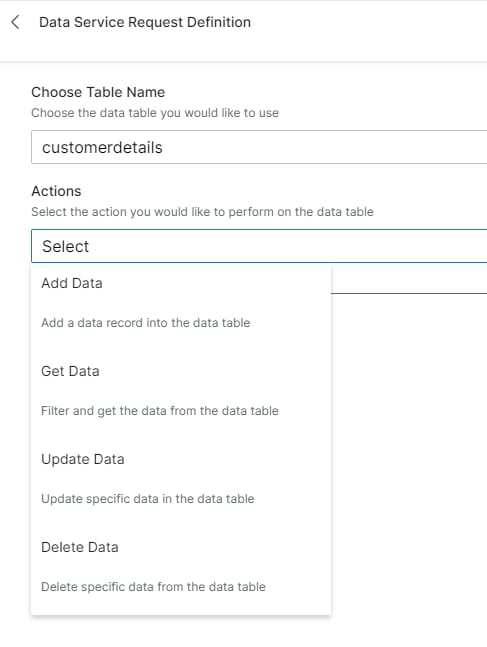
- Choose a Data Table — Select from the tables assigned to this app.
- Action — Select the operation: Add Data, Get Data, Update Data, or Delete Data.
- Select Test to validate (note: context references won’t resolve until runtime).
- Select Save.
Access the returned data using:
{{context.<service_node_name>.response.body.queryResult[<index>].<column_name>}}Add Data
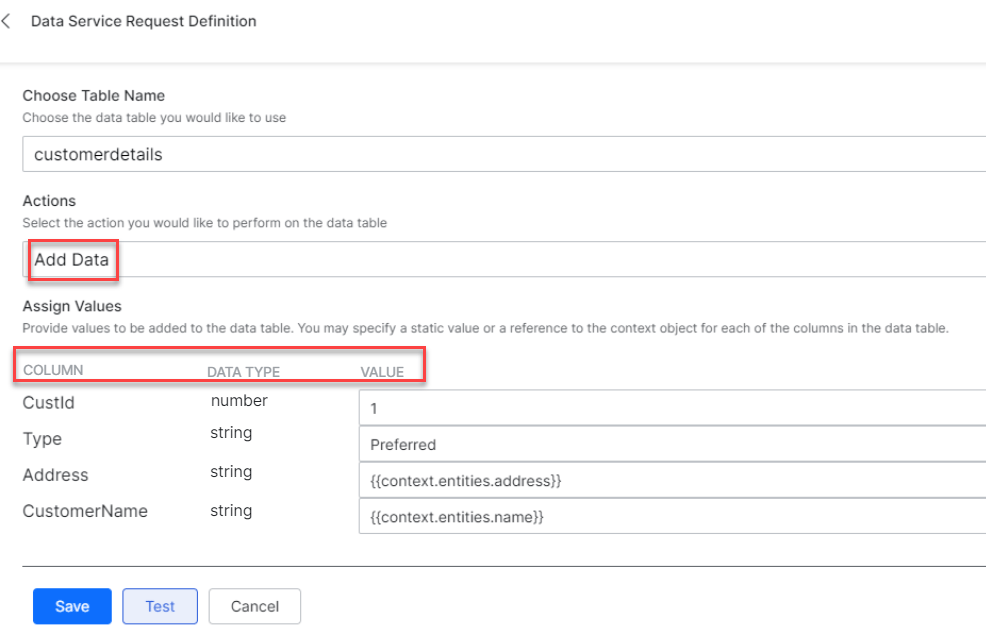
Provide a value for each column. Values can be static or reference a context object, for example{{context.entities.<entity-name>}}.
Get Data
Filter and fetch rows from the table.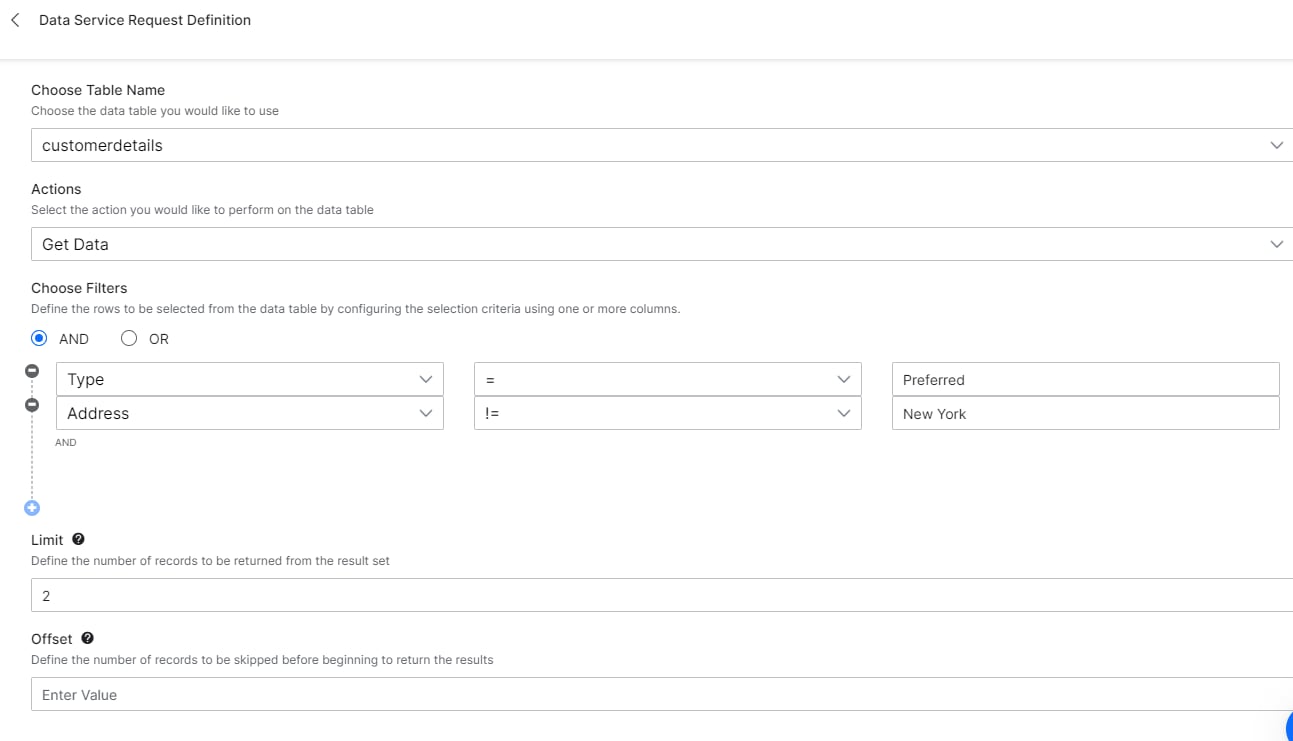
Sample response:
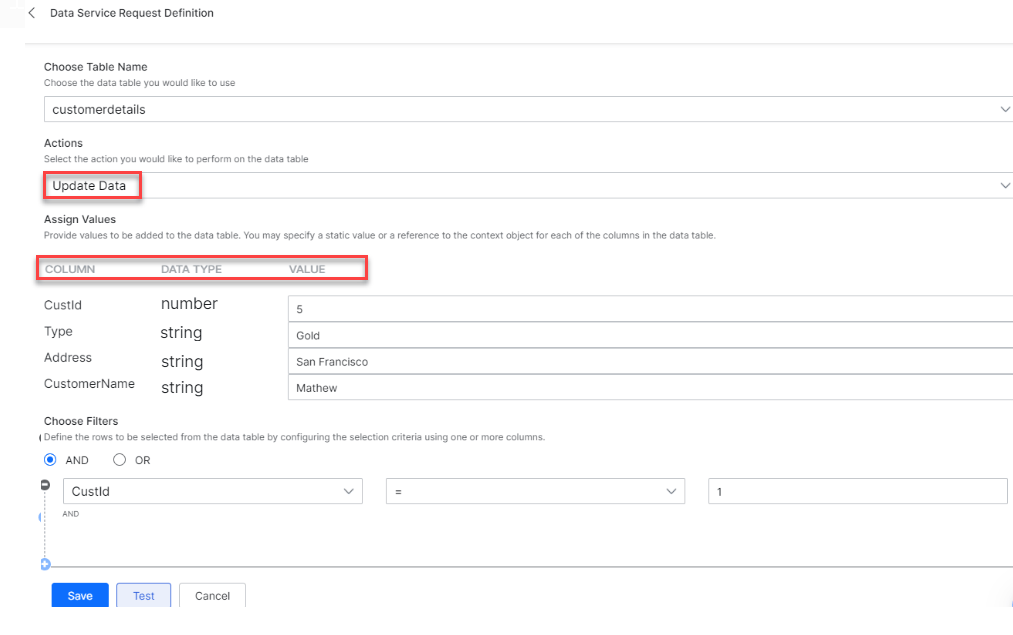
Update Data
Modify existing rows by specifying column values and filter criteria.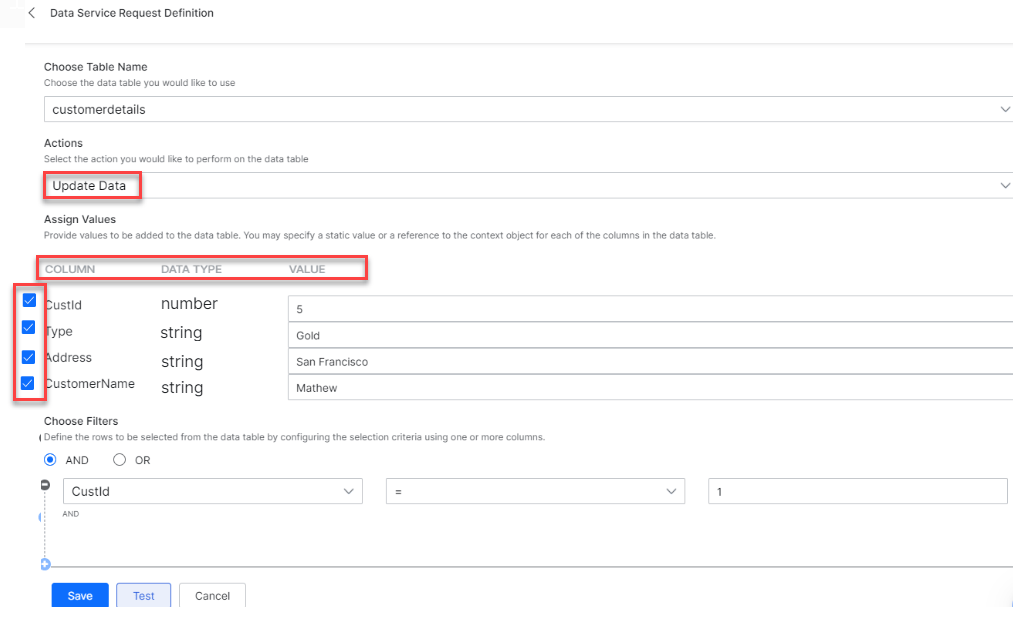
- Check a column to update its value. If you check a column and leave the value blank, that column is set to empty.
- Unchecked columns retain their original values.
- Use filter criteria to target specific rows.
Delete Data
Delete rows by specifying filter criteria (column name, operator, and value). Multiple criteria can be connected with AND/OR.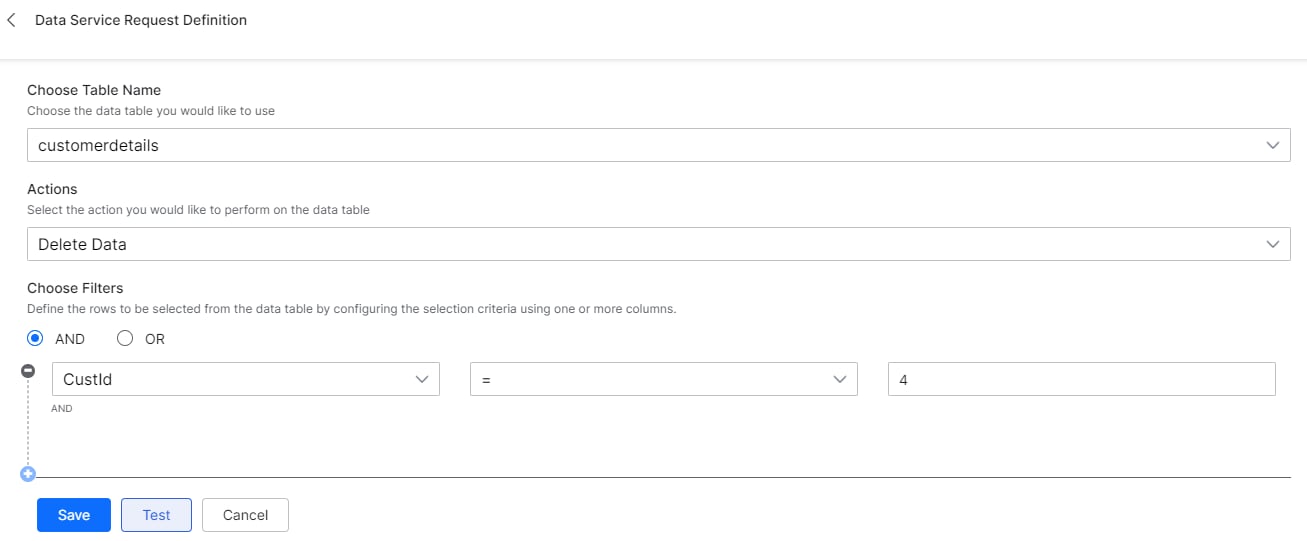
Service Call — View
Configure a Service Node to query data from a Table View. Steps:- Open the app and the Dialog Task.
-
Add a Service Node and configure General Settings:
-
Select Define Request and configure:
- Choose a Table View — Select from views assigned to this app.
- Filter Criteria — Column, operator, and value (supports AND/OR); omit to return all rows.
- Limit — Maximum records to return.
- Offset — Records to skip.
- Select Test, then Save.
{{context.<service_node_name>.response.body.queryResult[<index>].<column_name>}}
Sample response:
Admin Console Management
As an administrator, you can view all Data Tables and Table Views in your workspace and change their ownership.Manage Data Tables
- Log in to the Admin Console.
-
Navigate to Data Tables & View > Data Tables.
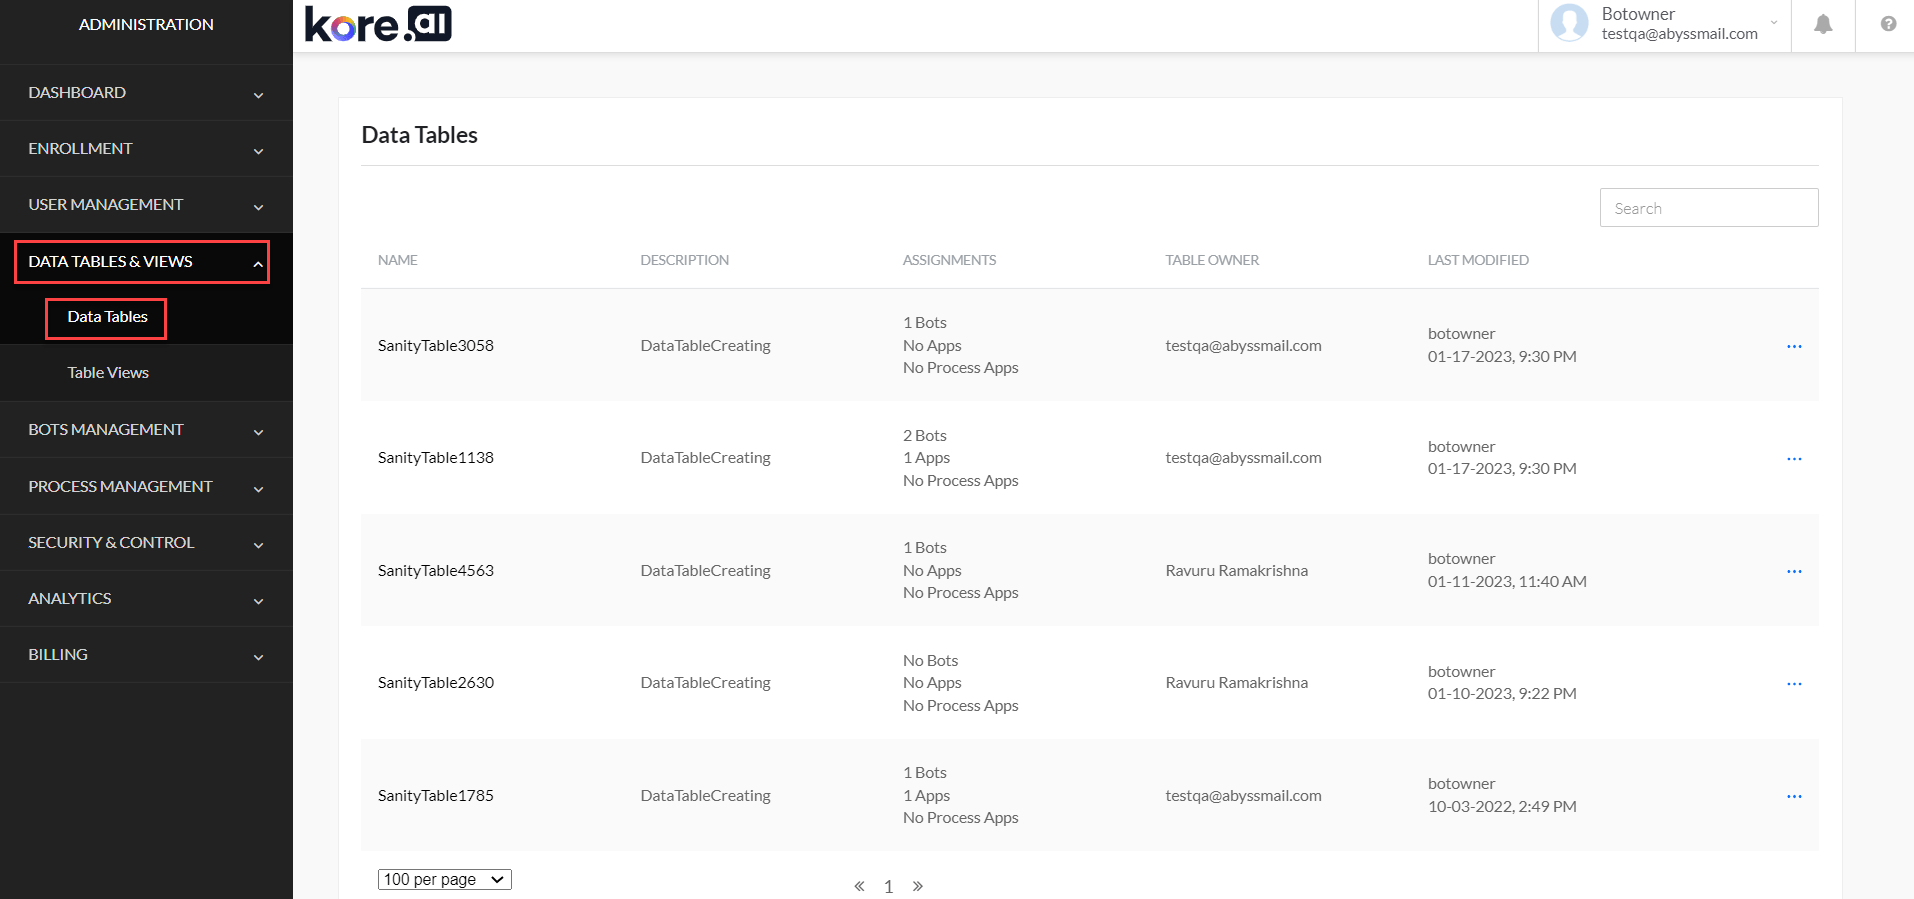
- View all tables you own and shared tables in the workspace.
-
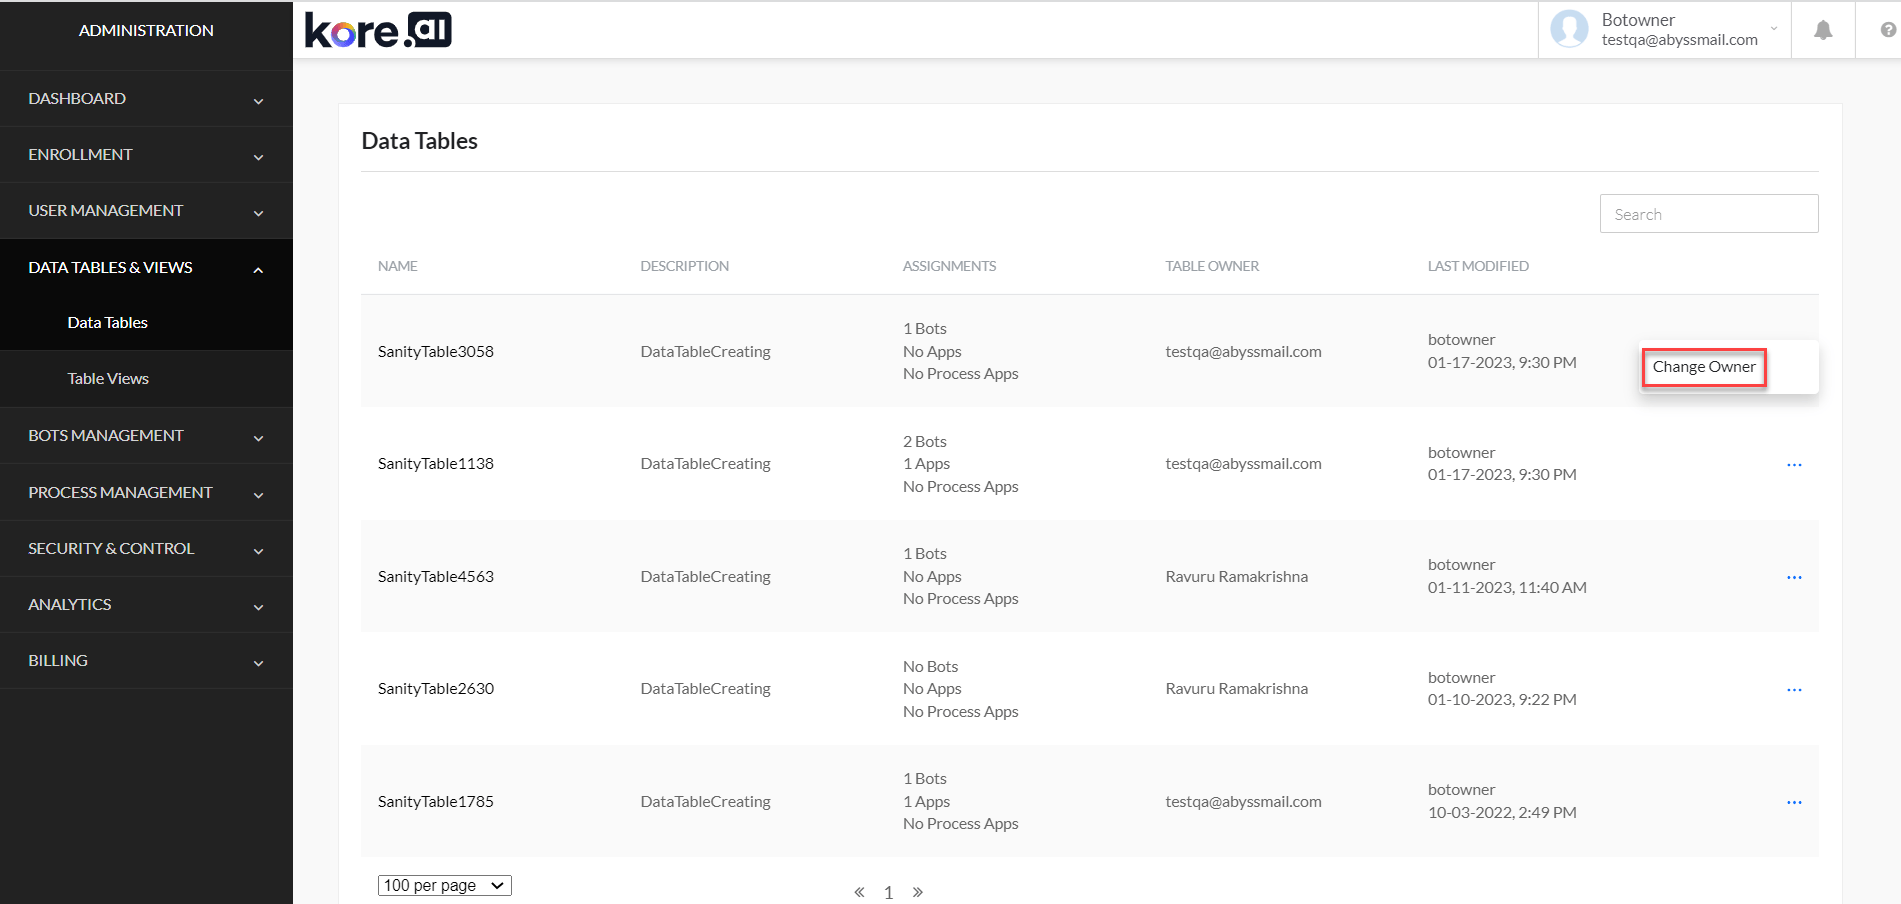
To change ownership, select the ellipsis (…) icon next to a table and choose Change Owner.
-
Select the new owner and select Proceed.
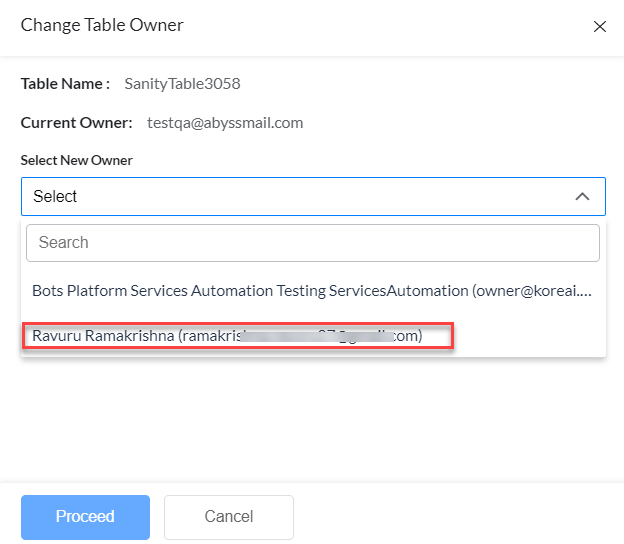
- All related tables and views are transferred to the new owner. All app assignments for the table are lost.
Manage Table Views
- Log in to the Admin Console.
-
Navigate to Data Tables & View > Table Views.
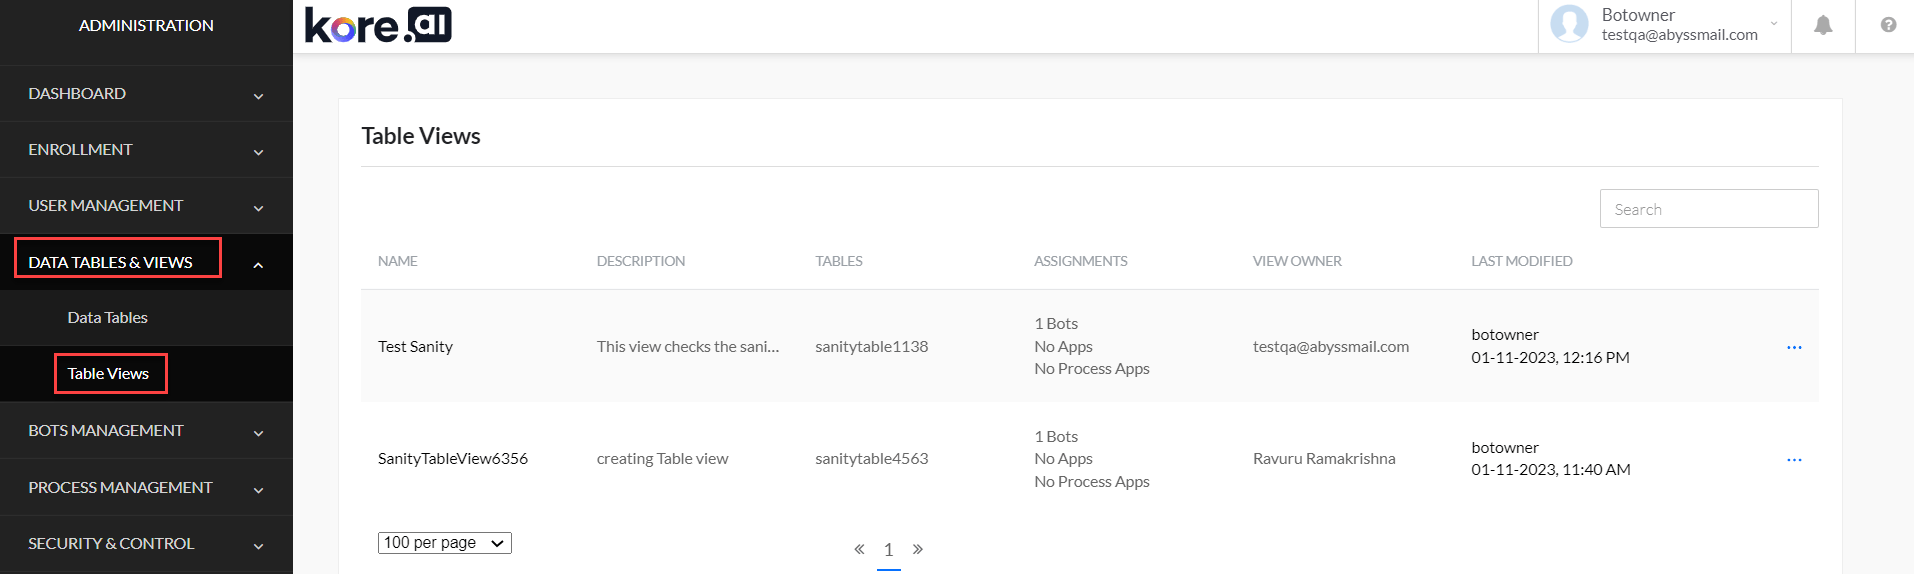
- View all table views you own and shared views in the workspace.
-
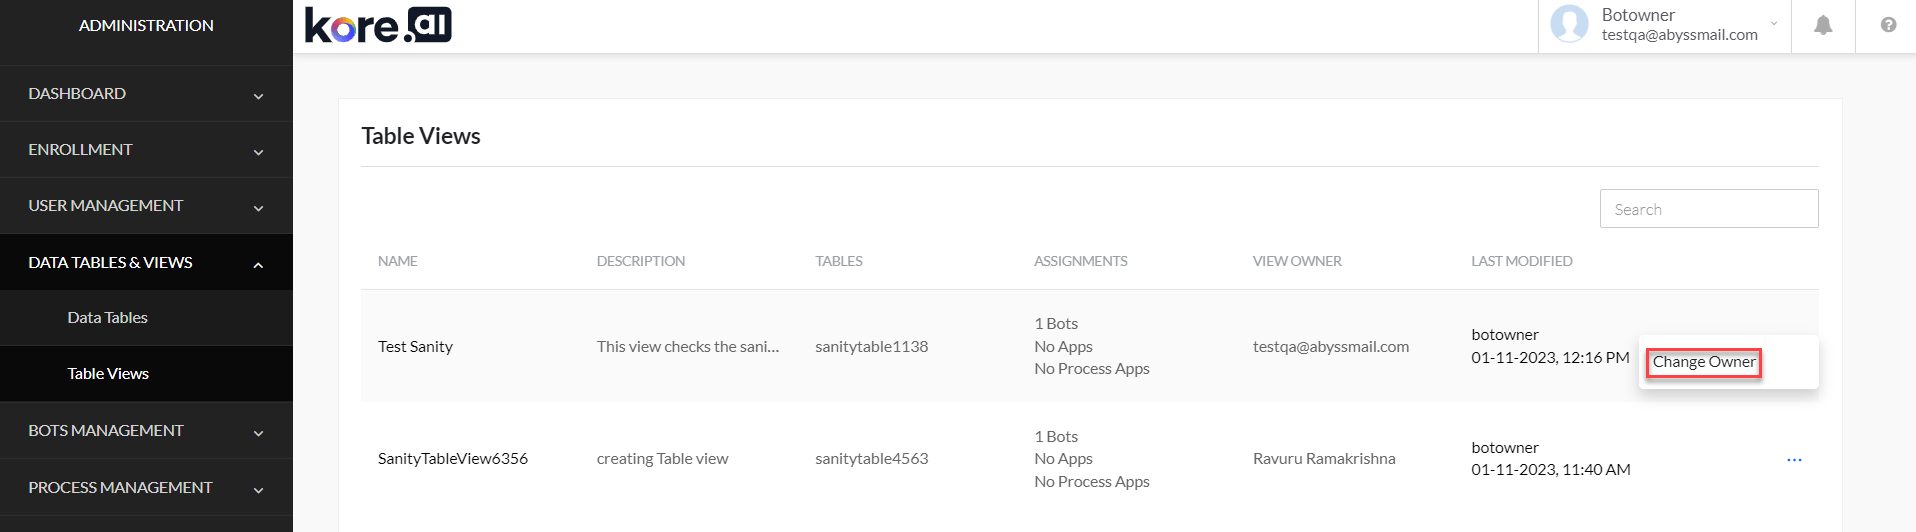
To change ownership, select the ellipsis (…) icon next to a view and choose Change Owner.
-
Select the new owner and select Proceed.
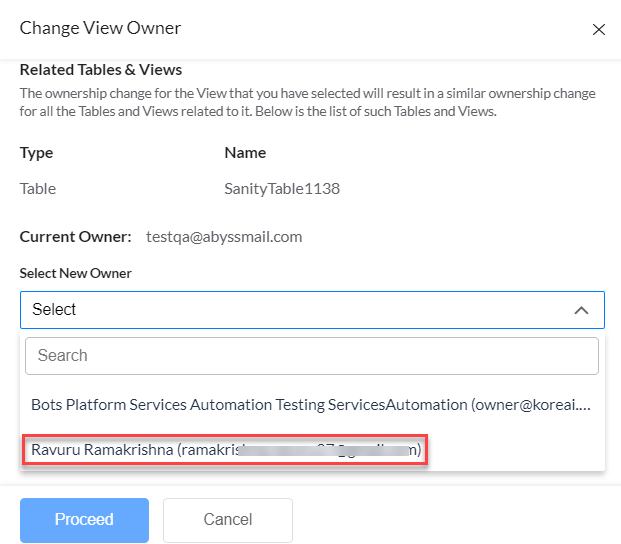
- All related views are transferred to the new owner. All app assignments for the view are lost.
Guidelines and Best Practices
Data Tables are designed for low-volume, conversation-relevant data. they’ren’t a general-purpose database.Recommended Limits
Best Practices
- Store only data that directly supports AI Agent conversations — user preferences, lookup tables, conversation context.
- Use clear, consistent naming conventions for tables and columns.
- Don’t store JSON objects in Data Tables.
- Regularly remove outdated or unnecessary rows.
- Avoid bulk operations; they can impact AI Agent performance.
- Ensure data type mappings are accurate for all columns.
- Back up important data regularly.
When to Use Alternatives
For large datasets or complex operations, use:- Relational databases
- NoSQL databases
- Data warehouses
- Cloud storage solutions